Bags for school
By
Ohhhhh, this post was drafted about a month ago, but hey, better late than never. Now that I have spent a couple of weeks sewing super cute kids stuff I feel ready to post and move on ![]() More on the cuties coming up…
More on the cuties coming up…
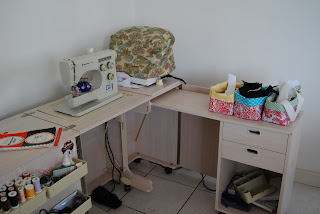
The last two weeks have seen my sewing area (and life) be taken over by gift bags for the school fete (known as a kermesse here).

This year the school is having a “reduce and recycle” theme for the kermesse. I’ve never been to the kermesse, but apparently we all buy tokens and then the kids use these to play games and then they win prizes. The prizes are normally inside little celophane bags. But that doesn’t really sit with the “reduce and recycle” theme. That’s where I came into the picture…
A range of old or unused fabric was donated and I volunteered to sew the gift bags. I aimed for 200. I think the final count was 263. I hope they have enough as I think I need a break until next year’s kermesse before I’m ready to make them again!
However, I did learn how to make a lot of little bags really quickly. Normally you might want to make a dozen or so party bags, these tips will still speed you up. Remember, it is quicker (but also boring, I’m just warning you!) to do each stage for all the bags at once, or in my case I was doing 40-60 bags at once, so cut all fabric, then iron all fabric, etc.

Break your bag into steps and do each step for all of the bags at once:
 |
| Top L-R: sample size, cut & folded fabric, sewn 2 sides of bag Bottom L-R: cord casing & side folded & ironed, casing sewn, cord inserted. |
1. cut your fabric to size (make sure your finished bag can fit around the arm of your sewing machine or it will be impossible to sew the cord casing). I was doing a little cut then ripping, then got to ripping about four layers of fabric at once.
2. iron your fabric, I recommend putting the fold to one side with the selvedge (if applicable) along the top.
3. start at the bottom corner, securing your end with a few stitches backwards and forwards, and sew almost to the top leaving about a 1″ gap, secure the end. Do not cut your thread, just pull the bag out a little and start your next one. When you’ve done them all cut all the threads and trim the bottom corners.
4. fold the bit at the top (where you stopped sewing)back on itself and iron flat.
5. fold over the top (this will be your cord casing) and iron.
6. sew your cord casing, make sure you go over your first stitches at the end and then a few backwards stitches to secure your thread. I found 1/2″ was the perfect size casing. Do not cut your thread, just pull out your bag a little. Please note that by not cutting your thread it will make securing your stitches fiddly but will save you time. If you’re only making a few I would cut the threads to save fiddling about.

7. turn your bags inside out.
8. cut your cords, make them double the width of your bag and a bit more, say 3″.
9. insert your cords and tie them off. I use this handy tool. If your making more than a dozen or so of these bags you’ll want something like this! I used to use a pin to pull the cord through the casing. You can read about it here. Slightly frustrating at the best of times…
Most importantly, drop your usually super-high standards! If I was selling these I would make sure that all were the same size and the stitching was perfectly straight (and matched the fabric). I was making a HEAP for free to help out the school. None of the bags were smaller than the sample size but there was a noticeable variation in size.

I forgot to wash my fabric first up… This meant that I had to wash the bags once they were sewn and then iron them all. Um, I don’t iron my kids clothes but I ironed 263 bags for school. Wash your fabric first, you won’t need to iron them at the end as they will be nice and flat from all the ironing in stage 4 and 5 

And here are the bags being used at the fete

And here is Mr 5 checking out his loot in his bag ![]()