Archive of ‘Women’s Clothes’ category

It’s Thursday, yay! It’s almost the weekend  I hope you’ve got your quilt on and you’re ready to link up to this week’s I Quilt party. This week I’m talking about how I quilt online. But before I get started I want to feature the amazingly talented Christa of Christa Quilts!
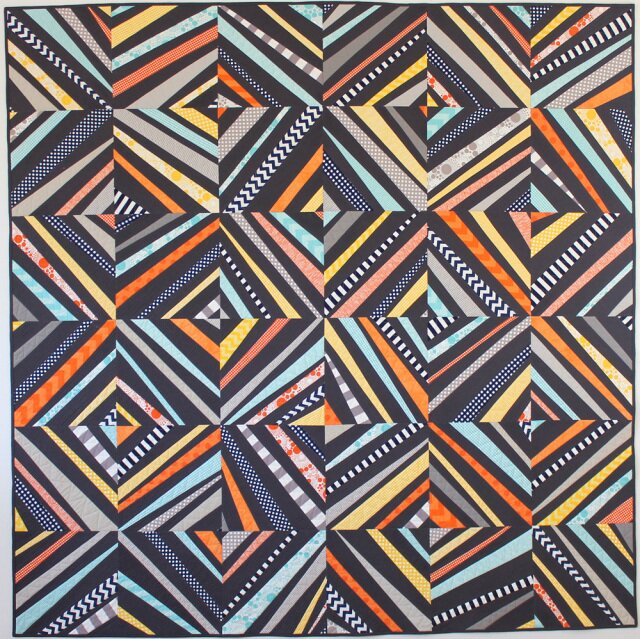
“Spiraling Out of Control” image used with permission by Christa Quilts
Christa has her own fabric shop so I’m terribly jealous from the outset  She is also a talented and successful quilter and her blog is the place to go if you’re seeking inspiration, insights and how-tos. I’m sure you all know Christa, but if you don’t, please pop over and check out her work and say hi!
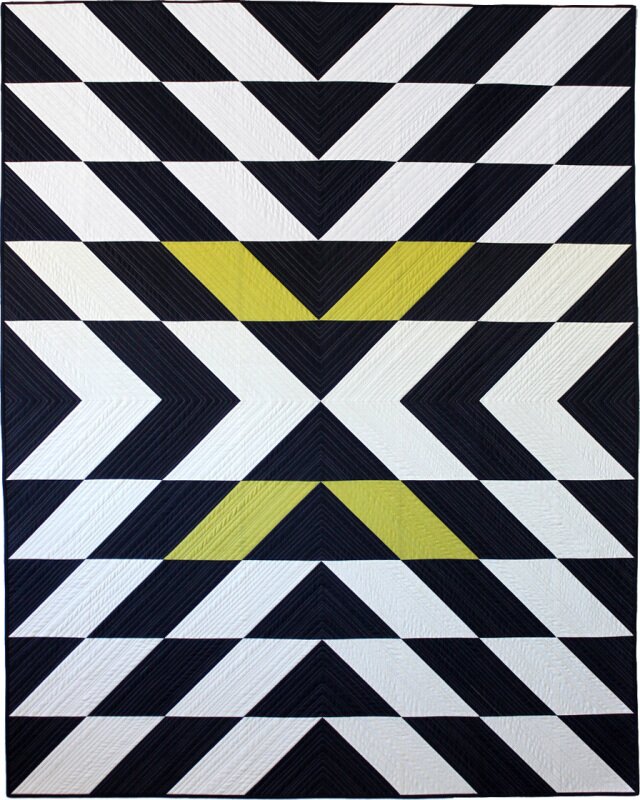
“Modern X” image used with permission by Christa Quilts
Last week Christa shared some binding tips (and y’all know how much I love that part of the process!). I love Christa’s modern Christmas trees series, you can find the main post here, but definitely check out the posts on the quilting, it’s super impressive!!
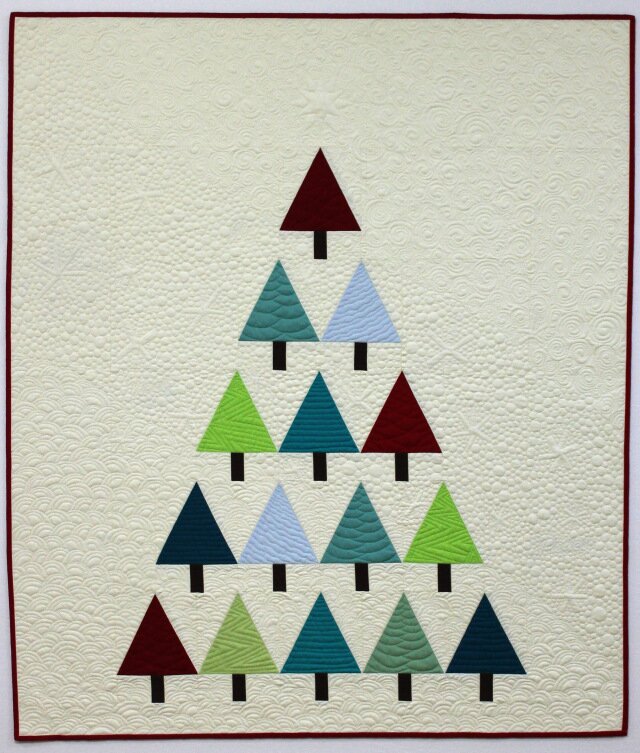
“Modern Trees“, image used with permission by Christa Quilts
I love the crisp, sharp lines that she tends to favour and I adore her quilting, especially as she is a real sharer of process, something that this linky party is ALL about! 
This week I wanted to talk about being an online quilter. You may be aware of the Blogger’s Quilt Festival run by Amy of Amy’s Creative Side. If you haven’t participated before or you’re nervous about being “good enough” I strongly encourage you to throw caution to the wind and just jump in! I’ve found some of my favourite bloggers through the festival (I’m looking at you Susan of Canadian Abroad) and aside from anything else, it is such a visual feast!
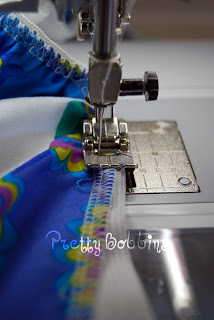
You’d be surprised to hear that I don’t spend as much time online as I used to but I still LOVE all the fun, creative blogger things happening out there. This week I came across “me made May” on Instagram (check out #mmm14 and #memademay) which is all about wearing clothing in May that you’ve made yourself. Inspired to join in and make myself a fabulous outfit (I firmly believe that if you feel good in what you’re wearing and love how you look, you can conquer the world) I got busy last night and stitched up a tova tunic. I’ll post about it later in the week, but you can see a sneak peek

Pink and yellow giraffes! Love my new tova tunic!
Some of my other favourite online quilting activities are Work in Progress Wednesday, Fresh Sewing Day and TGIFF. Please, please, please add your favourite online quilty/creative/stitchy link ups/activities below. If a hashtag inspired me to sew a fabulous dress then I think we need to share more of them!
Now let’s get linky! Share your quilting process and don’t forget to visit three other linkers, we all love comments!!
An InLinkz Link-up
Eeek! It’s already the 4th of October and I haven’t done my round up for September yet! This week I have been completely preoccupied with sorting out my long arm purchase. Will you excuse my tardiness if I told you I have been doing such fun things as reading a 68 page tax document? Yep, that’s how much I want this dream

Clockwise from left: Cascading Quilt, Quilted 214 Tote, QAYG cushion front and back
As usual I pieced, quilted and was merry in September.

This is me as a show pony L-R: Tova dress, Tova top, halterneck dress (drafted from store bought dress)
I had a whole heap of fun participating in Selfish Sewing Week and made myself three items of clothing!
I’m linking up very late to Fresh Sewing Day at Lily’s Quilts I hope to see you there! And big love to those of you who have linked up to my quilting linky party or plan to I really appreciate the support and am super excited! There are some really great posts linked up, you can find them here.
Put your hand up if sewing is your therapy This week is selfish sewing week and I totally needed to make myself some pretties to feel better. Yesterday I turned my quilt as you go (QAYG) mini into a cushion. I didn’t quilt it at all as I just wanted the colours to show. Isn’t she pretty?

QAYG selfish cushion
Because it’s selfish sewing week I decided to use one of my favourite prints on the back. I’m worth it dammit.

Because it’s Selfish Sewing Week I used a special print just for me!
As much as my daughter loves this cushion I managed to snaffle it for myself and I love how it looks on my bed.

I used some favourite scraps and LOVE how it turned out!
This morning I really needed some sewing therapy; look good, feel good, right? I pulled out the last of my Nottinghill voile yardage and grabbed a dress that I love but is a little too small. I managed to kind of figure out the measurements and set about making myself a dress.

Nottinghill voile halterneck dress
Big love to the folk on IG who gave me some honest feedback that the boobs were baggy so I spent a good hour adding darts and trimming. In hindsight I think the issue is probably that I joined the skirt to the bodice too low. I think the dress would have a better shape if the elastic casing was just below the bust rather than at waist height. Anyway, I got on with it, hemmed her (I love a good blind hem!), added a contrasting sash and decided that if it feels good it looks good

You will notice there is one spot and one spot only in my yard suitable for photos LOL
I’m not generally one for a halterneck and I actually prefer this dress with the straps hanging long rather than tied in a bow. It will be nice and cool on our hot summer days anyway

Summer here I come!
And the all important details I use Aurifil 50wt for dressmaking, in fact I use it for everything! I do need to start growing my Aurifil stash again, at the moment I’m getting by with about 20 spools. The cushion is 20″ square with wool wadding, has a concealed zipper closure in the bottom seam and is backed with an old Alexander Henry print, African Butterflies. I bought the Nottinghill voile at Pink Chalk fabrics and 3 yards got me both a Washi dress and this halterneck dress (I’m stingy LOL).

I’m linking up to TGIFF over at Cherry Valley Designs for my cushion (it’s a mini quilt!) and Selfish Sewing Week because this week it’s all about me!

If you’ve read this far you probably already know, but don’t forget that I’m starting my quilty linky party here at Pretty Bobbins from next Thursday. You can read more about it here.
As soon as I saw the Wiksten Tova pattern I knew I had to make it (I bought the PDF version available here). It’s my favourite type of pattern; hides the wobbly bits, has a decent neckline (gives me shape but not too revealing) and versatile. I would recommend it to intermediate to advanced sew-ers. It is a rather forgiving pattern but the collar is fiddly and I had to make a few alterations to give it some shape.

I love this top with jeans!
First up I made a Tova tunic with long sleeves in Madrona Road (Wild Carrot in Straw) from Pink Castle Fabrics and Aurifil 2000 in 50wt. It was very easy to lengthen the sleeves, I just measured my arm from shoulder to wrist and added about an inch then cut the sleeves to that length. I found the top too large around the bust so I added a dart to each side, this took a bit of pinning to get right and they are slightly uneven on my first attempt, but not noticeable.

Tova top with full length sleeves and shortened collar
I really need tops that hide my tummy but don’t make me look like maternity wear. When I first tried on my tova for fitting I looked like I was wearing a potato sack. Not cool. I added 5 rows of shirring (10″ wide and .5″ apart) at the center of the back which really helped to give my tova some shape. I also made the collar half the height of the pattern piece, Very Kerry Berry has a tutorial on this step.

Shirring added at center back to give shape
I was so happy with my tova top that I promptly whipped up a second one, this time as a dress using some yardage from the Notting Hill range.

Tova dress; feeling bold ;)
For my Tova dress I broke out some Nottinghill (Primrose Magenta from Pink Castle Fabrics) and stuck with the original 3/4 length sleeves and collar height. I did make the same adjustments to the pattern (darts and shirring) and made the pattern at the suggested dress length. Now I’m not one for a short skirt but I love this dress so much that I don’t mind that it’s a little shorter than I’m comfortable with. I could easily lengthen the hem by an inch but I took up some of the length doing an invisible hem.

Tova dress back with added shirring.
The pattern suggests that you need 3.5 yards, I made a size L and just managed to squeeze it out of 2 yards of fabric with only the smallest of scraps left over (I wouldn’t suggest this and I couldn’t have done full length sleeves, but just so you know, it is possible). I had fun using a bold pink thread, Aurifil 1100 in 50wt, I figured if the stitching won’t blend in because of the graphic print, then why not let it feature?
I find both my tova top and dress so comfortable to wear that I’m planning on making another with short sleeves. I also think it would be the PERFECT pattern to use as a nightie, I’m thinking I might make a long sleeved dress Tova in flannel for next winter. In the meantime I have a few other patterns that I’m itching to break out. These two are fairly straight forward and one actually looks quite similar to the Tova.

Left: Simplicity 2363. Right New Look 6557
I’ve had these for ages but having had such success with the Tova I’m thinking I might try one of these two which require a bit more work.

Left: DKNY V2900. Right: Vogue V1086.
I have a few different prints that I have enough yardage to make myself another dress and I can’t wait. I prefer to wear clothes by me as they fit perfectly, look good and I feel a little clever Plus, I NEED to grow my wardrobe. Seriously.

Once again I’m adding these photos to the Selfish Sewing Week pool on Flickr. Technically these weren’t sewn this week but they were sewn in September and I did have selfish sewing week in mind. That counts, right? There are some lovely items being made so make sure you pop over and check it out!
I’m linking up to Sew Cute Tuesday at Better Off Thread, pop by and say hi to Janice if you haven’t seen this linky before


It appears to be a week of finishes for me which should be uplifting, but having just spent the morning on hold to various businesses I am feeling kinda flat LOL But enough of that, let’s look at my most recent Washi dress
 |
| Washi dress front. Me feeling like a total poser LOL |
I love this print. It is part of the Nottinghill range and this voile is so insanely soft. It’s almost like silk and was easy to work with and an absolute delight to wear. (Side note: I bought the yardage at Pink Chalk Fabrics which is a lovely online store and the only place I could find the right colourway in the voile.)
 |
My darling daughter needed Mummy’s attention NOW.
Love this little photo bomber
|
I love this pattern. When it first came out it was all over blogland and I did my usual, “I love it but I don’t want to be a sheep” thing. But then common sense prevailed and I bought a copy and I am so glad I did! You can see my first version here and there is even a Washi group on flickr! The pattern is very easy to put together with a number of handy tips in the pattern instructs ions I also love that the fabric requirements are listed on the website, a little thing, but very handy!
I altered the pattern (again) slightly. The neckline is lower than the pattern calls for, I went with what suits me This time I didn’t do the little cutout and I’m happy with it this way. The other change I made was dropping the shirring rows a little. The first time around the bottom line of shirring lines up perfectly with the bottom of the bodice. Second time around there are a couple of rows of shirring below the bottom of the bodice (on the back) which gives the dress a better shape on me.
 |
| side view: Washi dress |
The main reason I love this dress (and let’s be honest) is that it hides my belly. Any extra weight goes straight to my tummy and there has been a fair amount lately with me being unwell. This dress will fit if I manage to lose those extra kilos (shirring is so forgiving!) and the pleats on the front manage to hide my tummy without it looking like a maternity dress. Win – win If you’re considering the Washi dress, I would say go for it! I’m already planning to make another soon. They are just perfect for our sticky, hot days here in Nouméa.
And just so you know All these opinions are 100% my own. I paid for the supplies myself and was not asked to provide a review. I just like to share things I love
Have you made a Washi dress or is there another very forgiving dress pattern that you love?
Today is Mother’s Day in France. We celebrated by sharing a family meal at one of our new favourite cafes. The food was delicious and the kids enjoyed praline puddings for dessert!
 |
| All gone! But don’t you love that matching hairclip? |
We had lots of fun humming tunes and making each other guess what the song was. I felt a bit like “The Simpsons” when we started out with TV theme songs, but we soon ran out of them and just hummed lots of our favourite songs. It was such a simple game but we had so much fun guessing and giggling at ourselves. After lunch we crossed the road and enjoyed some time at the beach. It was a super low tide so we had fun exploring the muddy rocks.
 |
| Discovering muddy rocks with my tribe <3 |
Being Mother’s Day, I decided to be a bit selfish and this morning took the time to make myself a new outfit. This has something to do with the fact that 6 years ago I was pregnant with my eldest child and recently I realised that most of my wardrobe is either pre-kids and doesn’t fit or is threadbare and the rest of my clothes are hideous or clothes that I wore when pregnant. I still dream about losing the last of my baby fat, but we’ll see, in my mid-30s I might have to accept the body that I have is the body that I’m keeping LOL Anyway, with my depressing wardrobe in mind I got busy altering an existing top and making myself a new skirt. I love it!
 |
| My new outfit! |
The skirt was really simple to make, I did a yoga style waist band with only one side seam, it is about 3″ smaller than my waist as the red fabric is a 2 way stretch. I was short on fabric (I’m always short on fabric!) so the skirt meets the waist band at my hip, but the band is extra wide. I put a small pleat in the back and a tiny gather in the front. I probably won’t do that next time.
 |
| Good for find shells. |
I did not alter the style of the existing top other than to widen the neck and therefore increase the cowl neckline, increase the arm holes and take it in about 2″ on each side of the torso. I bought it as a maternity top in Hong Kong and it has never fit properly, I think it was made for someone much smaller than me, but the fabric is lovely and I couldn’t resist. It is very short, always pinched my arms and pulled at the bust in a particularly unflattering manner so I’ve only ever worn it once or twice. Now it is fitted (with no room to spare LOL) and very comfortable but still short. I am considering adding a band to the bottom of it for length, but the lack of length isn’t a problem with this skirt.
 |
Not the best photo of the top, but you get the idea.
We were too busy playing in the sand to pose
|
It was a great Mother’s Day and I particularly loved matching my gorgeous little girl. You can read more about her dress here. Wish I had shoes that pretty!
 |
In case you’re wondering, I use a French Moustach
to cover signage, number plates, etc |
Is anyone else celebrating Mother’s Day today? If so, bonne fete des meres. And if not, eat a piece of chocolate and enjoy being wonderful!
I have (gladly!) given away pretty much all of my maternity wear. I do have a couple of items hanging about that were good for breastfeeding, but I’m so sick of them that they have not been worn for a long time. So, I decided to turn an old maternity t-shirt into something that would actually get worn!
A few months back I unfortunately ruined some gorgeous Michael Miller Pretty Bird fabric by pre-washing it with another blue which ran

It is such a special fabric that I still wanted to use it. I only had a yard and thankfully the worst staining was near one of the selvedges. I’m hoping the end result is so lovely that no one notices the remaining discoloration :)
 |
| My stained yard of Michael Miller Pretty Birds |
So, in case you have some old t-shirts (or maternity tops) that need to be repurposed into something pretty, here is how I made my dress.
Supplies:
1 yard fabric (I used cotton. You could easily use 1 meter or more.)
1 maternity t-shirt
enough 1″ width elastic to go around your waist (I used 1″ elastic for comfort, but you could use any width really as long as you are comfortable sewing with it.)
Matching thread
Sewing machine
Overlocker/Serger (not necessary but makes it quicker)
1. Take in your maternity t-shirt until it fits snugly. Remember that it is stretch so you will need to alter the tension on your overlocker and stretch your fabric out as it passes through the machine. (Skip this step if you are using a regular fitting t-shirt.)
2. Iron your yard of fabric. Cut it in half selvedge to selvedge so you now have two half yard pieces. If you’re short like me this will give you just enough for a skirt. If you’re taller you might want to add an extra band of fabric to lengthen to skirt or have your skirt starting on your hips.
3. With right sides facing join your two pieces of fabric at the selvedges, remembering to come in an inch or so to ensure that you don’t end up with selvedges showing in your skirt. If your fabric is directional make sure that both pieces are the same way up.
4. Overlock or zigzag both raw edges of your skirt piece.
5. Hem the bottom of your skirt using the smallest hem possible. I overlocked, folded up once and then once again so my hem is about 1/4″.
6. Mark the point on your t-shirt where you would like your skirt to start. I went for my natural waist line. Cut your shirt off about an inch below this line and overlock your edge.
 |
| Wow! Look how crooked my cutting is there! Opps! |
7. Take your elastic and cut it slightly smaller than your waist (or the point at which you will join it to your t-shirt). Join the ends together to form a circle.
Now you want to gather your skirt. There are a number of ways to do this, but I wanted quick, simple and comfortable. I didn’t use pins as I am lazy when it comes to sewing for me.
8. Make four equally spaced marks on your elastic circle. You can do this by laying your elastic circle flat and mark the two “ends”, next place these two marks together and mark the ends again.
9. Pin your elastic to the wrong side of the top of your skirt. Use your markings to aid you in evenly pinning your elastic. Don’t worry that your elastic is much smaller than your skirt, you will stretch the elastic out while you sew and it will gather your skirt for you. Just make sure that your elastic can stretch as far as the circumference of your skirt.
9. Select a stitch on your machine that is appropriate for elastic, if you don’t have a specific stitch, use a zigzag. (You have already finished all of your edges so you are only thinking about attaching your skirt to elastic.)
10. With your elastic flush to the top of your skirt, attach your elastic to the wrong side of your skirt. Just keep stretching out your elastic. You will need to stop regularly so make sure that your machine is in needle down mode
You now have a lovely gathered skirt that you want to join to your cut off t-shirt.
11. Turn your skirt right side out and your t-shirt wrong side out. Place your skirt inside your t-shirt with the bottom of the t-shirt against the top of the skirt.
12. With edges flush pin the top of your skirt to the bottom of your t-shirt. Again you will want to use an elastic or stretch stitch. When joining your top and skirt make sure that you sew further in than your previous stitching. Don’t forget to stretch out your t-shirt and elastic a little as you feed it into the machine.
13. Turn inside out and voila! You now have a dress.
I was really happy with my dress but I felt that it looked a little like a t-shirt and skirt sewn together so I made a fabric brooch to go with it
My maternity t-shirt hadn’t been worn for a year but I wore this dress the day after I made it and felt gorgeous all day!
This is my first attempt at a tutorial so I’d love your feedback! Please be nice
I’ve spent most of this week pondering what to sew and very little of it sewing. I thought I would make Little Miss the Saffron Romper as I bought the pattern a while back. Then I thought, hmm, she has more clothes than me, how about a romper for me? Surely it will look better on me than her, for a start I don’t wear a nappy… Am I just getting carried away with the Indian summer?
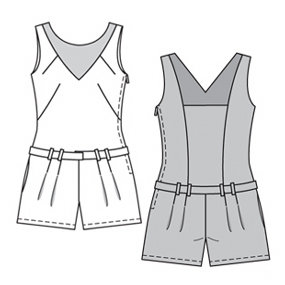
What do you think? This is the Doryon from Burda Style. I also found a great tutorial on drafting your own romper pattern here, a very easy looking tutorial for a romper at The Fabric Worm here and an inspiring version of the Doryon here.
I’m all keen but then I think about my frame in a romper and I’m just not sure… And then which fabric to use? I should wait a few more days as my lovely Mother-in-law has posted a few patterns that should be arriving any day now, but they’re all dresses and now I think I might need a romper… I’ve just started wearing a bikini to the beach again, is a romper taking it one step too far? I’d love your thoughts (be kind!)…
I’ve recently started a new board on pinterest and am quickly filling it up all with pretty things to make for me! Hooray! I made this dress the other day, sorry for the poor photography…
 |
Vogue V8724 in a size 14 but with about 1″
taken off each side seam |
It’s super comfortable, hides my leftover baby fat, is easy to breastfeed in, and heck, I think I’ll make another! It was such a success that I’m keen to make some more dresses for myself. It is so hot here at the moment that dresses really are called for.
In my quest to source patterns online (there are a bazillion ones for little girls, but not so many for the ladies) I have found a couple of fantastic online resources. BurdaStyle. Right, we’ve all heard of it, but did you know they have some free patterns/projects there.
I’d come across Sew Weekly before, but not their “make this look” articles. So help me God, I think I’m in heaven! You like the dress? They list a commercial pattern that makes a very similar item. Forget hours of searching through patterns online. These are what you want now! Trust me, if you want to sew for yourself, this is the place to go! There is also a forum for asking questions such as “what is understitching” (I must admit I had to think it through the other day when making a different dress as the instructions were rather confusing). You need to sign up for a log in with BurdaStyle to download any of the free patterns, took me awhile to figure that out…
I’ve also been trawling through Vogue, Butterick, Simplicity and McCalls. Yet to buy a pattern from any of them, but I have a few here that I would like to make. I’m almost finished another dress, but I don’t like it so it’s been sitting on my “recent projects” chair. Hmm, I don’t really want it on that chair. OK, I’ll take a pic and share it, it’s not hemmed yet and I have to take it around the waist (unpick the zip first of course…). Here tis… Brown ain’t my colour….
 |
Vogue V8489 (style A) in size 14. I had to
take it in a lot (3″ or more) at the waist and
a fair amount off them hem. |