Archive of ‘Tutorial’ category
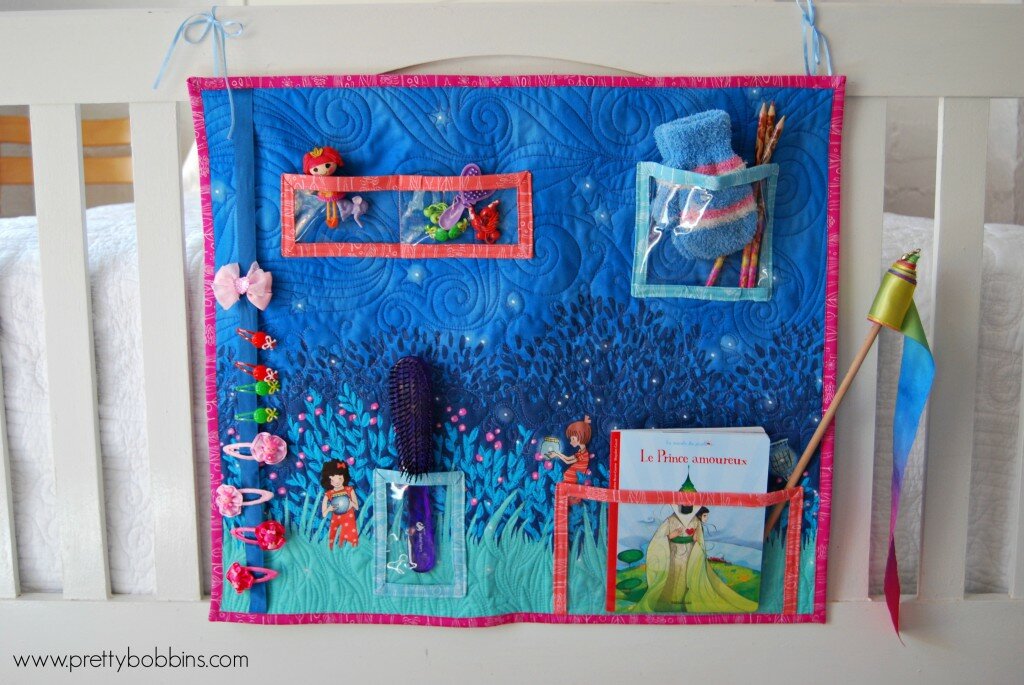
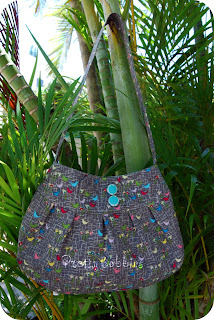
Hanging Organizer Tutorial fit for a wee princess!
When the super talented Sarah Jane put the call out for blogger to work with her new line, Wee Wander, I couldn’t help but put my hand up!

Today I’m sharing a tutorial for a Hanging Organizer. I have a lovely three year old daughter who certainly could do with a little help organizing her important and precious belongings and she just LOVES her pretty new organizer <3
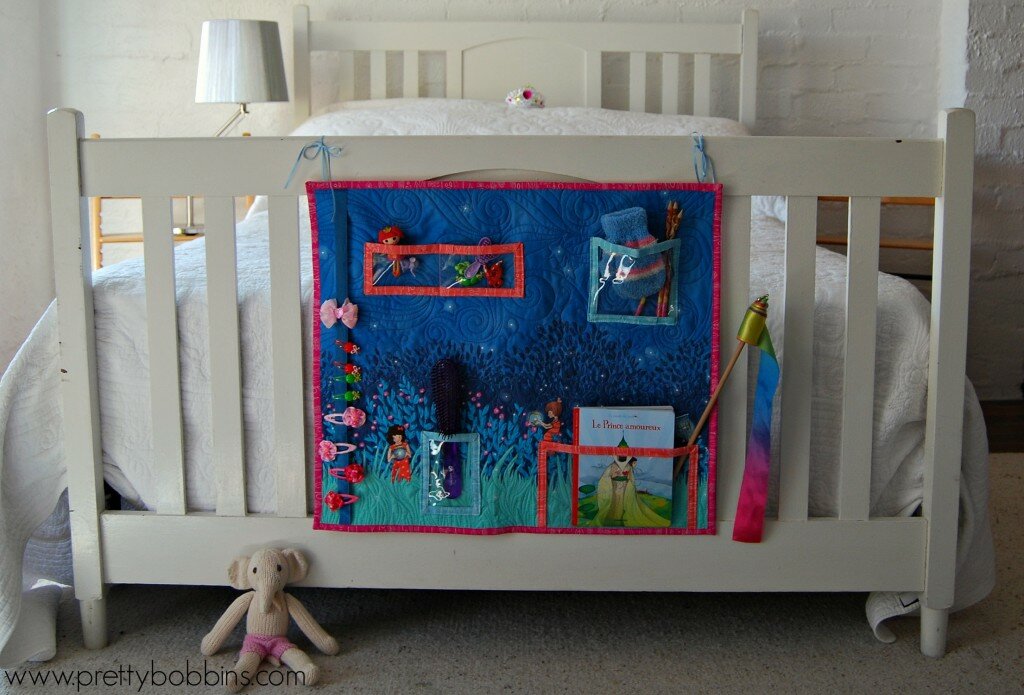
Fit for a princess!
Let’s get started! You will need…
Supplies:
- 1 panel Wee Wander
- Backing fabric (32″ W x 29″ H)
- Wadding (28″ x 25″)
- Hanging sleeve (5′ x 23″)
- 1 piece clear vinyl 11″ x 15″ (I repurposed one of those clear zip bags that pillows and linen come in)
- 12″ x WOF (width of fabric) for binding OR purchase aprox 250″ premade double bias binding (you will have lots left over!)
- 60″ ribbon for clip strip and hanging
- 24″ long piece of dowel rod for hanging
- usual quilting supplies
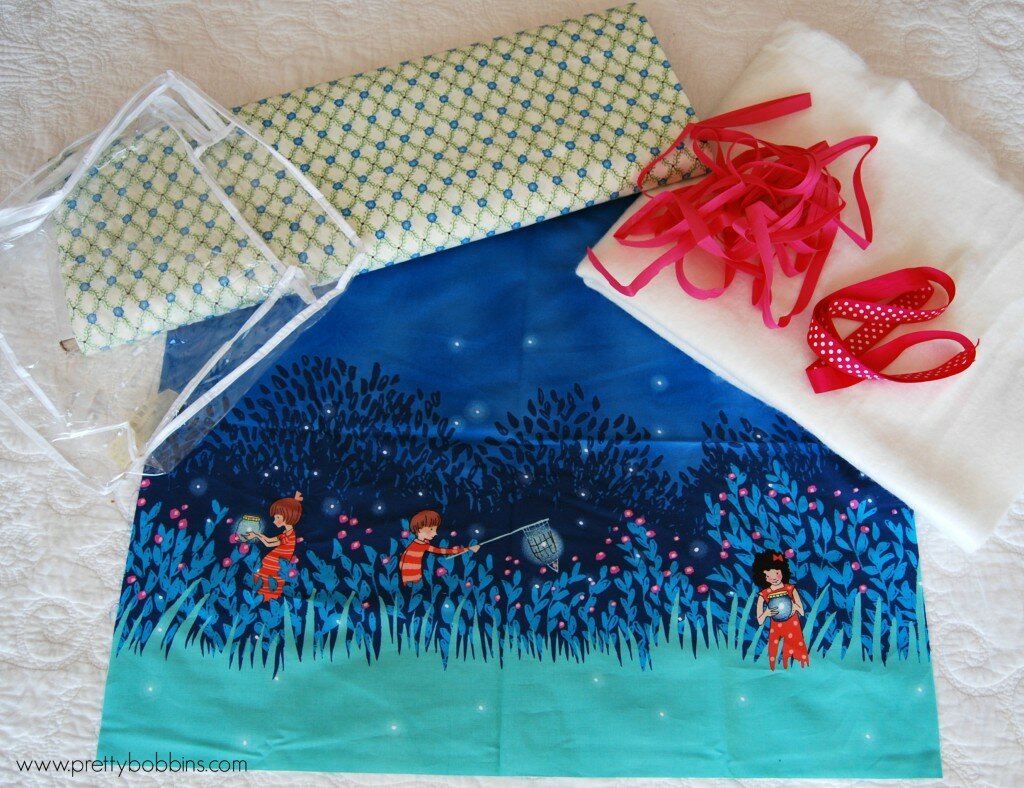
Gather your supplies
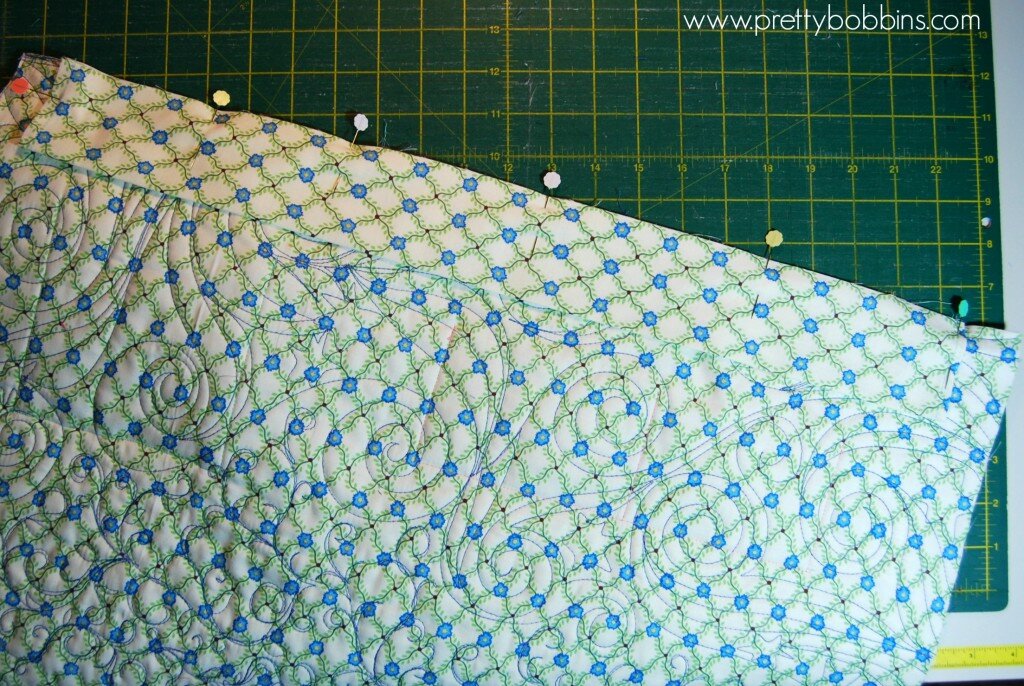
Prepare and quilt you Wee Wander panel for quilting. I cut backing to 32″ x 29″, wadding 28″ x 25″ and the panel to 21″ x 24″. I changed threads a few times and let Sara Jane’s whimsicle design dictate my quilting. TIP: I always find it best to quilt wall hangings quite densely so they sit nice and flat.
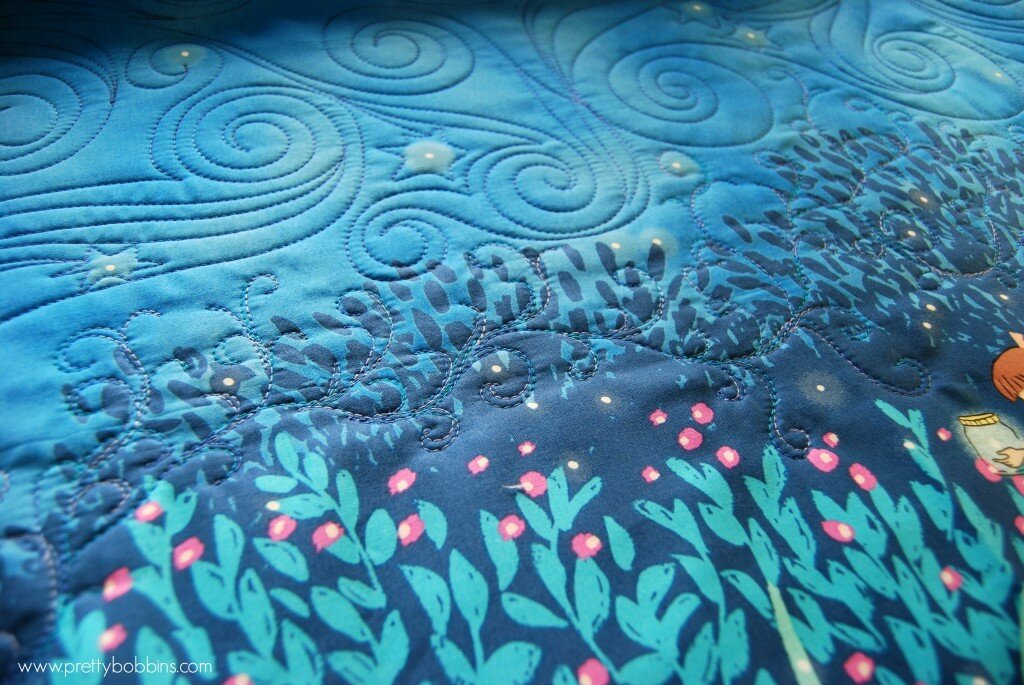
Quilt to your heart’s content!
Once you have finished quilting your panel, trim it so it is nice and square, then set it aside.
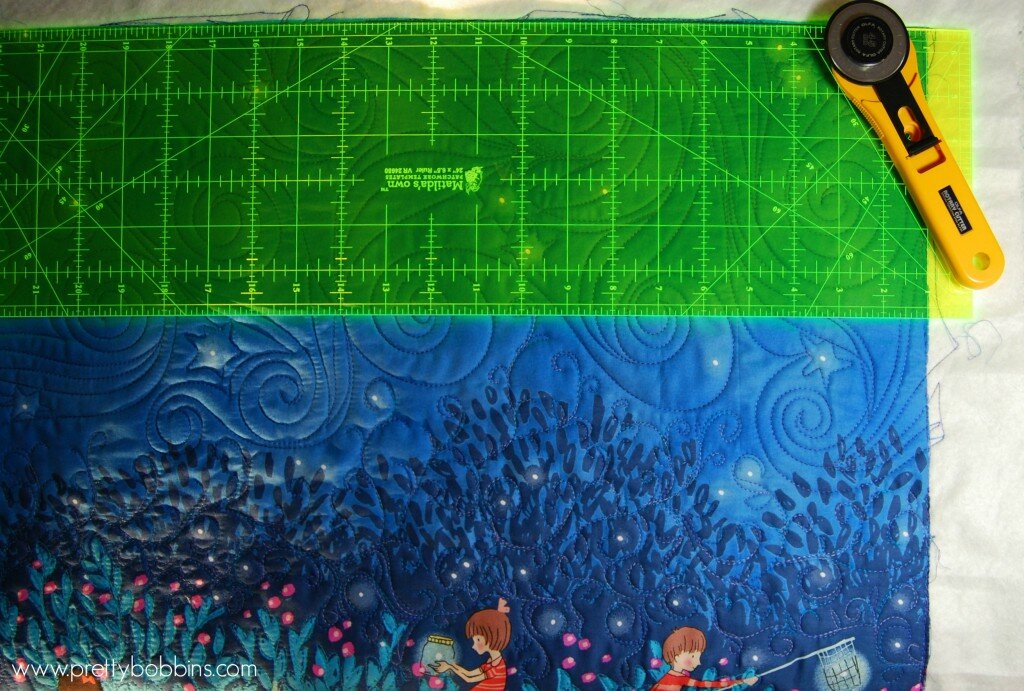
Trim your quilted panel
Prepare your binding. I wanted to feature a number of Sara Jane’s prints for the binding, but you can use pre-made double bias binding or make your own. You will need 105″ binding for the outside of the organiser and four smaller pieces for the plastic pockets:
- Pocket A 37″ of double fold binding
- Pocket B 36″ of double fold binding
- Pocket C 29″ of double fold binding
- Pocket D 43″ of double fold binding
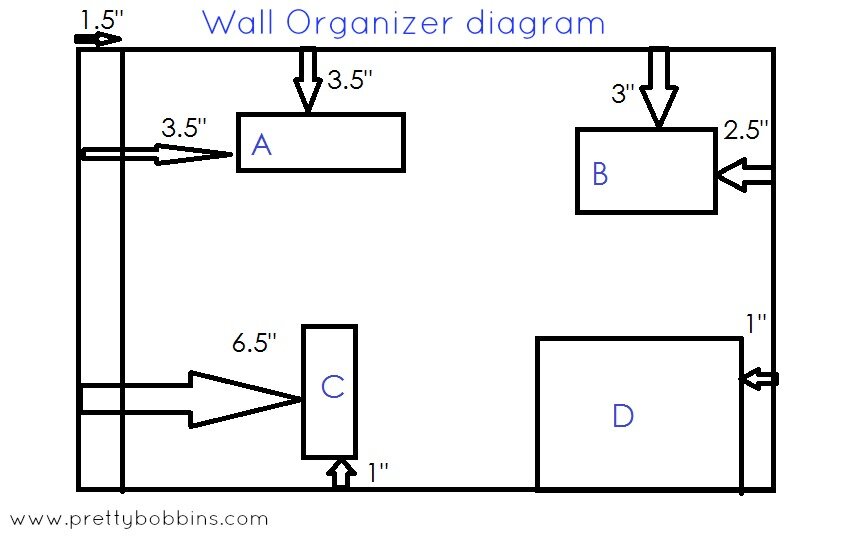
Prepared your clear plastic/vinyl pockets. Cut one each of:
- Pocket A 3″ x 9.5″
- Pocket B 5″ x 7″
- Pocket C 5″ x 3.5″
- Pocket D 9.5″ x 6″
Bind all four sides of A, B and C. Bind three sides of D (leave one of the long sides raw).

Binding tips
Cut a 23″ length of ribbon for your clip strip. My ribbon is .75″ wide.
Place your pockets where you would like them. DO NOT PIN THEM!! I decided to fold the bottom two corners of pocket B in a little so that the pocket sits out and can take bigger objects. TIP: make sure that you don’t place your pockets directly over the parts of the panel that you would like to feature.
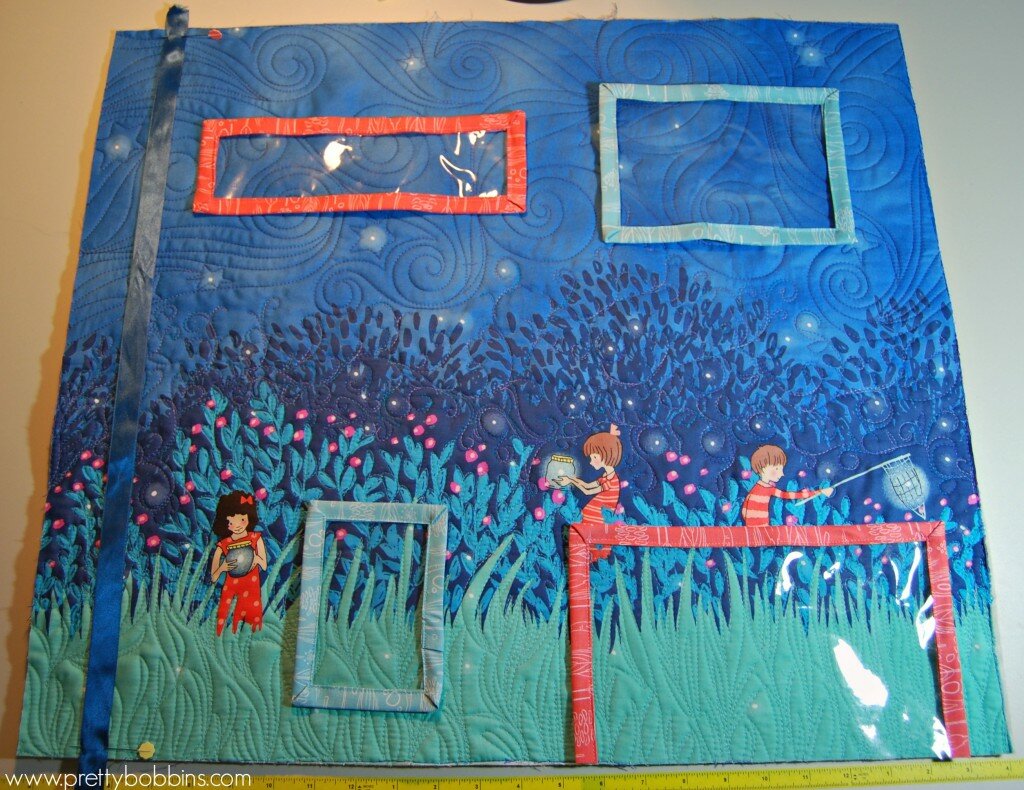
lay out pockets
Once you are happy with the placement of your ribbon and pockets you can pin them carefully within the found section. The pins will leave holes in the vinyl so please be careful 
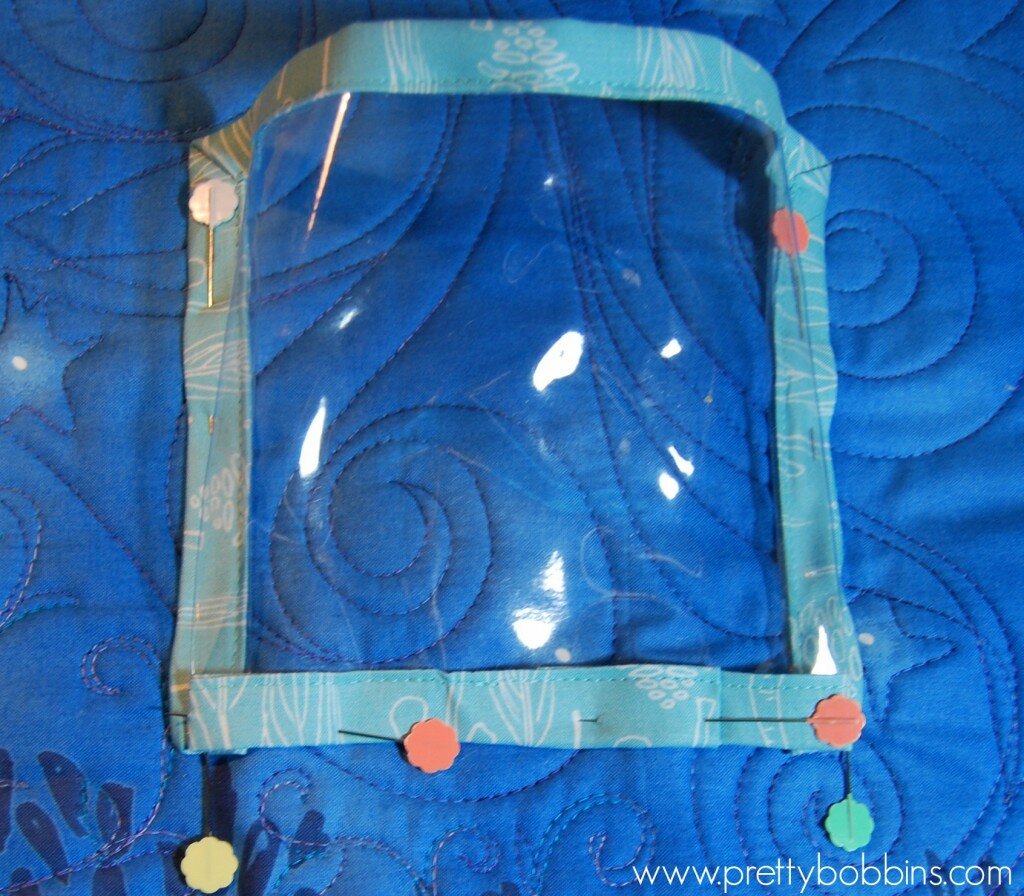
Pin your pockets on the binding so that you don’t mark the vinyl.
Sew your pockets in place. I used a walking foot as the bound vinyl is somewhat bulky.
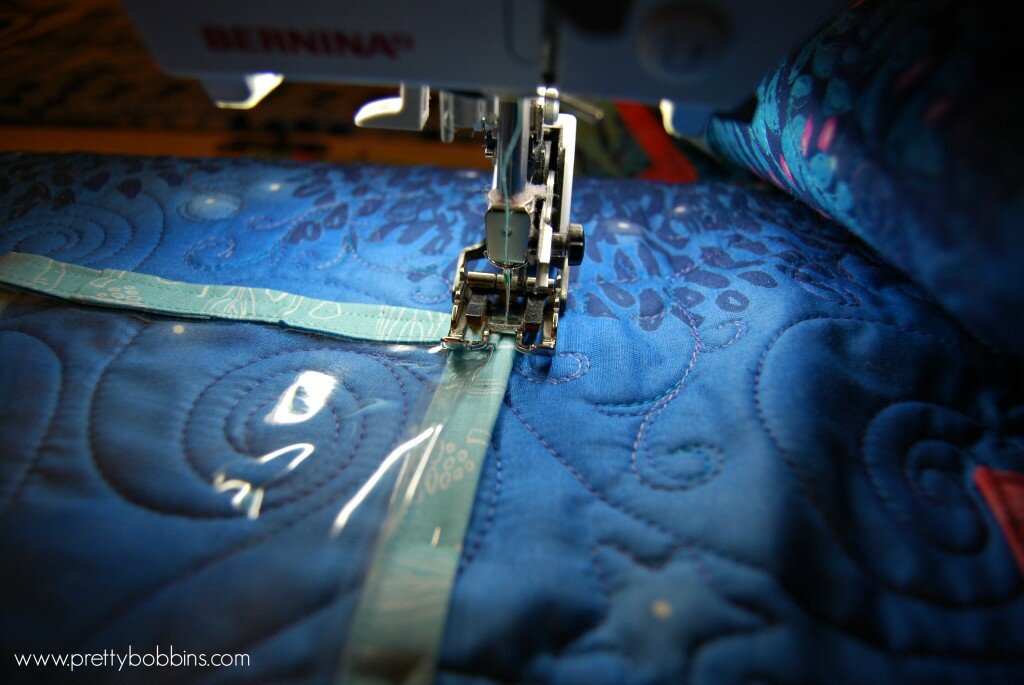
Sew pockets in place
Prepare your hanging sleeve. Take your 5″ x 23″ strip of fabric and fold both short ends in by 1/4″ and again by 1/4″ to conceal the raw edges. Sew in place, fold in half with wrong sides together and press. Center your hanging sleeve on the top back edge of your organiser (raw edges togethre) and sew in place within the 1/4″ seam allowance.
Apply binding. I applied my binding to the back and then machine stitched it down to the front. This is a quick,easy and neat way of binding. Crazy Mom Quilts has a great tutorial here.
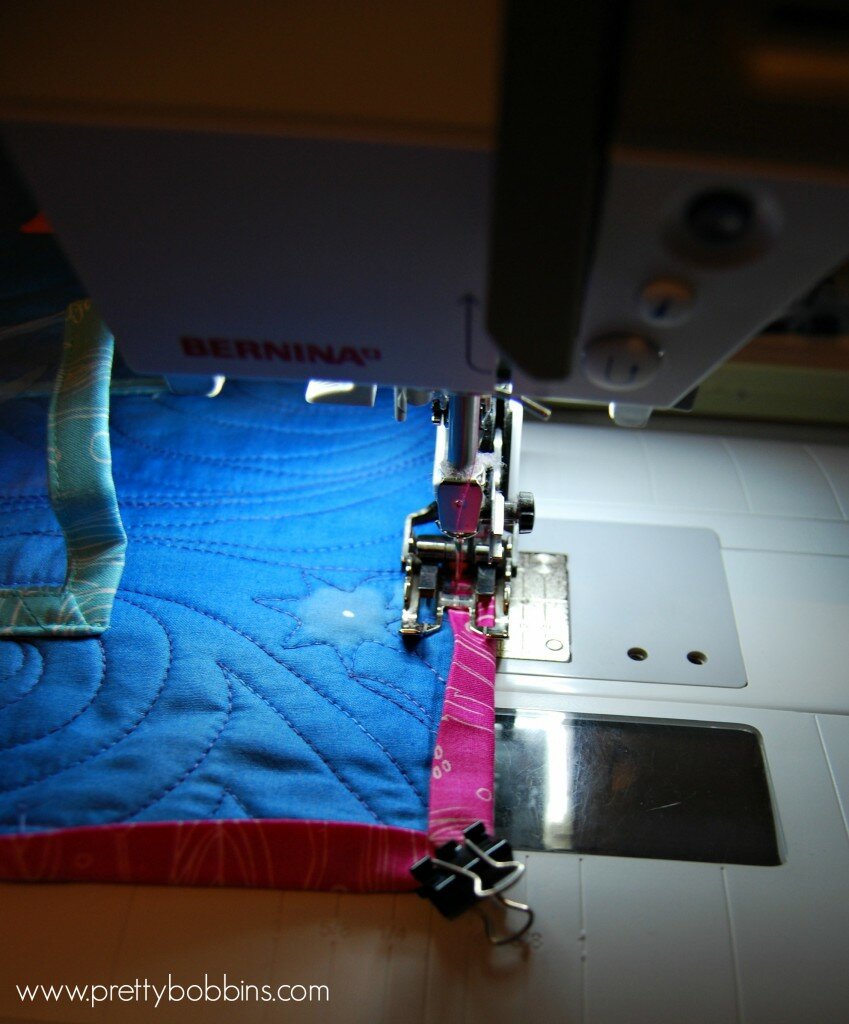
I applied my binding to the back and then machine stitched it in place on the front
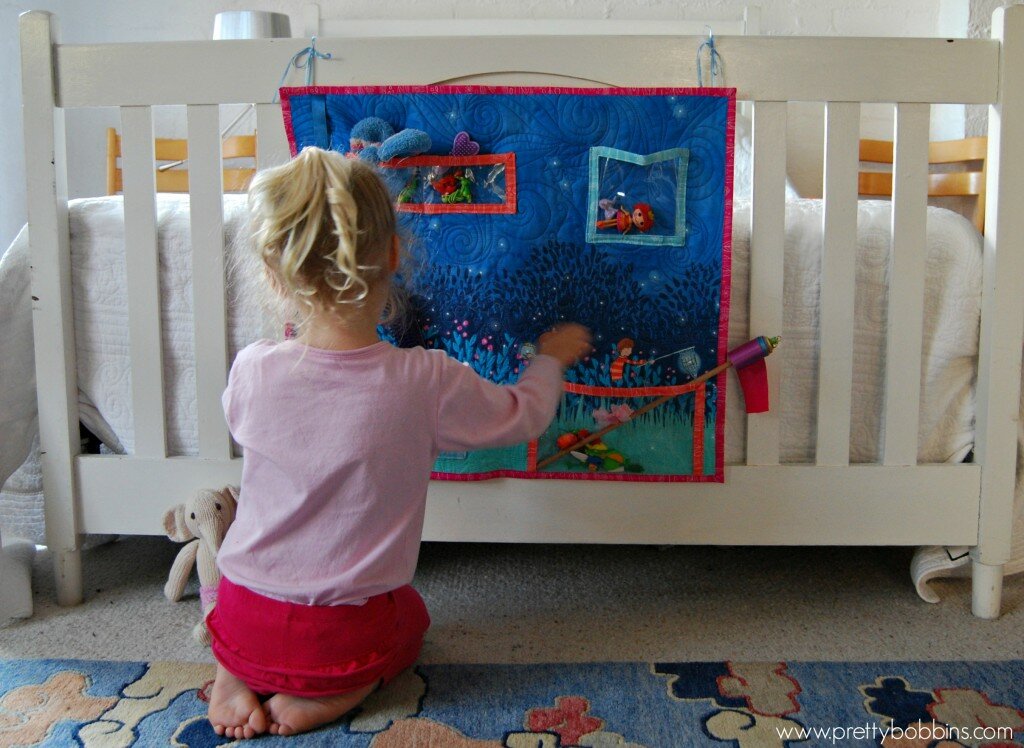
Use your remaining ribbon and dowel to hang your organiser in place. Fill with all your precious items <3

A place for everything and everything in it’s place <3
Then let your wee one re-organize to their heart’s content!
Thanks for stopping by and a big thank you to Sarah Jane for always producing such beautiful illustrations and for turning them into fabric that we can use and love! I’ve loved being part of this blog tour <3 You can find out more about Wee Wander here <3

Welcome to Pretty Bobbins! I’m stop number two on the Cushion for Christmas bloghop and today I’m sharing a QAYG cushion tutorial. The lovely Ms Midge came up with the great idea to feature cushions that can be made in a day – the ideal Christmas gift! Speaking of Ms Midge, I’m pretty sure she is freaking out right about now as my modem died over night and I have been offline for over 24 hours leading up to my stop on the hop… Amazing how long the battery lasts on my iPad when there is no wifi in the house 

I am sharing a cushion that I made yesterday morning. I didn’t time myself but I started after breakfast and finished before lunch, so it is definitely do-able in a day I am familiar with the techniques though, so it might take a beginner a bit longer I find the key to the Quilt As You Go (QAYG) method is to be organised. I set up my machine, ironing station, cutting mat and fabrics (in order) within reaching distance. I used a 16″ cushion insert. I pieced together cotton wadding and cut backing both at 18″ square.

Now my QAYG cushion is technically not QAYG as I didn’t quilt the sections other than to sew them in place. Usually with QAYG you will sew your strip down as I describe below, flip it right side up, then quilt it in place. I have done this and it does look rather lovely but I find it to be an unreasonably time consuming and thread hungry method. So I cheat a little Below you can see a lovely QAYG iPad pouch I made last year. I keep meaning to FMQ over a cushion that I’ve made using my cheats QAYG method but I always love the end result too much to add any extra quilting The choice is yours


I started with a reasonable sized scrap off center and then added a piece that covered the width and over hang 1/4″ each side. I cut all my pieces 1.5″ wide and worked out the length as I went along. The key being to ensure that each piece overhangs by 1/4″ at both ends.

I used my walking foot which has 1/4″ marked on it and I secured my stitches by going back and forth a few times at each end. I didn’t use any pins, I just lay my wadding on my backing and they stayed in place while I was working. After sewing each strip in place I trimmed back any overhang from the previous piece to the 1/4″ seam allowance. After trimming I ironed the most recent piece flat. Ironing after adding each strip will give you the best outcome.

I was trying to be clever with colour and laid all of my prints out in order and then checked as I went along. I didn’t quite get the affect that I was aiming for but I’m still really happy with the cushion.

After finishing the teals I laid out the purples. So pretty

I found it easiest to use my ruler to measure the required size of the next strip. You need to ensure that you strip has 1/4″ seam allowance from any raw edges.

In the above example the strip would need to be 7.25″ x 1.5″
I started to fall in love with this cushion when I was about half way through adding the purples

There’s something about pink that I love. In hindsight I should have gone teal, pink then purple but in the end I added the pinks starting from light to dark (both purple and teal were added lightest to darkest).

I realised after adding a few pinks that I didn’t have enough to continue with only 1.5″ strips so I laid out my remaining pieces to finalised the placement. I started with an 18″ square piece with the intention of a finished 15″ cushion cover.

After adding all of my pins I trimmed back my mini to 16″ (width) x 17″ (height) and cut a backing piece the same size.

I decided on a zipper closure in the bottom seam and I always like to add an extra inch for this purpose. I don’t have access to my overlocker/serger at the moment so I used a flatlock stitch on my sewing machine along the bottom edge (17″ edge – important if your prints are directional).
Lay both your backing fabric and mini right sides together and stitch 1/2″ in from the edge. This will be where you insert your zipper. You want approximately 1.5″ at both ends in your normal stitch length and the area in between in the longest stitch length possible. You can sew these three areas separately, but I’m lazy and just secure my stitches and adjust my stitch length without trimming

After timming your threads press the seam open. Because we’re making a cushion cover that involves quilting I always fuss with the pressing. You want a nice straight and flat seam

Select a zipper longer that the width of your cushion (I think I used a 21″ zipper) and pin in place so that the teeth are ligned up to where the front and backing meet. I use pins to remind me where my basting stitches begin/end. Grab your zipper foot and sew your zipper in place. Don’t forget to make sure that the tab is within the sewn area. I cross over the zipper just outside of the basting stitches and sew back and forth a few times.

Trim your zipper ends and secure with a few stitches. Next you want to grab your seam ripper and carefully rip out those basting stitches. I usually use tweezer to grab the tiny threads left afterwards.

Then you want to sew your cushion cover together. Make sure you leave the zipper open so that you can turn it right side out. I like to use a 1/4″ seam allowance, first with a straight stitch and then with the serger or a zigzag stitch to prevent fraying.
Et voila! You have a brand new cushion ready for Christmas!

I used a lovely Kate Spain fat quarter (from her line Good Fortune) for the back. LOVE.

I hope you have found my tutorial helpful. For me, as always, this was an exercise in colour play as much as it was in quilting and whilst I didn’t end up with exactly the affect I was after, I do love it In case you’re wondering, yes, it will be a Christmas present for a very special friend
Don’t forget to head over to Ms Midge on the 14th of December to link up your cushions. You can find all of the details here and links to the other fabulous bloggers below. I can’t wait to see what everyone has been up to!
Sunday 1st December – Ms Midge
Tuesday 3rd December – Kristy at Quiet Play
& Ms Midge
Wednesday 4th December – Joshua at Molli Sparkles
Thursday 5th December -Rachel at Little White Dove
Friday 6th December – Fiona at Finding Fifth
Saturday 7th December – Abby at Things For Boys
Sunday 8th December – Lauren at Molly & Mama Makes
Monday 9th December – Jodi at Tickle & Hide
Tuesday 10th December – Adrianne at On The Windy Side
& Ms Midge
Wednesday 11th December – Alyce at Blossom Heart Quilts
Thursday 12th December – Gina at Party of Eight
Friday 13th December – Jane at Quilt Jane
Saturday 14th December – Round up of Blog Hop and link up YOUR projects at Ms Midge!
Wednesday 18th December – Winners Announced at Ms Midge!
 |
| Patterns Only - $20 Voucher |
 |
| The Oz Material Girls - $20 Voucher |
 |
| Fat Quarter Shop - $50 Voucher! |
 |
| Polka Dot Tea - Fabric Bundle! |
 |
| Intrepid Thread - $25 Voucher! |
 |
| Blossom Heart Quilts - Ornamental Quilt Pattern! |
 |
| Quiet Play - Winner’s choice of 3 Paper Piecing Patterns! |
Let the cushion madness begin!
It rained ALL day yesterday, all night last night and then most of today. Yippee! Perfect sewing weather
This week I’m focusing on a cot quilt for a wee Irish lass. I have the fabric and design organised for awhile but this week I cleared my schedule and got to work.
I’m using wool batting for the first time and I couldn’t decide between raw edged applique and reverse applique so I decided to have a test run by making a cushion.
I started out by making myself some butterfly templates. I’ve made templates a few times before and one thing I’ve learnt is that symmetry is difficult to achieve. Here’s a little how to that I’ve found works for me.
Using graph paper draw half of your butterfly. I work out the approximate size I want and draw a rectangle the full height and half the width of that size, I then draw freehand within that rectangle. The graph paper makes it much easier to get nice smooth shapes. Once you’re happy with your sketch cut it out, I like to leave a flap of about .5″ from the center, I keep the center line visible for reference.
Place your cut out sketch on your cutting mat. Line up the edge (or in my case the line that will be the center) with one of the lines on your mat making sure the top point of the line is on a intersecting point on your mat. This makes lining up your second half easier.

You can use anything you like to trace your design onto your template plastic but I prefer a permanent marker. It means that you cannot hide any mistakes but I find it is much smoother than a pencil or chalk and therefore I make fewer mistakes.
Be very careful to hold your template in place, lift it slightly and remove your sketch. Again, being very careful not to move your template plastic, lift it slightly and place your sketch underneath on the second half. You want to line your sketch up with the same line and intersection on your mat. This is the only way I can achieve symmetry in my templates!
All that is left is to cut out your template, template plastic is thick and it’s a tedious job, go slowly to avoid mistakes Repeat as many times as needed. Today I made a half dozen templates using this method and they’re all symmetrical. Yay!
Oh! One last tip! I always trace my template onto blank paper before I start cutting, just to make sure that I’m happy with the shape
I’m linking up with Work In Progress Wednesday at Freshly Pieced. What have you been working on? Do you do a practice run when working with new materials? Any tips for using wool wadding/batting? I’m loving it so far!
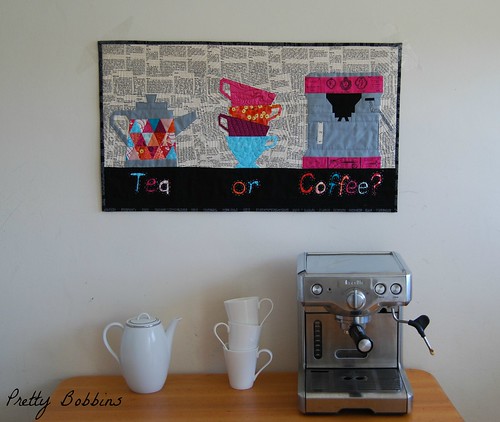
You may have noticed that I have a thing for Paper Piecing Yesterday was a big day for me, I launched my first Paper Pieced Patterns, exciting!
Today I’m sharing a tutorial (and free pattern for the teapot block – you can download it from the second last page of the tutorial) for anyone new to this technique. I hope that you find this tutorial useful and that you enjoy the new format that I am using for my tutorials.
simplebooklet.com
I would be absolutely delight to hear from you if you do make something with one of my patterns. Please feel free to add images of your creations using my patterns to my Flickr group
Do you have a favourite piecing or quilting technique?
Before I start this post I just want to say that today my thoughts are with those in Boston and Baghdad.
If you’re a regular reader you will be familiar with my long term work in progress.
I’m in the final stages of finishing this quilt for Mr 6 but it’s taking awhile… Mr 6 is thrilled with his quilt, absolutely loves it and can’t wait to use it, except for one print. As soon as I showed him the finished top he asked me to replace one print.
Last week I finally got around to ‘replacing’ the offending print using a technique that I’m pretty sure I first read about here. I’m pleased to say that you can’t even tell that the original block is hiding underneath and that Mr 6 is happy

So today I’m sharing a tutorial on how I replaced the offending block in case you ever need to do the same. I’m using a new web app, Simple Booklet, for this tutorial and I would love your feedback. Simple Booklet is basically a code free slider and flipbooklet maker, so it’s easy for me to use. I can edit everything in the one place making it much quicker to put together than my previous tutorials and they provide monthly stat reports which is handy. I think this new format will make my tutorials easier to navigate and make my tutorial page a little tidier plus it was fun to use Please let me know your thoughts! (If you’re reading in a reader and you cannot see the below photo, please click through to my blog so you can read the tutorial and also let me know, thank you!) And in the spirit of disclosure I’m friends with one of the creators of Simple Booklet, but I do really enjoy using it and wasn’t asked to promote it
Click on the arrows on the photo below to view the tutorial.
simplebooklet.com
Last week I shared the improvements I made to my blog. Thank you for your lovely comments , I am super happy with the new look I also had a couple of requests to explain how I made those changes so today I am sharing a 3 mini tutorials (links at the bottom of this post) and all of the links that I used
The third improvement I made that I had a few questions about was the addition of pretty social media buttons
That probably took the most time but was actually pretty simple once I worked it all out I used this fantastic tutorial. Please click through as she really does a great job at explaining it. She also has a second tutorial for the email button which is also worth reading. I did have to remove a few bits of code once I pasted it into blogger but it was as simple as viewing my blog, seeing which pieces of code were visible and then deleting those. I then clicked on each icon to make sure it worked and then asked a friend to do the same
The thing that took the longest in this part of the process was finding the graphics that I wanted to use. The above tutorial has some lovely ones that you can use and the whole process would be very quick if you used those I, however, wanted different coloured buttons and that took a lot of googling I would suggest that you look at blogs that you like the look of to get an idea of what to search for and then look through photobucket.
I hope this mini tutorial is helpful, I have broken one tutorial into three parts for convenience You can find Part 1 (Blog header and width) here and Part 2 (Blog tabs) here.
Don’t be scared of playing with your blog and getting it to look like you want. There are lots of people out there who will charge you to do it for you, but if you have the time, you can make some simple changes yourself
Last week I shared the improvements I made to my blog. Thank you for your lovely comments , I am super happy with the new look I also had a couple of requests to explain how I made those changes so today I am sharing a 3 mini tutorials and all of the links that I used
The second thing I did was add a new page and then center the page tabs (photo below).
Adding the tabs is as simple as creating new pages. Go into your blogger dashboard and click on pages on the left hand side (photo below).
Decide what pages you would like. I have pages for: Home, About, Photo Gallery, Tutorials and Sponsorship. There is a limit to the number of pages that you can have but I like to keep my blog clean and easy to read so I am in no danger of exceeding that limit Now you need to create a new page.
Click on the New Page tab up top and select a blank page (photo above).
A new page, very similar to the format when writing a blog post, will appear, make sure you add a title (this will be the tab that you see at the top of your blog under your header) and then write whatever you like in the text box. Here you can see I have added a tutorials page (photo below).
 |
| At this point I selected the same font my page heading as I used for my blog header. |
I like to add a title and photo for each tutorial and then a link to the blog post for that tutorial. So if you want to find a tutorial you just go to the Tutorial page and click on the photo, rather than having to scroll down through each tutorial. These links seem to stop working every now and then so I check them from time to time and fix them when necessary.
Adding the link to your tutorial blog post is as simple as clicking the link icon and pasting in the URL from the original blog post
I followed Alyce’s easy to follow tutorial here to center my tabs. For some reason it took a few times to work and I didn’t do anything differently, so if it doesn’t work the first time just try again
I hope this mini tutorial is helpful, I have broken one tutorial into three parts for convenience You can find Part 1 (Blog header and width) here and Part 3 (pretty buttons) here.
Don’t be scared of playing with your blog and getting it to look like you want. There are lots of people out there who will charge you to do it for you, but if you have the time, you can make some simple changes yourself
Last week I shared the improvements I made to my blog. Thank you for your lovely comments (especially to Carla who pointed out a key spelling mistake!), I am super happy with the new look I also had a couple of requests to explain how I made those changes so today I am sharing a 3 mini tutorials and all of the links that I used
The first thing I changed was the header up top It was super easy, I just made a collage of some of my favourite quilts using picmonkey. The key was getting the width right and I would suggest first deciding the width you want your blog to be and then making your header the same width. I found this great tutorial which is pretty much the way I went about it but if you’re familiar with picmonkey you will be able to make your collage very easily I would suggest that once you’ve saved your collage you keep it open as you may want to resave it with different widths a few times (or maybe that’s just me LOL).
I made a note of the font that I used in PicMonkey and then selected the same font in Blogger for my tabs. It’s much easier to write this down when creating your collage than trying to compare fonts later (ask me how I know…)
In terms of setting the width of your blog you can do so by going into the the Template section of Blogger.
You want to click on the customize button (underneath the picture of my blog in the photo above) which then takes you here:
Click on the “Adjust Widths” option on the left hand side (photo above).
It’s then as easy as sliding the bar with your mouse (photo above). I have set my blog with to 1200px and my header to the same width.
I hope this mini tutorial is helpful, I have broken one tutorial into three parts for convenience You can find Part 2 (Blog tabs) here and Part 3 (Blog pretty buttons) here.
Don’t be scared of playing with your blog and getting it to look like you want. There are lots of people out there who will charge you to do it for you, but if you have the time, you can make some simple changes yourself
Today I’m sharing a blog post that I recently wrote over at The Oz Material Girls. It is a beginners guide to fat quarters and includes a tutorial for a marble maze which is a super quick and easy project
Scroll down for the marble maze tutorial, I have included the fat quarter information in case any of my readers are beginners and would find it useful
Hello, I’m Gemma from Pretty Bobbins popping in to talk about fat quarters. I love sewing from free-motion quilting to dressmaking. You can pop by my crafty blog where I document my sewing or my travel blog where I talk about my life in Nouméa
If you’ve started buying fabric you might be getting a little confused by all the possible cuts. First up you need to know that many sew-ers work in both the metric and imperial system. Many patterns give you measurements in both centimeters and inches, some in inches alone and others stick to centimeters and meters. Whilst it can be frustrating and confusing at first, before you know it you will be able to estimate an inch or 1/4″ as easily as the centimeters that you learnt at school. Did you ever notice that most measuring tapes have both inches and centimeters marked? Now you know why
For the purpose of explaining a fat quarter we will work in inches. A yard of fabric can be divided up into many different cuts of fabric as demonstrated below.
To start with, the width of fabric (WOF) is generally 42″-44″ or 106.68cm-111.76cm
1 yard of fabric = 36″ x WOF = 91.44cm x WOF
1/2 yard = 18″ x WOF = 45.72cm x WOF
1/4 yard = 9″ x WOF = 22.86cm x WOF
1 fat quarter = 18″ x 22″ = 45.72cm x 55.88cm
1 fat eighth = 18″ x 11″ = 45.72cm x 27.94cm
5″ and 10″ charm squares are often used in quilting and sewing, these equate to 12.7cm and 25.4cm squares
Google will always come to your aid if you need to convert inches to centimeters, but it is really as simple as multiplying the number of inches by 2.54. 1″ = 2.54cm
Have I confused you yet? Of course you can also buy your fabric by the meter but as we are talking about fat quarters which are a quarter of a yard, it is useful to have this information.
I first started buying fat quarters because they often come in bundles or are on special. Then I had a crisis of confidence, how will I ever use these small cuts of fabric? Then I got creative. This post is for you if you’ve ever found yourself in the position of wondering what the heck you’re going to do with a fat quarter.
There are LOADS of things that you can make using fat quarters! There are so many in fact that we’re not going to talk about them all today but keep your eye out as this is the first in a series of posts featuring projects that use fat quarters.
To give you an idea, here are some recent projects that I have made using fat quarters.
Clockwise from top left (including links to original tutorials where applicable): Twig and Thistle Bunnies, Dolly Nappies, Marble Maze, Chibi Bunnies, Pencil Roll, Mug Rug and (center) Buttercup Bag.
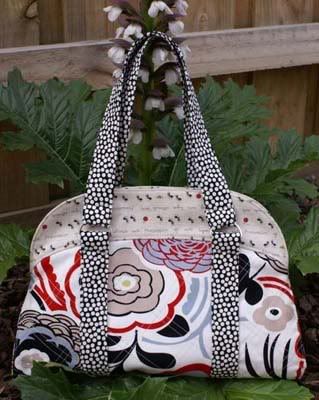
This bag by Melly and Me is a great example of patterns that utilise fat quarters. You can purchase the pattern here or a kit here which includes the fabric requirements.
Some popular online tutorials featuring fat quarters include the Buttercup bag by Made by Rae, Fat Quarter Apron by Prudent Baby, Fabric Airplanes by 2 Little Hooligans (I am so making some of these tomorrow!) and a Fat Quarter Fabric Folder by Schlosser Designs.
 |
| Fabric Areoplane. Image by 2 little hooligans |
Buttercup Bag. Image by Pretty Bobbins,
original tutorial by Made by Rae.
|
|
Of course there are so many gorgeous quilt blocks that you can make using fat quarters. A good idea for a quilt can be to purchase fat quarter bundles, these are made out of either complimenting fabrics of a selection (or complete) range. It can take the guesswork out of coordinating fabrics, especially if you are buying online. The Oz Material Girls have some gorgeous fat quarter bundles that are great for building your stash or working into a quilt. I can see a lovely baby girl’s quilt out of the mauve and pink fat quarter bundles with some kona solids, maybe a white, and this fun cherry print on the back, oh, and maybe some lovely pink gingham for the binding.


See what can happen when you start with a fat quarter? But before you head over to The Oz Material Girls and start stocking up on fabrics I’m going to share a quick project that I put together a little while back using a fat quarter from The Oz Material Girls. Keep an eye on their Facebook page for their fat quarter frenzy sales, I got a great selection!
Using one of these fat quarters I made some marble mazes, so quick and easy, all I needed was a fat quarter, a packet of marbles and my usual sewing supplies.
Marble Maze Tutorial
Using your rotary cutter and ruler you need to cut two squares 5.75″ x 5.75″. Take note if you print is directional and cut accordingly.
Place your two squares right sides together and sew around all four sides using a 1/4″ seam leaving a 2″ gap for turning.
Trim you corners.
Turn right side out, make sure your corners are nice and sharp, iron flat, then sew 1/8″ from the edge of your
square remembering to leave your gap for your marble.
Take your ruler and a fabric pen and draw out your maze. Make sure your measurements are precise or your marble will not fit through the maze. You want your maze “walls” to be 1″ apart. I STRONGLY recommend that you practice on a scrap to make sure that your measurements are precise and that your marble will fit through the maze. I made up a different route each time with some deadends. Just make sure you have a route that allows some movement and manipulation, it should be fun
Making sure you are precise, sew along your marked lines. Ensure that you sew a few stitches back and forth to secure each maze “wall”, the fabric and stitching will be stretched during play and you don’t want your stitches unraveling.
Insert your marble.
Be sure to push your marble well out of the way. Complete the top stitching across your marble opening.
Once you’ve finished sewing your maze walls you will find that you have lots of thread tails.
Knowing my boys I decided to add some fray stoppa once I’d cut the thread tails, just for some extra strength
 |
| I used some baking paper to protect my cutting mat. |
Please note that marbles are not suitable for young children, please pay attention to the safety information marked on the marble packaging.
I hope you found that useful! What clever uses have you found for fat quarters?
I’m just sharing a guest post that I wrote a few weeks ago for The Oz Material Girl’s blog. I hope that you find it useful I must admit straight up that I’m no expert when it comes to softies, but I do love them and have made a few. In fact I recently pulled a late nighter making 34 soft bunnies and eggs, you can read about my midnight madness here. Or you can read my more sane post with links to some great Easter softies here
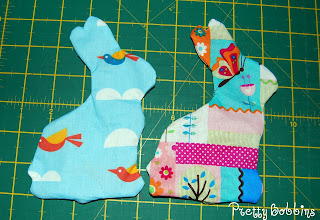
If you’ve been getting crafty for Easter you’ve probably seen the Twig and Thistle Bunny. I love it! I have made, oh, about 6 million as gifts for friends but I need to make two more (please note the terms and conditions on the Twig and Thistle site, it is for personal use only). It is a super easy softie and a great one for beginners, so today I’m going to share some tips that will help you make great shaped softies. Of course you can apply these to any softies and there are loads of gorgeous softie patterns over at Patterns Only.
So, let’s get started.
First of all you need your pattern piece. If you are going to make your softie a few times I highly recommend making a template rather than using your printed pattern piece. A template will give you a more consistent shape and is more durable. Today I am using some clear template plastic, but cereal boxes also work well.
Trace your pattern shape onto your template material.
Cut out your template.
PLEASE don’t use your fabric scissors! Save them for your pretty fabrics, you should love and cherish your fabric scissors Don’t put them near paper, glue, carboard, plastic, anything that’s not fabric or thread really. It is handy to have a few pairs. I keep my scissors together in an airtight box (remember I live in the tropics and near a salty lagoon) and have a number of pairs.
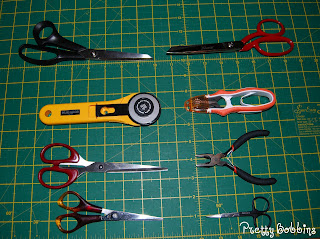 |
Clockwise from top Right: old fabric scissors, thread snipers,
pliers, curved nail scissors, craft scissors, paper scissors, rotary cutter, good fabric scissors. |
Now that you have a nice template to work with select and iron your fabric. Lay your fabric right sides together and place your template on top. Using a fabric pen trace around your template.
If you’re a beginner it is going to help you to use some pins. I may have mentioned before that I don’t really like pins…
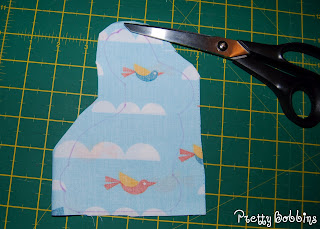
It will make life easier if you’re not working with a big piece of fabric, so at this point I tend to roughly trim around my shape making sure that I cut no closer than 1/2″ to my softie outline.
Before you take your fabric over to your sewing machine. You need to consider a few things first:
- Where are you going to start sewing?
- Are there any tricky shapes that you might find easier to approach from the left instead or the right, or vise versa?
- What colour thread and fabric are you using?
- What stitch length have you set your machine to?
I find that:
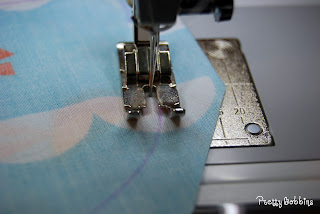
- It is always easiest to start and finish on a straight section, in this case his bottom.
- Curves can be tricky when you’re starting out. You need to lift your foot or pull your fabric to make it turn with your feed dogs. Maybe you find an inverse curve easier to manage than a converse curve. I find this something I need to consider more on an overlocker, but it is still worth considering when using your sewing machine.
- I know that it can be tempting to just use whatever thread you have in your machine or to only change your top thread and leave your bobbin alone. But trust me, your softie is going to look so much nicer if the thread is invisible. Select a colour that blends into your fabric as much as possible.
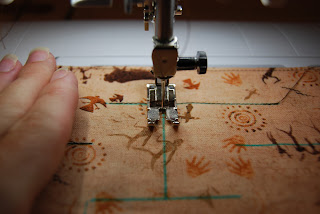
- When making softies you want to reduce your stitch length down to 1.4 or 1.6 This is really important when you come to triming your seams a little later.

Sew a couple of stitches back and forth to secure your ends. You might want to reduce the speed on your machine to help you with those tricky corners.
Don’t forget to leave a gap so that you can stuff your softie! I leave about a 1″ gap but you might find 1.5-2″ easier for your first few goes.
Now we want to trim our seams to 1/4″.
Clip any corners and cut little Vs on your curves cutting very close but not too close to your stitches.
Snip right up to your corners including the divide in your Bunny’s ears.
You’ve probably got a sore hand from the scissors, but it’s worth it! You will get nice smooth curves from all those little snips you’ve made
Now you want to turn your Bunny right side out. I use my fingers first.
Then I use my fabric pen with the cap on to gently push out the seams (I find that the smooth plastic cap which has a slightly rounded end is a perfect turning tool). You can use a chopstick, rubber end of a pencil or anything that isn’t sharp. Don’t use the right end of a chopstick or knitting needle as you will end up poking a hole in your seams. If you do poke a hole in your softie, don’t panic, just turn him wrong side out again and sew a little inside the section that has a hole remembering to secure your stitching.
Your rabbit skin should look something like this.
Now you want to stuff him. Take a small amount of stuffing (I’m using the inside of a cushion, you can use toy fill).
Push the stuffing up to the tip of his ears. I start out using my fingers and then use the wrong end of a chopstick to get it all the way to the end.
Keep using small amounts of stuffing and pushing them into your bunny.
You want to make sure that you are pushing the stuffing right to the edges of your softie.
It can get a little frustrating using such small pieces of stuffing at a time, but it is worth it. If you use big pieces you will end up with a lumpy softie. Keep going until your softie looks like this!
Recently I was given some fantastic advice on an online sewing group, The Sewing Library, in regards to stuffing softies. Use the chicken breast test. It should be firm like a chicken breast and like a chicken breast, it is safer to go too firm than too soft. Isn’t that great advice? Now I know exactly how firm to make my softies!
Once you have finished stuffing your softie you need to sew him up. Select a thread that blends with your fabric and grab yourself a needle.
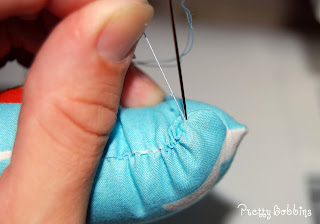
You want to use a ladder stitch so that your stitches end up invisible. There are lots of good tutorials online but I’ve put together some photos to try and show you how to do it.
First sew a heap of little sitiches within your seam allowance to secure your thread. Then bring your needle up right on the seam line right next to where your hole starts.
Take your needle over to the other side and push it in to the seam line and bring it back out about 1/8″ on the seam line on the same side (see photo below).
Pull your thread tight and insert your needle back into your seam line on the other side directly opposite your last stitch. Bring your needle out again 1/8″ along on the seam line same side.
Continue until you get to the end of the hole.
Now you need to secure your stitches but you want them to be invisible. [If I'm using a thread and material that allow me to make a few tiny stitches that can't be seen, then I will do so in addition to tying a knot.] Bring you needle out as close to your last stitch as possible. Now you want to tie a knot as close to the fabric as possible. I tend to do about 3 or 4 knots on top of each other.
OK, get close to your fabric and pull your thread tight. Can you see the hole that your thread came out of last? You want to thread your needle back into that same hole.
Without loosing your needle inside your softie take it through your softie and bring it out. Pull the thread firmly but not hard. You want your knot to pop into the inside of your softie but not tear a hole in it.
Pull your thread tight and snip it nice and close to the fabric so that the thread tail disappears inside the body.
Hooray! You shouldn’t be able to see where you closed up your softie!
Now stand back and admire your work
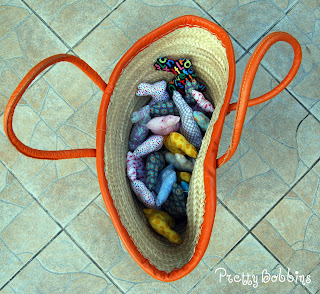
You can even add a ribbon and watch your Bunnies hop around the garden.
Or put them in a basket and take them to school for your kid’s friends!
You can use these tips for any softies and you will probably find that the shape of your softies improves with time I hope you found this tutorial helpful!