Hello my lovely quilting friends and welcome to I Quilt linky party at Pretty Bobbins! We had lots of new linkers last week and I apologise that I am still getting around to visiting everyone. I will get there!  Please remember to add the linky button (found at top left) and/or a link to my blog and to visit 3 other linkers. We all love comments!
I haven’t organised myself to feature a quilter this week, I will be back on board next week, I’m sorry! This week what I have been doing is visiting local Canberra quilt stores and introducing myself. Wow, that has been an adventure! We are super lucky in Canberra to have a big quilting culture and I think the Canberra Quilters (the local quilt guild) is possibly the longest running quilt guild in Australia. Don’t quote me on that  but they have a great reputation and have been around the traps since way back
  They haven’t had a meeting since I arrived in Canberra but I am looking forward to going along next Thursday.
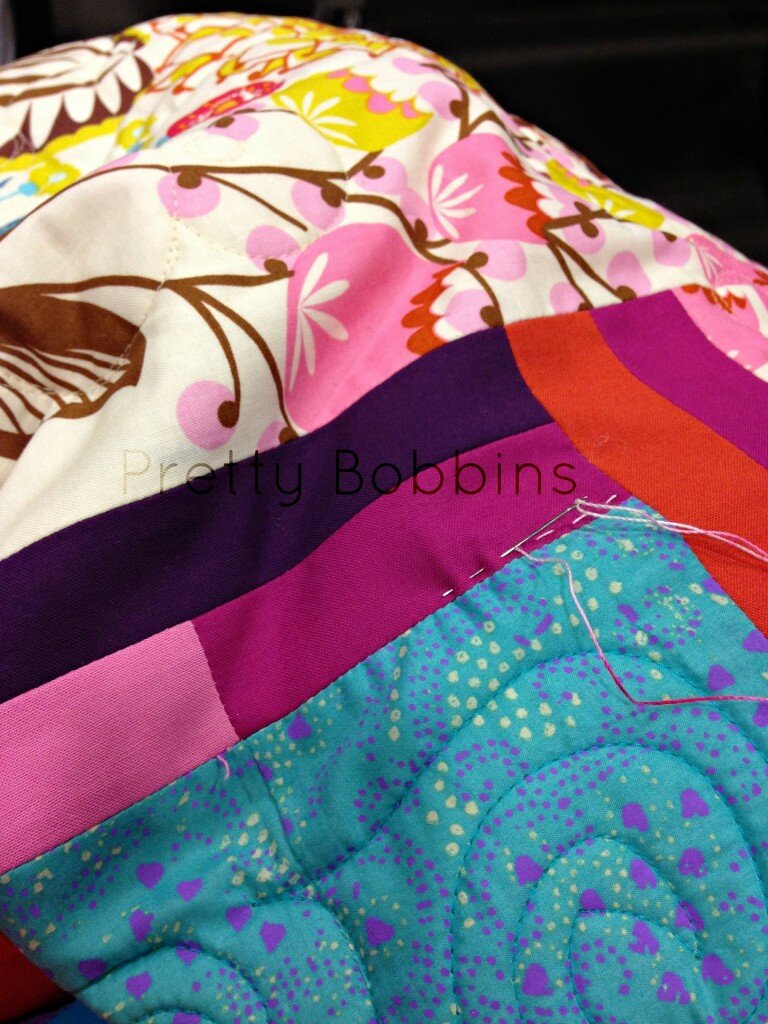
Of course taking a queen size quilt to handquilt at a guild meeting is the best idea in summer!
As part of being a professional longarm quilter I feel it is important to introduce myself to the local groups. Last Thursday evening I attended the Canberra Modern Quilt Guild meeting and had a hoot! They are such a lovely, enthusiastic, talented group of quilters. I shared two quilts and I must say I really appreciated the positive feedback I received. Thank you lovely ladies xxx It was also rather hilarious to have to ask everyone what their blog or IG name is because I don’t necessarily know their real names!
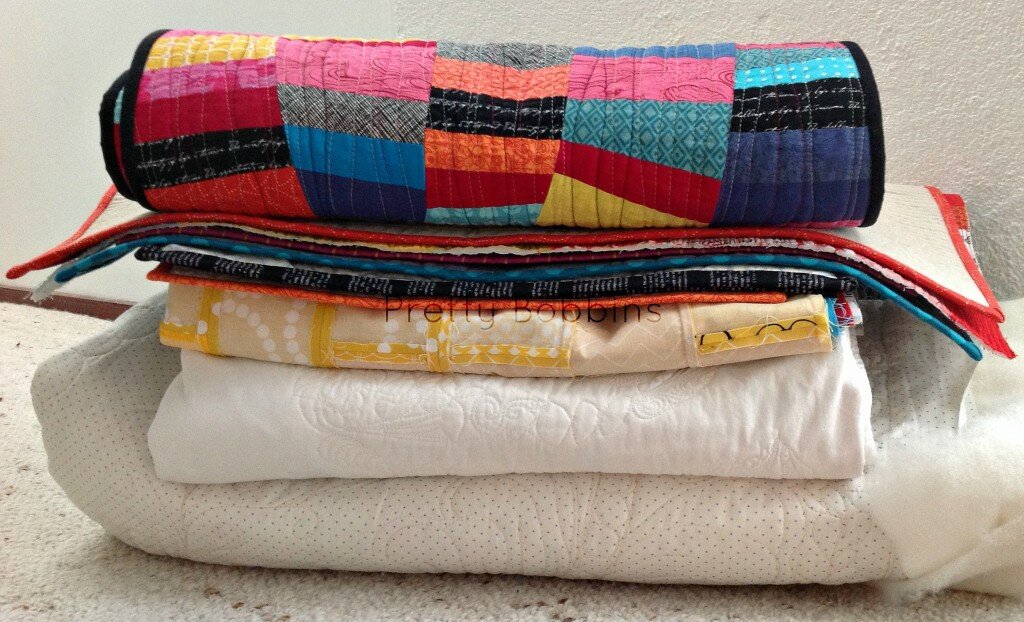
But back to this week. What I can take away from this week is the belief that I want this dream bad! I’m passionate, enthusiastic, committed, talented, kind, generous and possibly somewhat naive and sensitive. Driving from one end of Canberra to the other, quilts in hand and business cards on offer I was somewhat taken aback at the reception that I received. I was told that I would “never teach in this town without being accredited”, “we already have a longarmer, the owner isn’t in, but don’t come back because she won’t take your cards”, “you need to offer a discount to get any of our customers”, “wow! that’s a bit out there.”, “leave your cards over there” without even getting up to shake my hand. It was soul destroying. But after coming home and licking my wounds for an afternoon I realised that I want this, I want this dream, I am going to get there and I am going to do it with a smile on my face, in the knowledge that my quilting is awesome, my style is up there, my passion and enthusiasm is evident and contagious. Building a business takes time, belief in yourself and a thick skin. How much do I want it? I want it with every fiber of my being!
The other big positive that I want to share with you is that I will be teaching later this year at a local quilt store! I’m super excited to have the opportunity to teach others to machine quilt, to gain confidence and to get on board this fun, addictive hobby  If you’re local keep an eye out for more information closer to May
  The world needs more quilters!
So, with all this waffle (which is completely quilting focused!), I ask you, what is it that drives you to quilt? Are you committed to charity quilting? Do you quilt for your kids or grandkids? Is quilting your escape? Why do you quilt and how do you overcome those mental hurdles when someone discourages you?

Happy quilting, happy linking and thank you, thank you, thank you for being lovely and encouraging to each other! We need more of that in our community both online and in real life 

Welcome to I Quilt at Pretty Bobbins! It’s been a while since the last link-up and I hope to see you all back linking up with me on a weekly basis. Please remember that this linky party is about the quilting process. Everything from sketching your quilting designs to lessons you learnt stitching it all together. If you love quilting, this is the place to be 
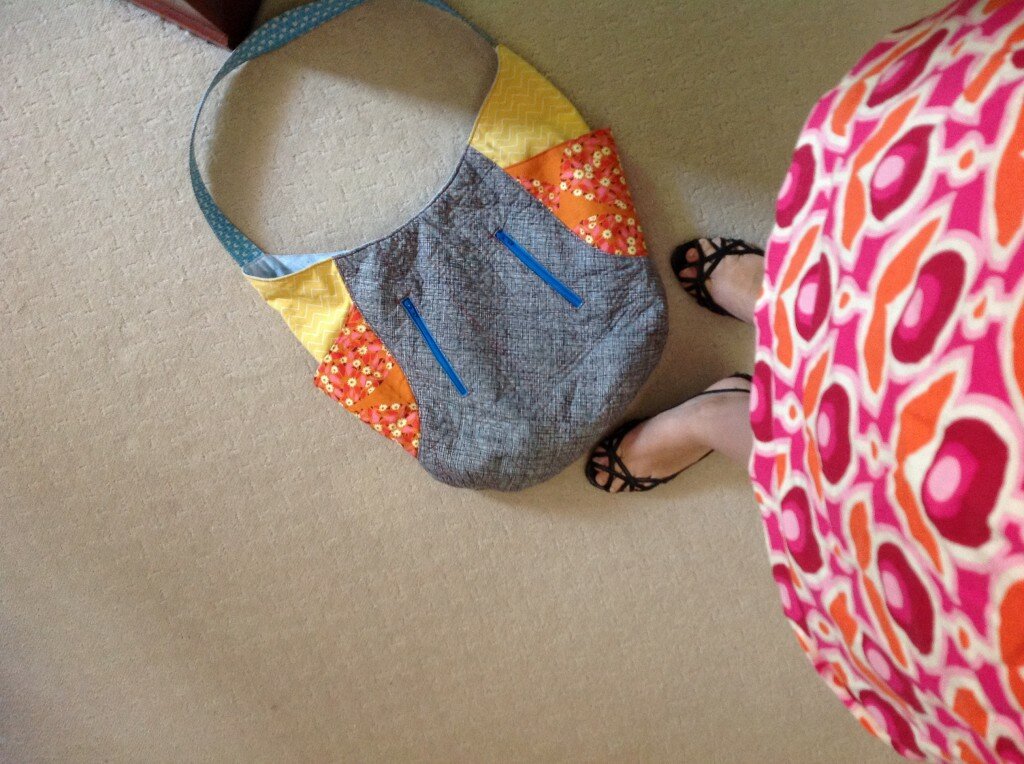
All dressed up in handmade and ready for work!
Ironically, as I restart the I Quilt linky party I am also returning to my ‘day job’ for the first time in eight years! This afternoon was my first day back and I was a nervous wreck on the way to the office. I actually had a great time and am really looking forward to working in an interesting area with some really nice, friendly people. Yay! I will still be taking quilts, so please pop over to my longarm quilting website if you’re interested in that 
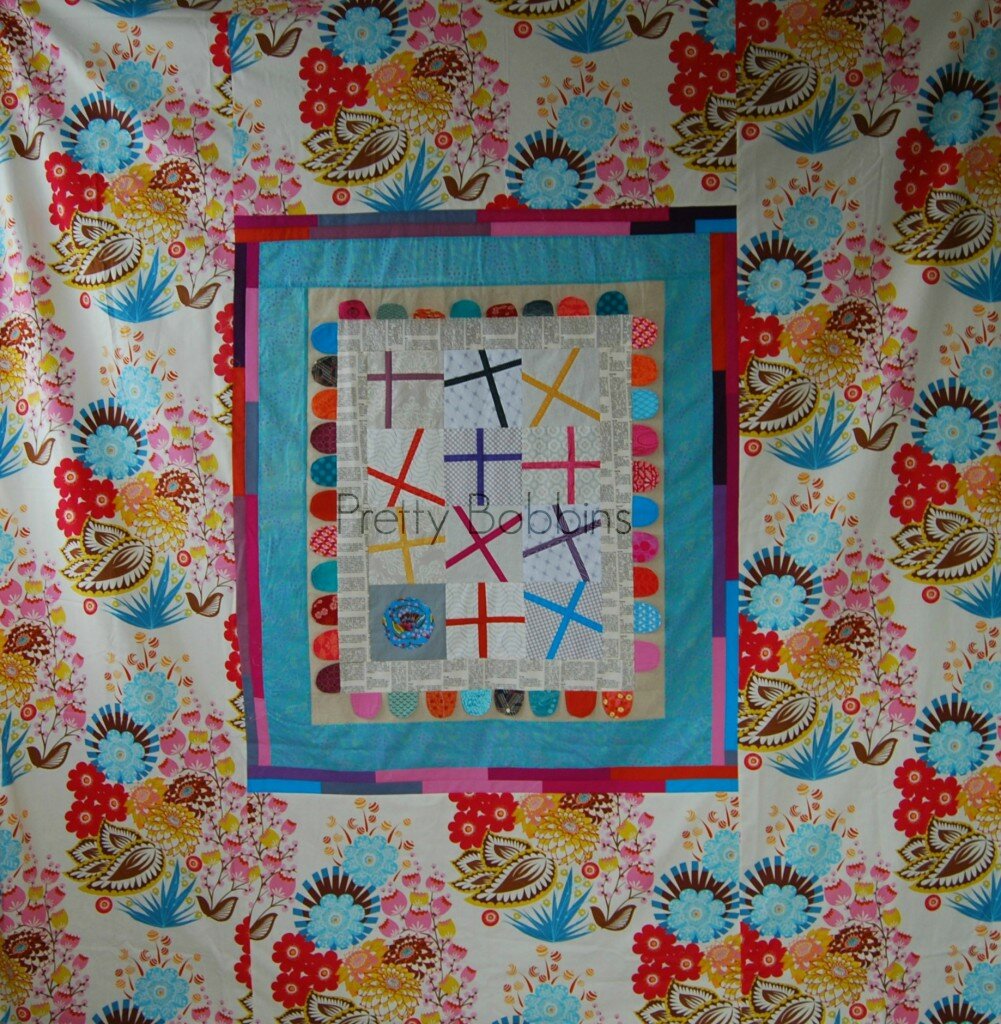
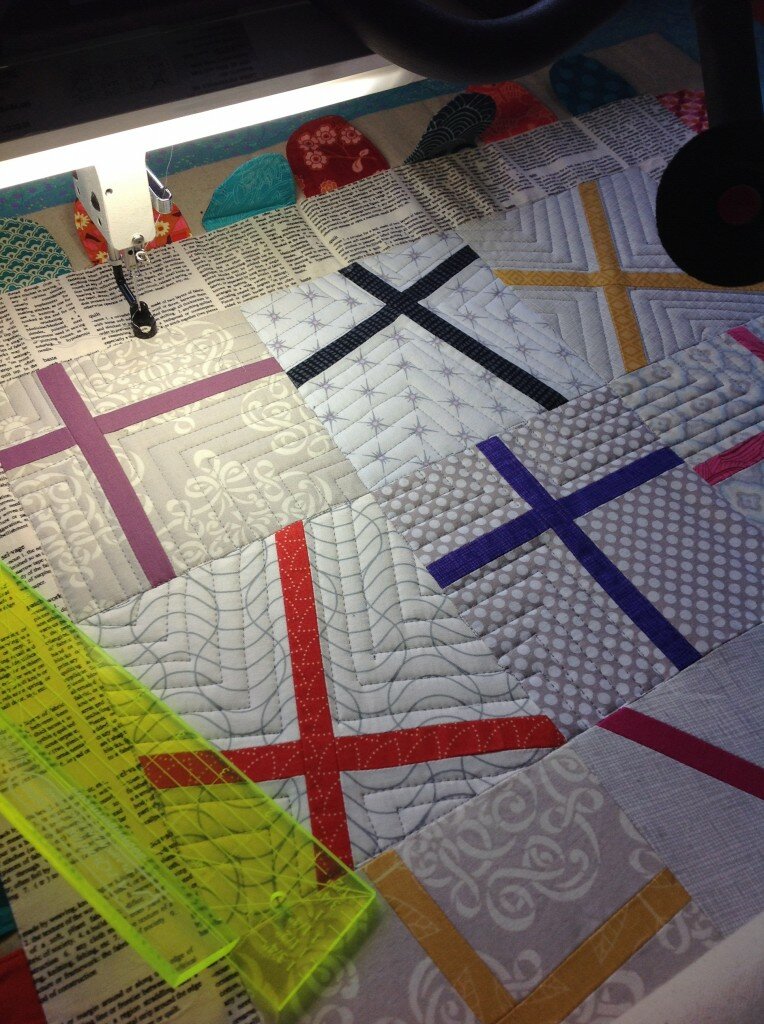
This week I thought I would talk about how I am finding quilting on my longarm  This week I have been working on a quilt for my bed – the only bed in our house that doesn’t have a quilt made by me on it! I made the top (above) a few months ago and put it aside to quilt on my longarm.
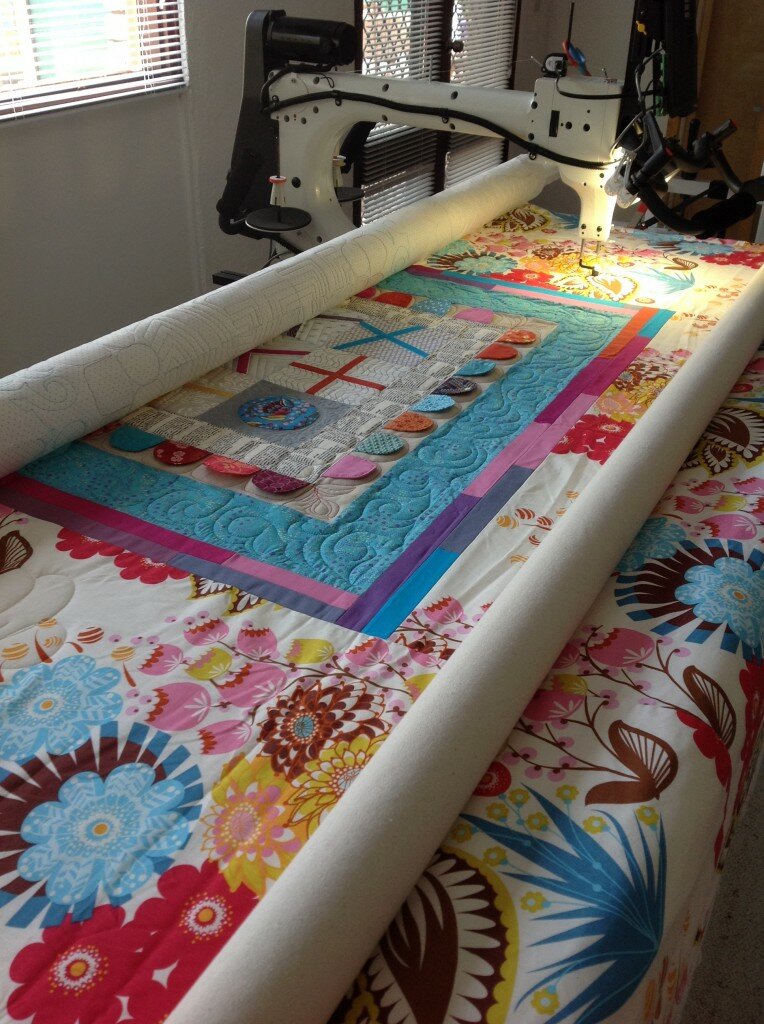
One difference between a domestic and longarm quilting machine is that you don’t need to baste your quilt. I was looking forward to this as I don’t particularly love crawling around on my knees and poking myself with pins. What I didn’t realise is that the tension is so much better whilst quilting on a longarm as the frame holds everything nice and firmly (in the above photo I am “floating my quilt top”, which means that the batting and top are hanging free and the back is “loaded”/wound onto the take-up rollers). Seriously, I was pinching myself admiring the lovely texture of my SLQ (below), sure the work isn’t perfect as this was my first time using a ruler, but wow, look how smooth that quilt is! 
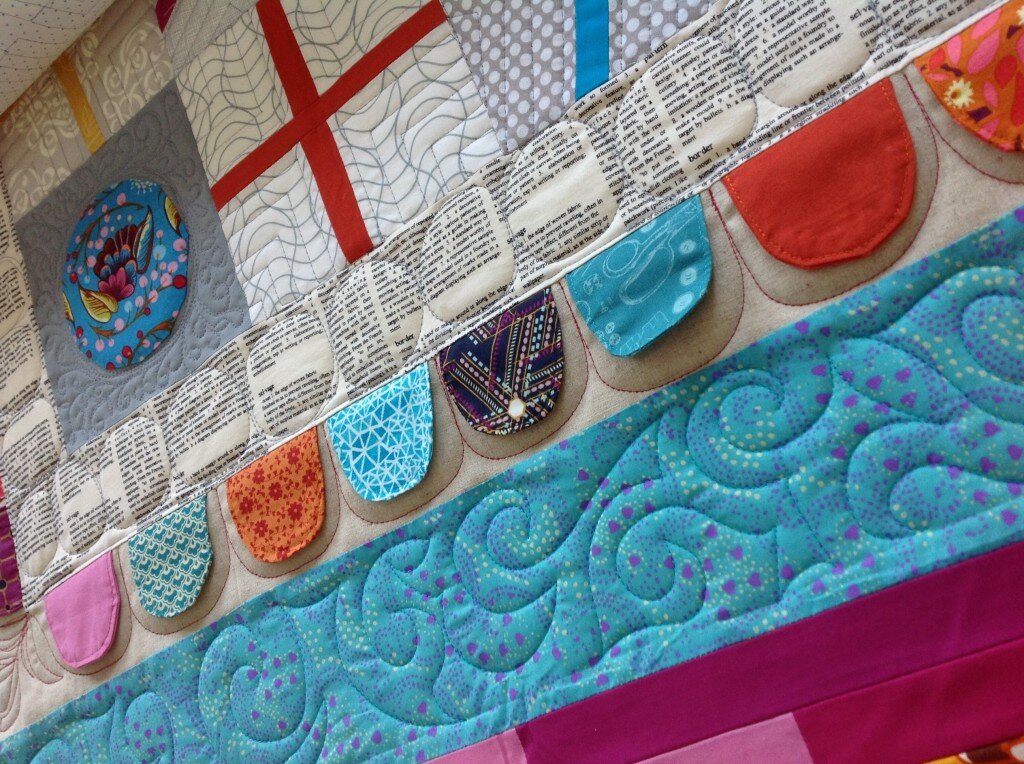
I used a variety of fabric in this quilt top, voile, linen blend and quilter’s cottons. Whilst the voile definitely wasn’t as forgiving as the cotton if I needed to unpick… It really quilted up lovely  (the teal border below is a lovely voile.)
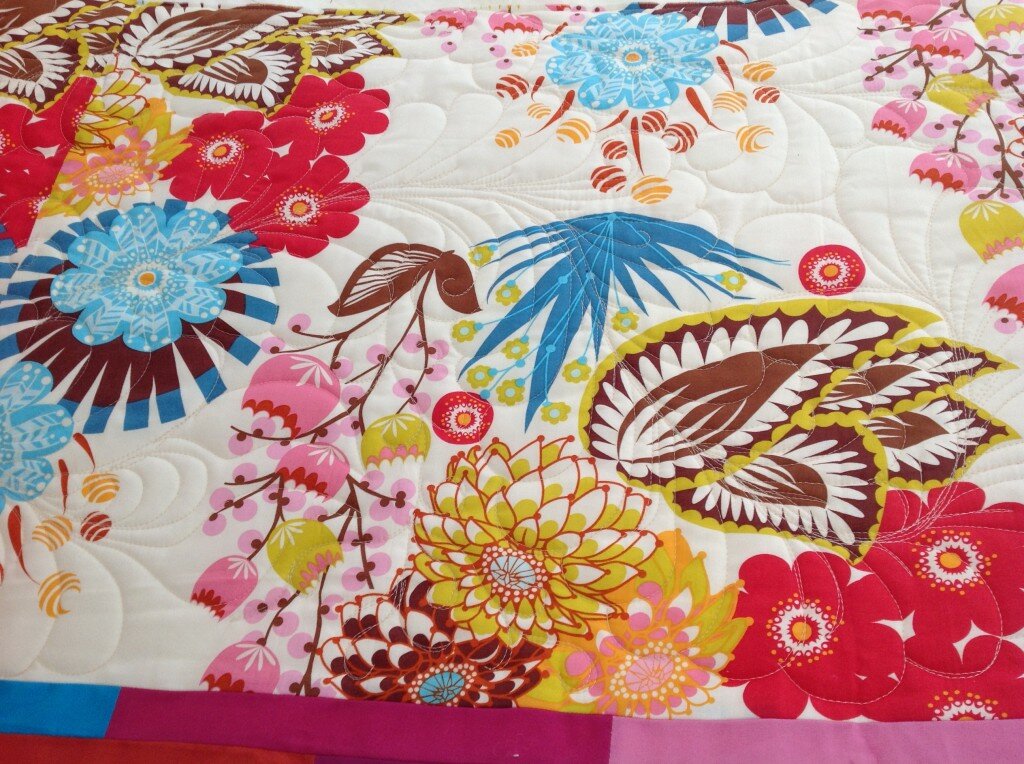
I have to say that Angela Walters is a bit of a idol of mine. I’ve read her a number of times saying that if a customer gives her freedom to do whatever quilt design she would like, she always goes with feathers. I really wasn’t sure how to quilt the large outer borders of this quilt and I didn’t want to overpower the beautiful Anna-Maria Horner print (from her Loulouthi line). Feathers in a lovely soft Aurifil thread (2000 in 50wt) have done the job quite nicely  I probably went a bit overboard, but I do love to quilt and I really did fall in love with my longarm whilst quilting this beast
Now it’s your turn! What have you been quilting this week? Have you ever swapped machines and had a different quilting experience? Do you have a fall-back design that you use to quilt busy prints? Add your link below and please remember to visit at least 3 other linkers  We all love comments!

Have you missed me? Did you notice my absence? Are you also melting in this crazy heatwave that Australia is currently enduring? What a homecoming!
I often describe myself as overly optimistic. I truly thought that I would continue blogging during our move. Um… that didn’t quite work out! But I’m back and I’m itching to get back to designing, piecing and quilting. The weekly I Quilt linky party will restart from next Thursday 23rd January, I hope you join me  But first up, let’s recap.

Last sunrise in Nouméa
Leaving Nouméa was emotional. Like any move it was chaotic, but those three years were more challenging and less enjoyable than many others that I’ve experienced and I really had to face it all as I left. I do dearly miss my friends in Nouméa and oh how I mourn the blue of the lagoon! I’ve swapped our tropical vista for the bush in Canberra (known as ‘Australia’s bush capital’ for a good reason!) and I am loving it.

Sunset from our house in Canberra <3
I feel relaxed, happy, relieved. All those things that don’t usually closely follow an international move. Of course I am very lucky that both my husband and I are on leave and are able to spend the summer holidays with the children and setting up the house. I LOVE our house. Many times a day I gaze lovingly into my husband’s eyes and tell him how much I love this house  It feels so right for us. It features classic 1970s mission brown and bright white paint, cathedral ceilings and mostly original fixtures. I am on a serious mid-century modern furniture bender at the moment (my budget being the only thing stopping me from refurnishing the entire house) and am eyeing off second hand sales and thrift stores. Do other people furnish their homes this brightly?
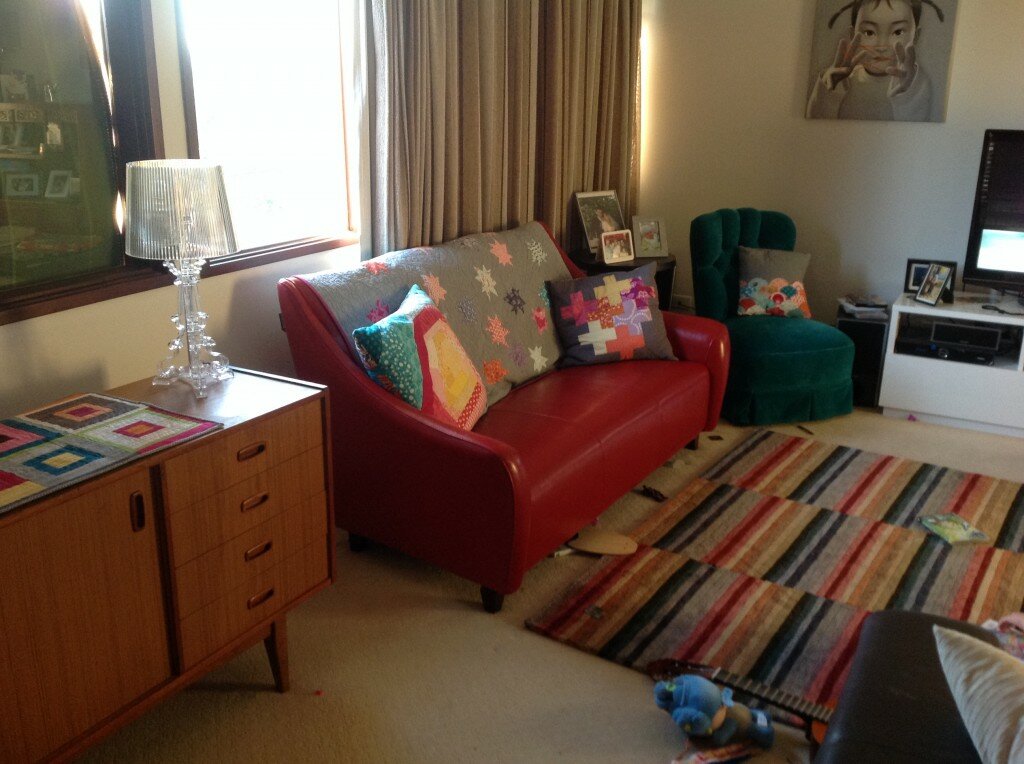
Excuse the shutters and blinds, we’re in the middle of a heatwave…
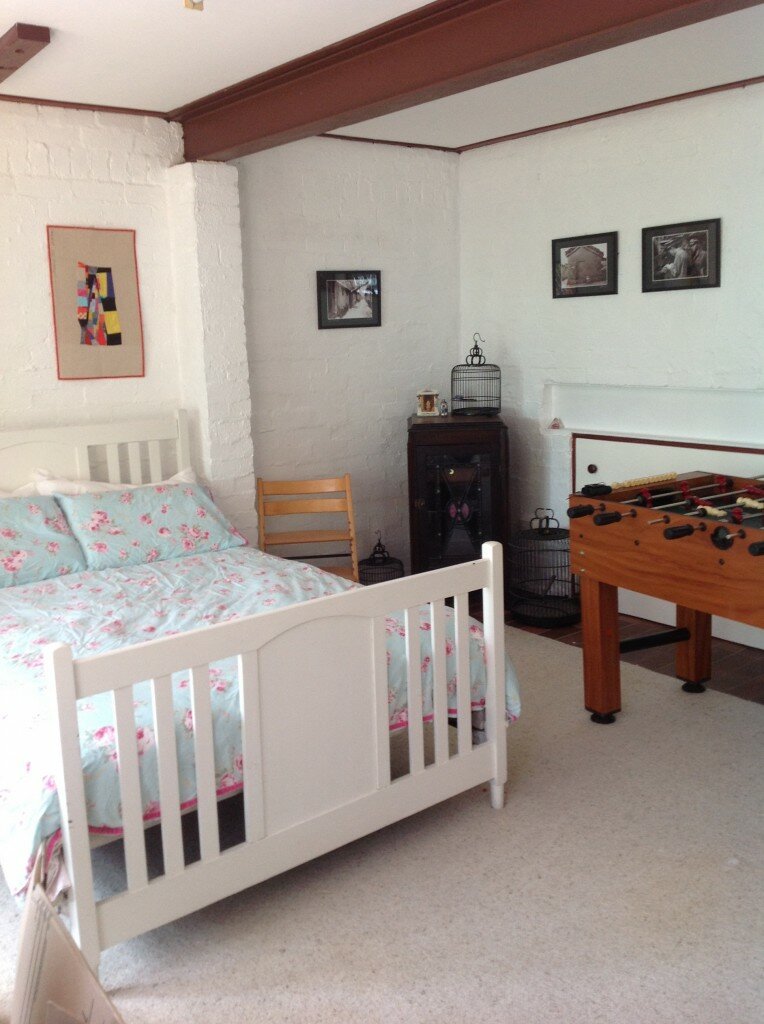
Whilst I am eternally frustrated that the house isn’t perfectly organised right NOW!! I am happy with the progress that we’re slowly making. Our ‘dumping ground’ (ie. the rumpus room that we put all the stuff in that we didn’t initially know what to do with) has transformed into a guest room quilt show room.
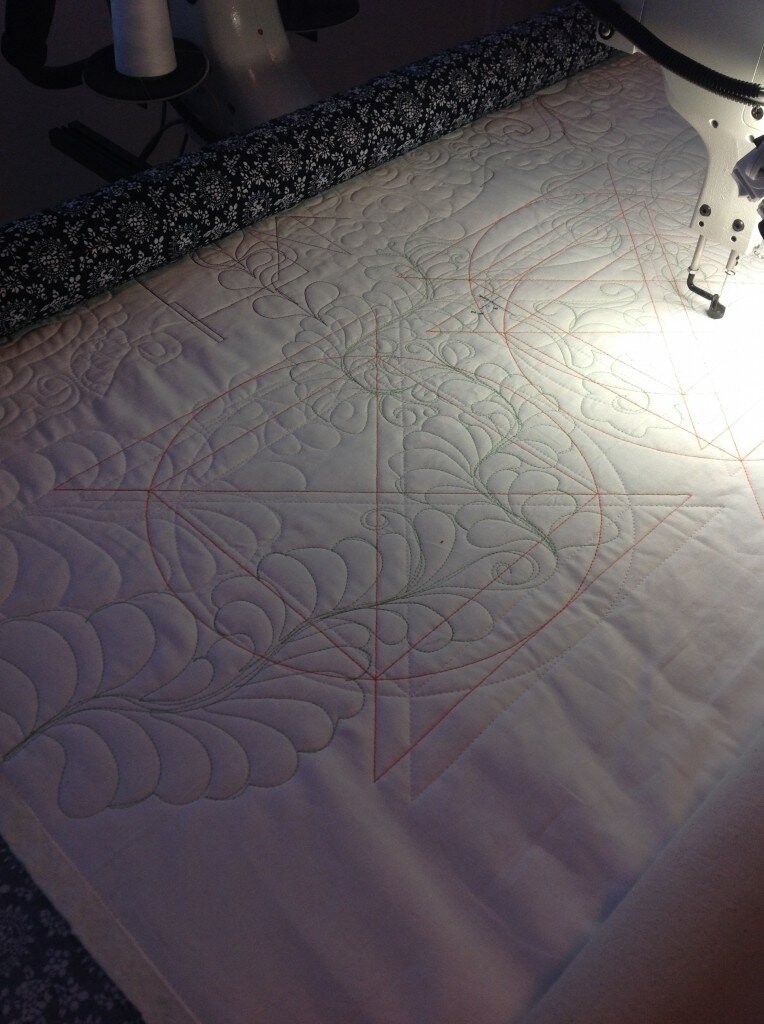
But I know what you’re really wondering about… Yes, I have a longarm!!!! I won’t bore you with the setup hiccups that we had but I will tell you that’s she’s beautiful, clever, sexy and powerful. She also needs a name… Any suggestions?
I’ve been having fun practicing and working on some charity quilts.
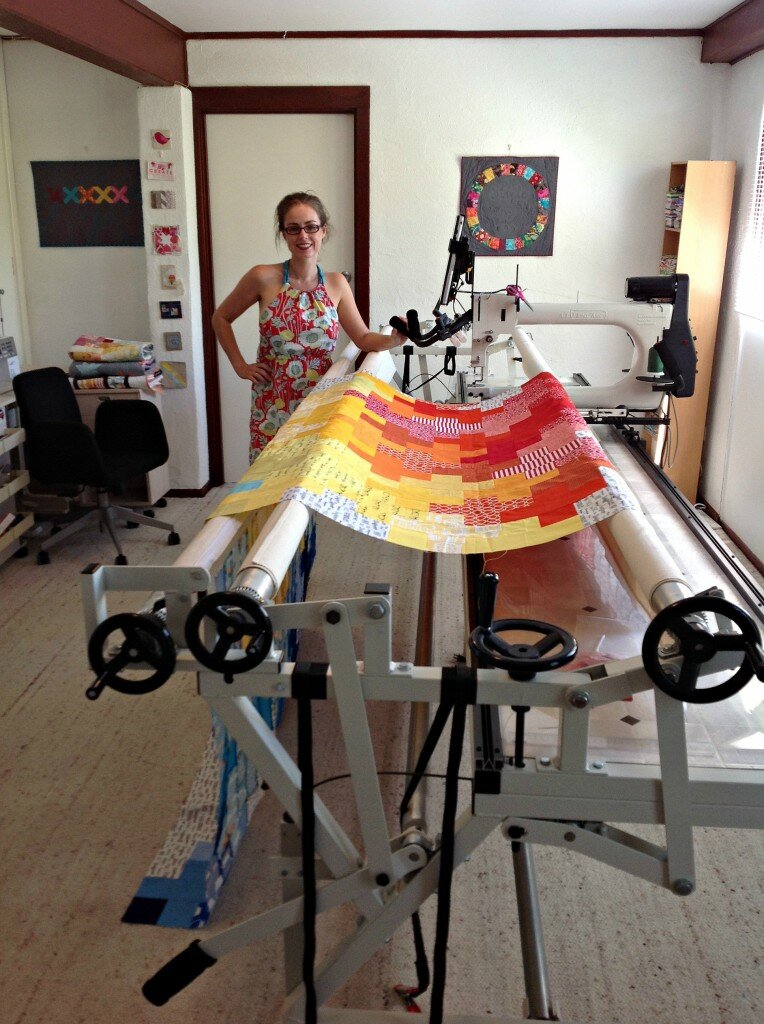
I am open for business but the quilting website is still a work in progress. If you are so inclined you can check it out here  Here I am in my studio with my lovely girl (and just for the record, I cannot bring myself to use the term ‘lady cave’, think about it people… ‘man cave’ works, ‘lady cave’ sounds a bit erm… Well, let’s just say I enjoy my STUDIO)
And yes, I make my own clothes so I can blend in with my stash LOL Apparently it’s known as “quilter’s camo” 
Thank you for all the lovely messages and support during our move. I have lots of quilts to share that I made just before we left Nouméa but blogging really had to take a backseat whilst we focussed on family. Now that normality is starting to return, expect to see me back to blogging and quilting <3
Big love and happy new year to all you lovely, marvelous quilty folk. Oh, and if you’re in Canberra, give me a hoi! I’m looking forward to joining the modern and local quilt guilds  Keep an eye out for me, I’m much more shy in real life
The big day has arrived and I’ll be up at the crack of dawn and on a plane back to Australia in a few hours. I’m an emotional wreck. Even when it is so right to leave, moving is so definitive, so final. It is hard to say goodbye. My last week in Nouméa has been exhausting and I have another big week ahead of me! This time next week I will be falling asleep dreaming of my longarm that will be set up the next day. Exciting!
So I’m very sorry to say that I Quilt Linky Party is taking a break this week. I need to curl up in a corner and lick my wounds. Wipe my tears as I farewell friends and dream of the South Pacific. All that I have learnt and experienced here.
Bisouses xxx
It’s Thursday and time for the I Quilt Linky Party  I’m going to keep it short and sweet this week as moving chaos has set in and I am exhausted!

Last week I shared my thoughts on wadding and invited you to also. The lovely Dasha from Patching Pixies wrote a fantastic post on wadding. Seriously, check it out. She raises some important points about selecting your wadding and shares her favourites which I am going to look into. Thanks so much Dasha! I’m totally not one for handquilting (patience is not one of my virtues when it comes to quilting!) but check out this amazing piece of Dasha’s hand-work. LOVE.

Thanks so much for sharing your wisdom Dasha, it is a great post, really good info for both newbie quilters and those with a bit more experience who want to know more about options when it comes to that invisible but essential middle layer!
I have been pumping out the quilts the last week. Am trying to avoid burnout and arrange delivery of our shipment, attending end of year school concerts and even packing one child off for his first school camp. I’ve finished three large quilts in two weeks and have almost completed two cot quilts this week. Did I mention I’m losing my mind…  At this point I’m going to finish up and
 go crawl into my bed cook dinner.
I’d love you to link up your quilting process. Please visit 3 other bloggers (seriously, please do, that’s the fun of linky parties  ) and add my button and/or a link in your post. My goal is to share the quilty love. I love reading about your process and I hope you are enjoying visiting the linkers as much as I am! Next week I will be back on board with lots of quilty process. This week I will have to live vicariously through you lovelies xxxx
I blinked and November disappeared! I missed making a collage last month as I was too busy but here for your viewing pleasure (and so I can feel like I achieved something) is my November round-up 

Clockwise from top: side two of Bee Quilt, Butterfly quilt (2m square!!), side one of Bee Quilt, quilted table runner, Pirate quilt (over 2m square!!)
I did manage to make three large quilts, and in addition to the above there were a number of cushions and quilted minis that were made and distributed too quickly to photograph! It was that kind of month… I don’t think I’ve blogged any of the above yet *sigh*
I’m linking up to Fresh Sewing Day at Lily’s Quilts.

Welcome to Pretty Bobbins! I’m stop number two on the Cushion for Christmas bloghop and today I’m sharing a QAYG cushion tutorial. The lovely Ms Midge came up with the great idea to feature cushions that can be made in a day – the ideal Christmas gift! Speaking of Ms Midge, I’m pretty sure she is freaking out right about now as my modem died over night and I have been offline for over 24 hours leading up to my stop on the hop… Amazing how long the battery lasts on my iPad when there is no wifi in the house 

I am sharing a cushion that I made yesterday morning. I didn’t time myself but I started after breakfast and finished before lunch, so it is definitely do-able in a day  I am familiar with the techniques though, so it might take a beginner a bit longer
  I find the key to the Quilt As You Go (QAYG) method is to be organised. I set up my machine, ironing station, cutting mat and fabrics (in order) within reaching distance. I used a 16″ cushion insert. I pieced together cotton wadding and cut backing both at 18″ square.

Now my QAYG cushion is technically not QAYG as I didn’t quilt the sections other than to sew them in place. Usually with QAYG you will sew your strip down as I describe below, flip it right side up, then quilt it in place. I have done this and it does look rather lovely but I find it to be an unreasonably time consuming and thread hungry method. So I cheat a little  Below you can see a lovely QAYG iPad pouch I made last year. I keep meaning to FMQ over a cushion that I’ve made using my cheats QAYG method but I always love the end result too much to add any extra quilting
  The choice is yours


I started with a reasonable sized scrap off center and then added a piece that covered the width and over hang 1/4″ each side. I cut all my pieces 1.5″ wide and worked out the length as I went along. The key being to ensure that each piece overhangs by 1/4″ at both ends.

I used my walking foot which has 1/4″ marked on it and I secured my stitches by going back and forth a few times at each end. I didn’t use any pins, I just lay my wadding on my backing and they stayed in place while I was working. After sewing each strip in place I trimmed back any overhang from the previous piece to the 1/4″ seam allowance. After trimming I ironed the most recent piece flat. Ironing after adding each strip will give you the best outcome.

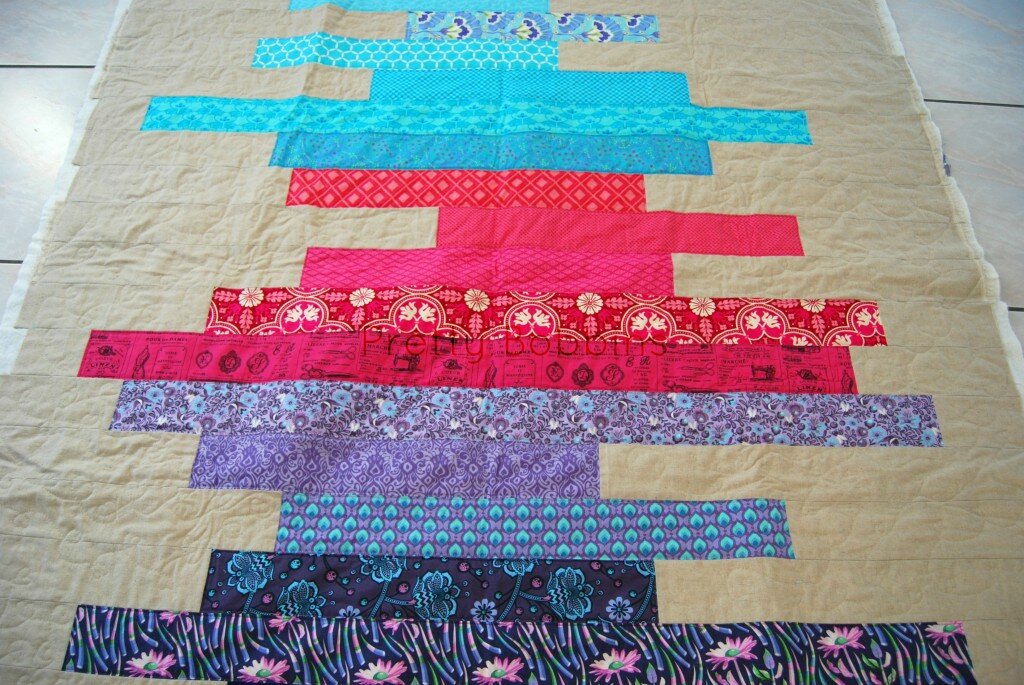
I was trying to be clever with colour and laid all of my prints out in order and then checked as I went along. I didn’t quite get the affect that I was aiming for but I’m still really happy with the cushion.

After finishing the teals I laid out the purples. So pretty 

I found it easiest to use my ruler to measure the required size of the next strip. You need to ensure that you strip has 1/4″ seam allowance from any raw edges.

In the above example the strip would need to be 7.25″ x 1.5″
I started to fall in love with this cushion when I was about half way through adding the purples 

There’s something about pink that I love. In hindsight I should have gone teal, pink then purple but in the end I added the pinks starting from light to dark (both purple and teal were added lightest to darkest).

I realised after adding a few pinks that I didn’t have enough to continue with only 1.5″ strips so I laid out my remaining pieces to finalised the placement. I started with an 18″ square piece with the intention of a finished 15″ cushion cover.

After adding all of my pins I trimmed back my mini to 16″ (width) x 17″ (height) and cut a backing piece the same size.

I decided on a zipper closure in the bottom seam and I always like to add an extra inch for this purpose. I don’t have access to my overlocker/serger at the moment so I used a flatlock stitch on my sewing machine along the bottom edge (17″ edge – important if your prints are directional).
Lay both your backing fabric and mini right sides together and stitch 1/2″ in from the edge. This will be where you insert your zipper. You want approximately 1.5″ at both ends in your normal stitch length and the area in between in the longest stitch length possible. You can sew these three areas separately, but I’m lazy and just secure my stitches and adjust my stitch length without trimming 

After timming your threads press the seam open. Because we’re making a cushion cover that involves quilting I always fuss with the pressing. You want a nice straight and flat seam 

Select a zipper longer that the width of your cushion (I think I used a 21″ zipper) and pin in place so that the teeth are ligned up to where the front and backing meet. I use pins to remind me where my basting stitches begin/end. Grab your zipper foot and sew your zipper in place. Don’t forget to make sure that the tab is within the sewn area. I cross over the zipper just outside of the basting stitches and sew back and forth a few times.

Trim your zipper ends and secure with a few stitches. Next you want to grab your seam ripper and carefully rip out those basting stitches. I usually use tweezer to grab the tiny threads left afterwards.

Then you want to sew your cushion cover together. Make sure you leave the zipper open so that you can turn it right side out. I like to use a 1/4″ seam allowance, first with a straight stitch and then with the serger or a zigzag stitch to prevent fraying.
Et voila! You have a brand new cushion ready for Christmas!

I used a lovely Kate Spain fat quarter (from her line Good Fortune) for the back. LOVE.

I hope you have found my tutorial helpful. For me, as always, this was an exercise in colour play as much as it was in quilting and whilst I didn’t end up with exactly the affect I was after, I do love it  In case you’re wondering, yes, it will be a Christmas present for a very special friend

Don’t forget to head over to Ms Midge on the 14th of December to link up your cushions. You can find all of the details here and links to the other fabulous bloggers below. I can’t wait to see what everyone has been up to!
Sunday 1st December – Ms Midge
Tuesday 3rd December – Kristy at Quiet Play
& Ms Midge
Wednesday 4th December – Joshua at Molli Sparkles
Thursday 5th December -Rachel at Little White Dove
Friday 6th December – Fiona at Finding Fifth
Saturday 7th December – Abby at Things For Boys
Sunday 8th December – Lauren at Molly & Mama Makes
Monday 9th December – Jodi at Tickle & Hide
Tuesday 10th December – Adrianne at On The Windy Side
& Ms Midge
Wednesday 11th December – Alyce at Blossom Heart Quilts
Thursday 12th December – Gina at Party of Eight
Friday 13th December – Jane at Quilt Jane
Saturday 14th December – Round up of Blog Hop and link up YOUR projects at Ms Midge!
Wednesday 18th December – Winners Announced at Ms Midge!
 |
| Patterns Only - $20 Voucher |
 |
| The Oz Material Girls - $20 Voucher |
 |
| Fat Quarter Shop - $50 Voucher! |
 |
| Polka Dot Tea - Fabric Bundle! |
 |
| Intrepid Thread - $25 Voucher! |
 |
| Blossom Heart Quilts - Ornamental Quilt Pattern! |
 |
| Quiet Play - Winner’s choice of 3 Paper Piecing Patterns! |
Let the cushion madness begin!

Welcome to I Quilt Linky Party! It’s Thursday and it’s time to get your FMQ on (any quilting really, I just like saying that  ) and link up your quilting process! This week I’m talking wadding (or batting, depending on where you live) which is a really important part of the quilting process. I’d love you to share your thoughts and experience on this topic too. It’s kind of the unglamorous part of quilting but oh-so-important!
  I have been quilting up a storm this week and if all goes to plan I will have finished three large quilts in two weeks!! Eeeeek! I’ve been sharing lots of progress pics on Instagram so won’t double up, but here is one in case you aren’t on IG (but you should be! Sooo fun!!).

I’ve been quilting like crazy this week!
This week I am featuring the absolutely amazingly talented Julia Graber from Life as a Quilter. Seriously, this woman is impressive! I wrote to her and asked if I could feature her and you know what she said? “I would be honored…” Julia, the honor is mine, every week that you have linked up I have been blown away by your work. Please check out her blog if you haven’t had a chance yet! Who can resist a quilter that is talented, modest and polite?! 

Image and work by Julia Graber
This week Julia made a BEAUTIFUL sailboat piece based on a photo. So impressive! Julia, if I’m ever in Missisippi can I please come by your studio and watch and learn? Thanks so much for sharing with us. I also LOVED Julia’s bird on a wire from last week. Beautiful and so interesting to see how two different artists started with the same photo and created unique pieces.

Image and work by Julia Graber
Getting back to wadding/batting, a question that most quilters ask themselves at some point is, “can I piece together wadding and use it for a quilt?” My answer is a resounding yes! I haven’t gone so far as to mix different types of wadding in one quilt but you can see in the below photo just how scrappy I will make my wadding. If I am being super scrappy (as per the below example) I just make sure that I quilt the piece fairly densely so that all of the joins are covered and the wadding won’t slip around with use.

Yep, I use the scraps most people throw away! I hate to waste things!
Sometimes I will use the flat lock stitch on my machine to join the wadding but usually I just lay it so that it is slightly overlapping. I do this all the time and have never had a problem (I do usually add a few extra pins whilst basting to make sure that I don’t end up with any gaps). You could use the zigzag stitch on your machine and I find that by only very slightly overlapping the wadding that you don’t end up with any bulk, it’s all caught in the stitches. I have been told that a good idea is to cut your wadding in a curvy line where it meets so that you don’t get a noticeable fold. I don’t bother and I haven’t had any issues so far 

I am still a newby quilter. My obsession with quilting only really began just under two years ago and whilst I did a beginners course at my (former) LQS most of what I’ve learnt is through trial and error and the internet. I decided that I wanted to make a number of quilts that I would keep out of different types of wadding to see how they would wear. So far I have tried out 100% cotton, 100% wool and 100% bamboo, all three are Matilda’s Own brand. The quilts that I’ll discuss below are all made with top quality quilting cottons unless otherwise stated 
My daughter’s Princess Quilt is made with 100% wool wadding and has been in use for about three months. It has a top quality flannel on the back and was really easy to quilt. I love how puffy it is and I love quilting with wool. The brand I use is low loft but has enough loft to really show up your quilting. I love using wool wadding for items that have lots of texture. It has a lovely drape and feels kind of bouncy. What I don’t like is how much it has pilled! Honestly, that quilt needs a shave! I plan to experiment with other brands of 100% wool wadding and try blends to see if I can overcome this issue. I’m loath to use this particular wadding in a bed quilt again  It is, however, my favourite for items that won’t be washed often, such as wall hangings, art quilts and table runners (maybe not at my house though – 3 young kids=food everywhere!).

This close up of the Princess Quilt shows you how fun it can be to quilt with 100% wool wadding.
Mr 7′s Rainbow I Spy Quilt was my first foray into 100% bamboo wadding. This stuff is CRAZY! It actually squeaks LOL Before washing it feels a little stiff but supple at the same time. It’s strange, but don’t let that put you off! Bamboo wadding is my current favourite. It quilts like a dream, it’s light and it wears SO WELL!! I plan on buying a bolt of 100% bamboo wadding to use both for myself and customer quilts. I recommend you give it a try 
Mr 5′s Kitchen Window’s quilt is made with 100% cotton wadding. It has worn exceedingly well considering the number of times it has been washed. I did use some dress making cottons in this quilt (I’ll elaborate another time) and the white sashing is linen, but otherwise it is made with quilting cottons and organic quilting cottons. Whilst this quilt has a nice drape I do feel that it is second (both in drape and wear) to the bamboo quilt. In another year or two I’ll probably be able to pinpoint it, but at this stage all I can say is that it just doesn’t quite live up to the bamboo standard (but it is older, so that could be age).
I’ve used archive photos of the above projects as they are all on their way to Australia, but I did finish three quilts this week with three different types of wadding and I thought you might like to see them side by side. You get a better idea of the loft and texture on an angle.

So there you go! What’s your favourite type of wadding? Do you use scraps? Do you have any special tips for joining wadding of which is best for what type of project?
Now it’s your turn to link up! Please remember that this linky is about the quilting process (the last Thursday of each month I will introduce a theme and you are welcome to join me by posting on this topic or sticking to quilting process – your choice). I urge you to please visit three other linkers. We all love sharing and comments <3 Please add my button and/or a link to my blog in your post. Share the love! My goal is to share, encourage and educate quilters. I’ve been learning each week and am loving visiting all of your blogs!

It’s the 25th of November and in case you needed reminding, Christmas is just around the corner!!!! Eeeek! I’m joining the wonderful Ms Midge and a host of other talented bloggers in December for the “A Cushion For Christmas” blog hop. You may have noticed that I have a thing for cushions (or pillows, depending on where you live in the world. I’m talking the decorative type, not the ones you sleep on.) and I’m really excited to see what everyone comes up with.

A few of my all time favourite cushions that I’ve made <3
Ms Midge will be kicking off on December 1st followed by little old me on the 2nd. You can see the full schedule below and Midge has promised to post tips and tutorials during the hop to get you started. There will also be a linky party and some fun prizes at the end!

I can’t wait to decorate my new house with these pretties! I miss them…
If you’d like to join in, you can find the code for the button at Ms Midge and feel free to add it to your blog sidebar. If you don’t have a blog you can join in by emailing your finished projects to Ms Midge (details on her blog). There is also a Flickr group for you to join HERE.
asdf
Sunday 1st December – Midge at Ms Midge
Tuesday 3rd December – Kristy at Quiet Play
Wednesday 4th December – Joshua at Molli Sparkles
Thursday 5th December – Alyce at Blossom Heart Quilts
Friday 6th December – Fiona at Finding Fifth
Saturday 7th December – Abby at Things For Boys
Sunday 8th December – Lauren at Molly & Mama Makes
Monday 9th December – Jodi at Tickle & Hide
Tuesday 10th December – Adrianne at On The Windy Side
Wednesday 11th December – Rachel at Little White Dove
Thursday 12th December – Gina at Party of Eight
Friday 13th December – Jane at Quilt Jane
Saturday 14th December – Round up of Blog Hop and link up YOUR projects at Ms Midge!
A big shout out to the fab sponsors of the hop -
 |
| Patterns Only |
 |
| The Oz Material Girls |
 |
| Fat Quarter Shop - $50 Voucher! |
 |
| Polka Dot Tea - Fabric Bundle! |
 |
| Intrepid Thread - $25 Voucher! |
 |
| Blossom Heart Quilts - Quilt Patterns! |
 |
| Quiet Play - Paper Piecing Patterns! |
Now I have to get back to my moving lists and then get onto making my cushion. I’m going to be focussing on fun colours and the Quilt As You Go (QAYG) technique <3
Welcome to Pretty Bobbins I Quilt Linky Party. I would love you to link up! This linky party is all about the quilting process, we want to share and learn and grow as quilters. Please make sure to visit three other linkers and add a link to my blog and/or my button to your post (you can find it top right or at the bottom if you’re on a mobile device). Next week is the last Thursday of the month and I’d like to invite you to discuss wadding (also known as batting depending on where you live in the world).

This week I’m talking forgiving, as in which quilting designs are rather forgiving  I’m also hoping that you’ll be forgiving as I have a full plate this week and haven’t managed to get myself organised to feature someone from last week’s linky. It’s a busy time and my day kind of fell apart when we had some intruders strip our lemon tree this morning. It’s happened once before and to be honest the guys probably are after nothing more than lemons, but it is scary when they won’t leave and it leaves you worried about what might happen. Anyway, the day is nearly over and I’m looking forward to a fresh day tomorrow!

One of my favourite (and thread hungry!!) techniques to personalize a quilt <3
I’m currently working on a lovely, girly butterfly quilt which I hope to finish tomorrow. It’s actually a repeat of a cot sized quilt I made earlier in the year, but this one is a whopping 2m x 1.9m!! I am quilting the same design but it’s been really interesting to use different materials and see how that changes the look and the feel of the quilt. Last time I used an AMH flannelette for the backing and wool wadding, this time it is all quilting cottons with 100% cotton wadding. Next week I’ll be talking more about wadding and I’d love to hear your thoughts.

You can see the flight paths and how much better they look once the main quilting is completed
I quilted three “paths” for the butterflies to give movement and whilst it looks a bit odd at first, it works quite well once you fill in all the space.

This quilting design is really easy. It’s three shallow arches that are themselves in an arch shape and end in a swirl. The swirl can either touch another ‘cloud’ or not. It’s great for quilting up close to the butterflies (which are attached with fusible web and then quilted in place) without having to worry about direction.

The 100% cotton wadding is much flatter than the wool I used last time but it still gives a nice shape to the lettering.
It is also very forgiving when you think you’re going to get a pucker or fold or bubble in your quilt sandwich. You just leave a gap in your quilting that is part of the design and you avoid messy folds. Perfect!

The back is kona berrylicious and I love the contrasting quilting in grey Aurifil
OK, that’s about the limit of my ability to write coherently this evening LOL I’d love you to link up and support your fellow quilty bloggers by visiting at least 3 other linkers. Also, linking back to my blog will hopefully bring more linkers and more for us to learn. I’m really loving visiting everyone’s blogs each week. I’ve managed to visit everyone each week so far but I haven’t been quite so awesome in replying to comments so if you asked me a question and I haven’t replied, please as again  Happy linking and please feel free to link about wadding/batting next week

![]() Please remember to add the linky button (found at top left) and/or a link to my blog and to visit 3 other linkers. We all love comments!
Please remember to add the linky button (found at top left) and/or a link to my blog and to visit 3 other linkers. We all love comments!![]() but they have a great reputation and have been around the traps since way back
but they have a great reputation and have been around the traps since way back ![]() They haven’t had a meeting since I arrived in Canberra but I am looking forward to going along next Thursday.
They haven’t had a meeting since I arrived in Canberra but I am looking forward to going along next Thursday.


![]() If you’re local keep an eye out for more information closer to May
If you’re local keep an eye out for more information closer to May ![]() The world needs more quilters!
The world needs more quilters! ![]()
![]()


