Archive of ‘Sewing’ category

It’s Thursday, yay! It’s almost the weekend  I hope you’ve got your quilt on and you’re ready to link up to this week’s I Quilt party. This week I’m talking about how I quilt online. But before I get started I want to feature the amazingly talented Christa of Christa Quilts!
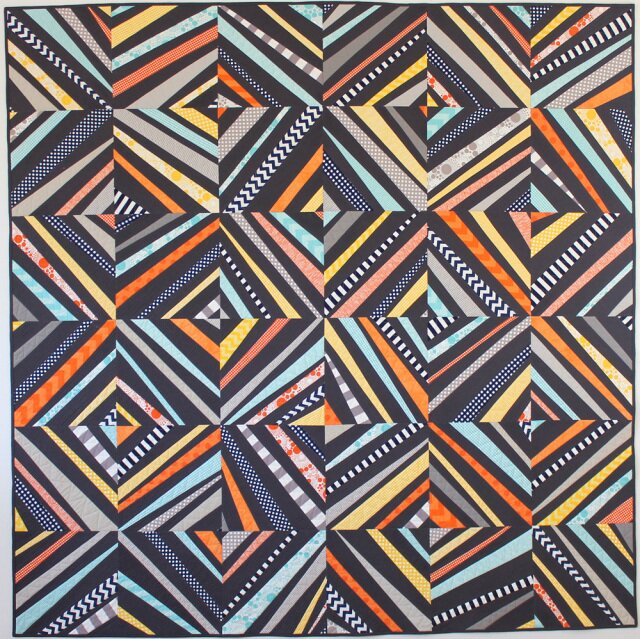
“Spiraling Out of Control” image used with permission by Christa Quilts
Christa has her own fabric shop so I’m terribly jealous from the outset  She is also a talented and successful quilter and her blog is the place to go if you’re seeking inspiration, insights and how-tos. I’m sure you all know Christa, but if you don’t, please pop over and check out her work and say hi!
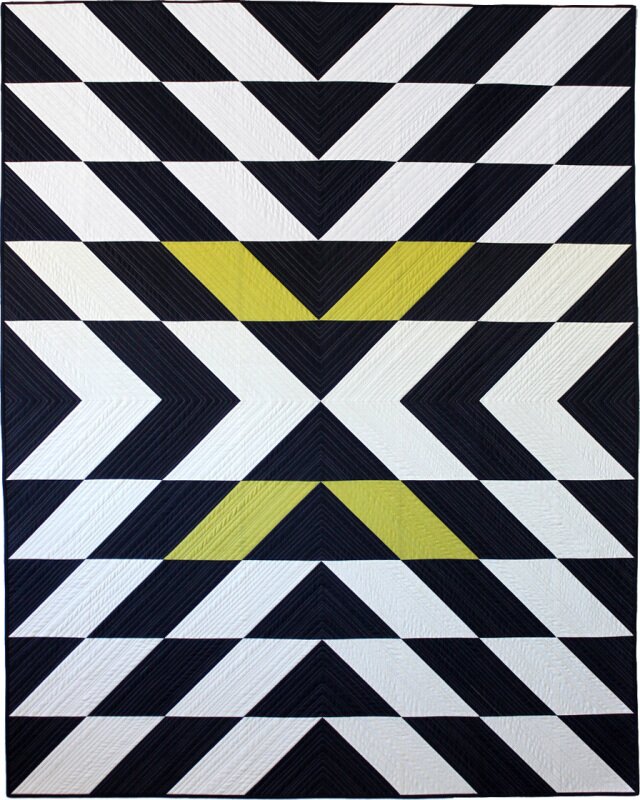
“Modern X” image used with permission by Christa Quilts
Last week Christa shared some binding tips (and y’all know how much I love that part of the process!). I love Christa’s modern Christmas trees series, you can find the main post here, but definitely check out the posts on the quilting, it’s super impressive!!
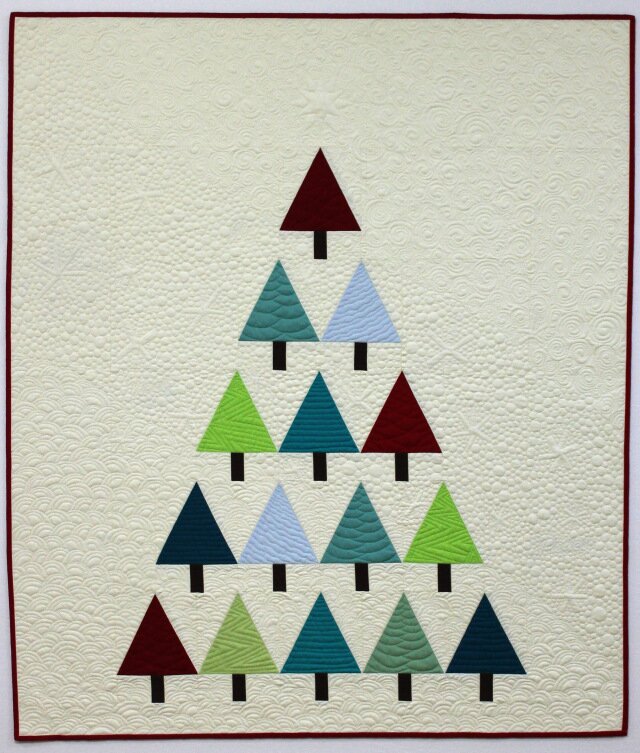
“Modern Trees“, image used with permission by Christa Quilts
I love the crisp, sharp lines that she tends to favour and I adore her quilting, especially as she is a real sharer of process, something that this linky party is ALL about! 
This week I wanted to talk about being an online quilter. You may be aware of the Blogger’s Quilt Festival run by Amy of Amy’s Creative Side. If you haven’t participated before or you’re nervous about being “good enough” I strongly encourage you to throw caution to the wind and just jump in! I’ve found some of my favourite bloggers through the festival (I’m looking at you Susan of Canadian Abroad) and aside from anything else, it is such a visual feast!
You’d be surprised to hear that I don’t spend as much time online as I used to but I still LOVE all the fun, creative blogger things happening out there. This week I came across “me made May” on Instagram (check out #mmm14 and #memademay) which is all about wearing clothing in May that you’ve made yourself. Inspired to join in and make myself a fabulous outfit (I firmly believe that if you feel good in what you’re wearing and love how you look, you can conquer the world) I got busy last night and stitched up a tova tunic. I’ll post about it later in the week, but you can see a sneak peek
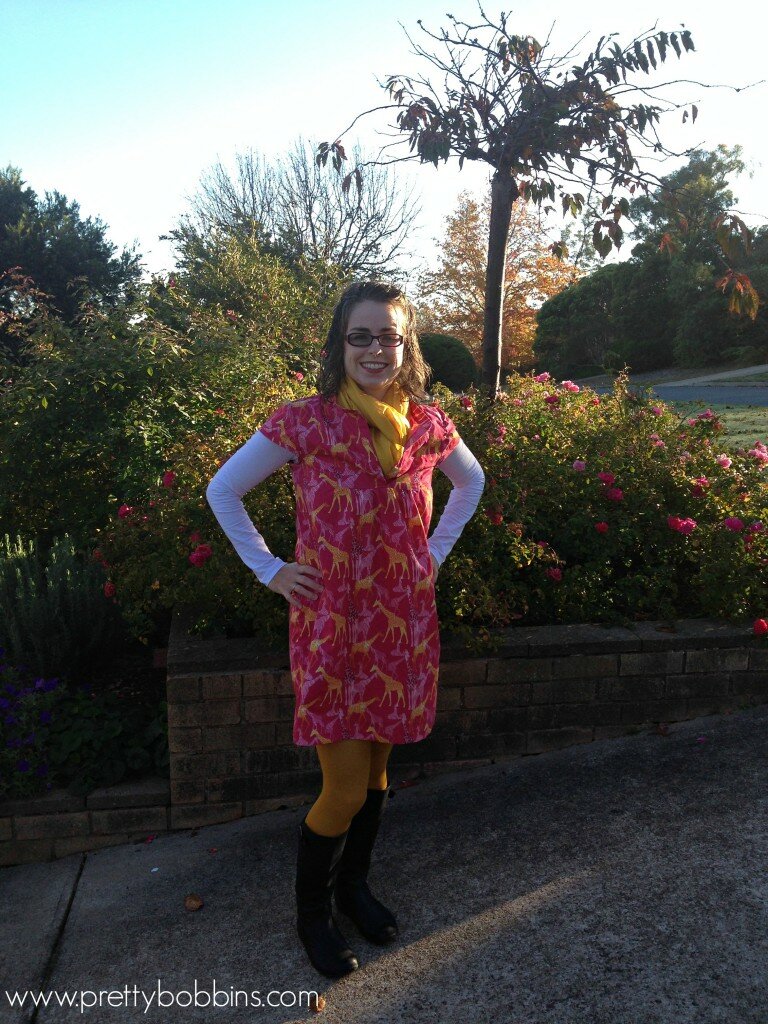
Pink and yellow giraffes! Love my new tova tunic!
Some of my other favourite online quilting activities are Work in Progress Wednesday, Fresh Sewing Day and TGIFF. Please, please, please add your favourite online quilty/creative/stitchy link ups/activities below. If a hashtag inspired me to sew a fabulous dress then I think we need to share more of them!
Now let’s get linky! Share your quilting process and don’t forget to visit three other linkers, we all love comments!!
An InLinkz Link-up
I don’t often post twice in one day and I would love to say I have a grand plan. In actual fact I have a headcold and I’m not really thinking very straight. For example I parked the car on the street today, got the kids out and started to walk off only to remember that I’d left the keys in the ignition. Gah! Let’s not tell Mr Husband…
Even with a headcold I managed to piece Feburary’s block for Kristy’s Sew On BOM. Seriously people, if I can manage this block without any unpicking when my brain is NOT functioning. Well, then I give it the stamp of approval LOL Kristy’s patterns are so well designed, very straight forward and the end result is always impressive. How does that girl do it?
I’m going with a bit of a colour scheme here are my January and February blocks together.
The other pretty finish that I achieved this week was a set of pillowcases for a lovely lady.
They are to match the triangle quilt she bought from me late last year
I think they look lovely on my bed
They are made with the same fabrics as the quilt (I had to order more as I had used every last scrap of the originals). I personally thought it was a stroke of genius to bind them just the same as the quilt
Being a total novice, when I sent her the quilt I forgot to include a quilt bag. So I made one of those too
I kind of suspect her gorgeous daughter might steal this bag for her toys, but it is in the same colours as the quilt so she can always claim it is hers
Do you like the writing? I had a lot of fun with that, it was a good way to practice some FMQ as I haven’t had a whole lot of luck writing with my FMQ foot in the past. I’m really happy how it turned out this time, although in hindsight some tearaway stabliser on the back would have been a good idea.
Did you participate in the Sew On BOM this month? Don’t forget to link up The March block will be up soon, I’m really looking forward to the next one
I’m linking up with February’s Sew On linky party over at Quiet Play.
It appears to be a week of finishes for me which should be uplifting, but having just spent the morning on hold to various businesses I am feeling kinda flat LOL But enough of that, let’s look at my most recent Washi dress
 |
| Washi dress front. Me feeling like a total poser LOL |
I love this print. It is part of the Nottinghill range and this voile is so insanely soft. It’s almost like silk and was easy to work with and an absolute delight to wear. (Side note: I bought the yardage at Pink Chalk Fabrics which is a lovely online store and the only place I could find the right colourway in the voile.)
 |
My darling daughter needed Mummy’s attention NOW.
Love this little photo bomber
|
I love this pattern. When it first came out it was all over blogland and I did my usual, “I love it but I don’t want to be a sheep” thing. But then common sense prevailed and I bought a copy and I am so glad I did! You can see my first version here and there is even a Washi group on flickr! The pattern is very easy to put together with a number of handy tips in the pattern instructs ions I also love that the fabric requirements are listed on the website, a little thing, but very handy!
I altered the pattern (again) slightly. The neckline is lower than the pattern calls for, I went with what suits me This time I didn’t do the little cutout and I’m happy with it this way. The other change I made was dropping the shirring rows a little. The first time around the bottom line of shirring lines up perfectly with the bottom of the bodice. Second time around there are a couple of rows of shirring below the bottom of the bodice (on the back) which gives the dress a better shape on me.
 |
| side view: Washi dress |
The main reason I love this dress (and let’s be honest) is that it hides my belly. Any extra weight goes straight to my tummy and there has been a fair amount lately with me being unwell. This dress will fit if I manage to lose those extra kilos (shirring is so forgiving!) and the pleats on the front manage to hide my tummy without it looking like a maternity dress. Win – win If you’re considering the Washi dress, I would say go for it! I’m already planning to make another soon. They are just perfect for our sticky, hot days here in Nouméa.
And just so you know All these opinions are 100% my own. I paid for the supplies myself and was not asked to provide a review. I just like to share things I love
Have you made a Washi dress or is there another very forgiving dress pattern that you love?
Sorry for the silence! Although if you read as many blogs as me you might not have noticed LOL My Dad headed back to Hong Kong last Thursday and I promptly came down with a migraine for two days, then a huge coldsore, then a tummy bug! Whilst I still have the remains of the coldsore (I hate those nasty things!) I am otherwise feeling good again
Due to Dad’s visit and feeling unwell I haven’t really sewn much until today. The only sewing I was able to muster the energy for was to make Mr 6 a new pencil case for school. Of course Mr 4 had to have one too (I made a total rookie mistake of not making one for Miss 2 and have been constantly reminded since!). Mr 6 was happy enough to select his fabrics and head back to the lounge, Mr 4 had his first sewing lesson.
 |
| Lucky boy learning to sew on a Bernina with Aurifil thread! Only the best will do! |
Mr 4 is going through some major jealousy issues. His big brother has started Primary School and will get his photo in the paper. This is a HUGE issue of contention and I felt that a one on one sewing lesson with Mummy might help things a little. You should have seen his face light up when I said he could use my sewing machine!
 |
| Quilting his pencil case. |
So much fun and of course I was secretly imagining him growing up into an amazing designer LOL I know lots of people buy a cheap machine for their kids to learn on but I would really like my kids to learn on a good machine. So for now I will work with them on my Bernina and when they’re ready to go solo I’ll break out my old girl, a trusty old Husky that is pretty much bullet proof.
 |
| The finished pencil cases. Mr 4 did all of his own quilting with a *little* Mummy help
|
Today I finally made it back to the sewing machine and started to piece together a wheel quilt as part of the Curves Class at Stitched in Color. Curves Class has finished but I will continue to work on the projects in my own time.
Rachel produced a beautiful wheel quilt and seeing as I have always wanted to make a colour wheel I decided to go with a rainbow themed wheel.
 |
| Just a reminder that it was made in France. |
The segments were entirely pieced from my scraps. Isn’t that an awesome feeling?
 |
Aren’t these mice the cutest? And using scraps I’m OK with half the Mummy mouse missing.
Really, I’m OK Not OCD at all LOL |
I think I’m going to go with a solid grey background and quilt the heck out of it. Nothing like a little FMQ to raise the spirits!
 |
| A favourite scrap from the lovely Ms Midge! |
This little quilt will be a Baptism gift for someone super special. I plan to stitch some meaningful words onto the quilt and would love any suggestions. I have a few ideas (which I won’t write here because I think baby’s Mum reads my blog) but I’d really appreciate any suggestions you might have. The beautiful babe who will receive this gift is Catholic and I’m happy to go with something biblical or a more modern blessing.
 |
| Even some Liberty scraps slipped in! |
Here’s hoping everyone has some colour in their day today
 |
| Looking good! |
I’m linking up with Work In Progress Wednesday over at Freshly Pieced
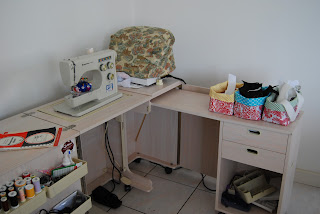
I love to sew. Everything from bags to quilts to baby clothes and shoes. I’ve even made cloth nappies, pillow cases, toiletry bags, belts, hats, playmats. I could probably come up with a Dr Seuss rhyme of what I love to sew. But I won’t because that would just be silly
I first started sewing on my Mum’s machine, then took a few classes at school. Then about ten years ago I inherited my Nanny’s machine when she passed away. It’s an old Husqvarna and really solid. That baby will sew through anything. It weighs a tonne. When I first inherited it I had it serviced and the man told me it would last longer than anything I could buy now and that it was in full working order (I even have the original paperwork).
 |
| My beloved husqy
|
Last year my youngest baby (I’m talking humans, not machines now) stopped sleeping. It was tough. Really, really tough. I’m talking waking 7 times a night. I needed something for me and whilst I had been sewing regularly for awhile, I really started to get into it again. It was a great way to forget how tired I was. A few months and a bazillion stitches later and I started to realise that my Nanny’s machine was taking the joy out of sewing. In her old age she had become touchy and whilst she was still reliable I was playing with tension every two seconds, not to mention the foot falling off regularly and the bobbins being very little.
I started to research new machines, after a lot of reading I decided I needed a Bernina 440 QE. By chance this machine was being phased out and the price had dropped a little so I was lucky enough to end up getting one. She is wonderful! Her name is Delilah and she has brought the joy back into sewing. There is room to grow and learn. She is reliable and capable. I’m very lucky to own such a fantastic sewing machine.
I often get asked for tips on the 440 so I thought it would be helpful if I shared some of the things I have learnt I hope you find this useful
The foot pressure on the 440 is awesome. Unless I’m using the walking foot I reduce the foot pressure below the standard setting.
 |
| Foot pressure dial. |
 |
| Foot pressure indicator. |
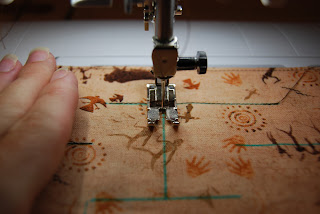
If I want really accurate piecing I place the top fabric slightly less than 1/8″ before the bottom fabric. This takes the foot pressure into account and I end up with perfectly aligned edges.
 |
I would actually place the red fabric on top and the white
sashing underneath. I have photographed it this way to
demonstrate the allowance I give myself to account for the foot pressure. |
The bobbins are HUGE. Don’t bother using 100m spools of thread, you will fill a bobbin and have nothing left. While we’re on the bobbins, it is REALLY IMPORTANT to wind your bobbin at the slowest possible speed. Just slid the speed control all the way to the left and then start your bobbin winder. You might need to slightly increase the speed as sometimes the bobbin will stop winding prematurely. Ideally your bobbin will feel kind of springy when you squeeze it. Initially I wound my bobbin at full speed and often ended up with a birds nest on the underside of the fabric. Now that never happens
 |
| Speed dial. |
Just before we move off threads. I find that even with a wonderful machine like the Bernina 440 QE, the quality of your thread makes a difference. I recently started using Auriful 50 weight thread and I can feel the difference when piecing and quilting. It glides through the machine and I highly recommend you try it out. It is expensive but I believe it is worth every penny.
 |
I prefer Aurifil thread (and no one is paying
me to say that, I really do think it makes a difference!)
|
I’m sure you already know this if you have a Bernina, but you need to really push the bobbin in to place. My Husqvarna was similar but a number of people have mentioned that they find getting the bobbin properly in place difficult. If you push it in slowly you will feel a kind of double click If it isn’t in place it will fall out and you end up with a big mess and your fabric stuck to the foot plate. This still happens to me sometimes.
 |
| Invest in as many bobbins as you can afford
|
Even if you’re a speed demon, start slowly and then put your foot down. I find that if I start at full pelt I am much more likely to end up with a tangled mess. This might just be because fast is fast on the 440
Use the knee lifter! I didn’t try mine out until I’d had Delilah for a few months. Now I couldn’t sew without it. It is so handy, especially when quilting, but I use it every single time I sew.
 |
| Knee lifter in action. |
The Bernina Stitch Regulator (BSR) is great in my opinion.
 |
| BSR and an almost empty bobbin. |
I have read that people who are experienced quilters tend not to like the BSR but before I had Delilah I only ever Straight Line Quilting (SLQ) without a walking foot (yes, I dragged the fabric through, was not fun!). I love the BSR, it really helps me with Free Motion Quilting (FMQ). I also really enjoy SLQ and I regularly use all three foot attachments for the walking foot.
 |
| Walking foot with edge-stitching foot attachment. |
Buy the invisible zipper foot. It makes putting in a zipper a pleasure! The outcome is great and in my opinion it is easier than a normal zipper.
 |
| Left: invisible zipper foot. Right: normal zipper foot. |
Button holes are super easy, but the key is threading the bobbin thread through the little hole in the arm of the bobbin. It makes a huge difference to your tension. I also do this when quilting and I think it helps with tension for quilting too. If your buttonholes still aren’t quite right, try a stabiliser.
 |
| Threading your bobbin thread through this little hole helps with tension issues. |
I will write up some more tips as I think of them, but please feel free to ask any questions that I may be able to answer or help with. I found the blog Dog Named Banjo fantastically helpful regarding the Bernina 440. She has quite a few posts, so go have a look around I have also written previously about my 44 here. Fembellish Journal has some good information too. Another blog I found with some information on the 440 is Creative and Handmade. As for totally useful information that I can’t believe I didn’t already know, this post by badskirt completely opened my eyes to the versatility of the edge-stitching foot! I already used my edge-stitching feet (both the normal one and the one on the walking foot) a lot, now I use the ALL THE TIME.
I hope that you’ve found this post useful
Happy Sewing!
Today I’m sharing a blog post that I recently wrote over at The Oz Material Girls. It is a beginners guide to fat quarters and includes a tutorial for a marble maze which is a super quick and easy project
Scroll down for the marble maze tutorial, I have included the fat quarter information in case any of my readers are beginners and would find it useful
Hello, I’m Gemma from Pretty Bobbins popping in to talk about fat quarters. I love sewing from free-motion quilting to dressmaking. You can pop by my crafty blog where I document my sewing or my travel blog where I talk about my life in Nouméa
If you’ve started buying fabric you might be getting a little confused by all the possible cuts. First up you need to know that many sew-ers work in both the metric and imperial system. Many patterns give you measurements in both centimeters and inches, some in inches alone and others stick to centimeters and meters. Whilst it can be frustrating and confusing at first, before you know it you will be able to estimate an inch or 1/4″ as easily as the centimeters that you learnt at school. Did you ever notice that most measuring tapes have both inches and centimeters marked? Now you know why
For the purpose of explaining a fat quarter we will work in inches. A yard of fabric can be divided up into many different cuts of fabric as demonstrated below.
To start with, the width of fabric (WOF) is generally 42″-44″ or 106.68cm-111.76cm
1 yard of fabric = 36″ x WOF = 91.44cm x WOF
1/2 yard = 18″ x WOF = 45.72cm x WOF
1/4 yard = 9″ x WOF = 22.86cm x WOF
1 fat quarter = 18″ x 22″ = 45.72cm x 55.88cm
1 fat eighth = 18″ x 11″ = 45.72cm x 27.94cm
5″ and 10″ charm squares are often used in quilting and sewing, these equate to 12.7cm and 25.4cm squares
Google will always come to your aid if you need to convert inches to centimeters, but it is really as simple as multiplying the number of inches by 2.54. 1″ = 2.54cm
Have I confused you yet? Of course you can also buy your fabric by the meter but as we are talking about fat quarters which are a quarter of a yard, it is useful to have this information.
I first started buying fat quarters because they often come in bundles or are on special. Then I had a crisis of confidence, how will I ever use these small cuts of fabric? Then I got creative. This post is for you if you’ve ever found yourself in the position of wondering what the heck you’re going to do with a fat quarter.
There are LOADS of things that you can make using fat quarters! There are so many in fact that we’re not going to talk about them all today but keep your eye out as this is the first in a series of posts featuring projects that use fat quarters.
To give you an idea, here are some recent projects that I have made using fat quarters.
Clockwise from top left (including links to original tutorials where applicable): Twig and Thistle Bunnies, Dolly Nappies, Marble Maze, Chibi Bunnies, Pencil Roll, Mug Rug and (center) Buttercup Bag.
This bag by Melly and Me is a great example of patterns that utilise fat quarters. You can purchase the pattern here or a kit here which includes the fabric requirements.
Some popular online tutorials featuring fat quarters include the Buttercup bag by Made by Rae, Fat Quarter Apron by Prudent Baby, Fabric Airplanes by 2 Little Hooligans (I am so making some of these tomorrow!) and a Fat Quarter Fabric Folder by Schlosser Designs.
 |
| Fabric Areoplane. Image by 2 little hooligans |
Buttercup Bag. Image by Pretty Bobbins,
original tutorial by Made by Rae.
|
|
Of course there are so many gorgeous quilt blocks that you can make using fat quarters. A good idea for a quilt can be to purchase fat quarter bundles, these are made out of either complimenting fabrics of a selection (or complete) range. It can take the guesswork out of coordinating fabrics, especially if you are buying online. The Oz Material Girls have some gorgeous fat quarter bundles that are great for building your stash or working into a quilt. I can see a lovely baby girl’s quilt out of the mauve and pink fat quarter bundles with some kona solids, maybe a white, and this fun cherry print on the back, oh, and maybe some lovely pink gingham for the binding.


See what can happen when you start with a fat quarter? But before you head over to The Oz Material Girls and start stocking up on fabrics I’m going to share a quick project that I put together a little while back using a fat quarter from The Oz Material Girls. Keep an eye on their Facebook page for their fat quarter frenzy sales, I got a great selection!
Using one of these fat quarters I made some marble mazes, so quick and easy, all I needed was a fat quarter, a packet of marbles and my usual sewing supplies.
Marble Maze Tutorial
Using your rotary cutter and ruler you need to cut two squares 5.75″ x 5.75″. Take note if you print is directional and cut accordingly.
Place your two squares right sides together and sew around all four sides using a 1/4″ seam leaving a 2″ gap for turning.
Trim you corners.
Turn right side out, make sure your corners are nice and sharp, iron flat, then sew 1/8″ from the edge of your
square remembering to leave your gap for your marble.
Take your ruler and a fabric pen and draw out your maze. Make sure your measurements are precise or your marble will not fit through the maze. You want your maze “walls” to be 1″ apart. I STRONGLY recommend that you practice on a scrap to make sure that your measurements are precise and that your marble will fit through the maze. I made up a different route each time with some deadends. Just make sure you have a route that allows some movement and manipulation, it should be fun
Making sure you are precise, sew along your marked lines. Ensure that you sew a few stitches back and forth to secure each maze “wall”, the fabric and stitching will be stretched during play and you don’t want your stitches unraveling.
Insert your marble.
Be sure to push your marble well out of the way. Complete the top stitching across your marble opening.
Once you’ve finished sewing your maze walls you will find that you have lots of thread tails.
Knowing my boys I decided to add some fray stoppa once I’d cut the thread tails, just for some extra strength
 |
| I used some baking paper to protect my cutting mat. |
Please note that marbles are not suitable for young children, please pay attention to the safety information marked on the marble packaging.
I hope you found that useful! What clever uses have you found for fat quarters?
I’m linking up with Fresh Sewing Day at Lily’s Quilts for the first time It was a bit of a shock to look back at August and realise that I had only completed a few sewing projects. I do have a big WiP though and we did have two birthday parties which could explain why the photos don’t reflect how busy I felt in August!
Clockwise from top right: Custom order cushion, birthday pinata (I made 3!), custom order dress, colour therapy quilt.
Did I mention the birthdays? I think the cakes deserve their own collage
I love making birthday cakes, when I was little I always wanted mine to look like the ones in the Woman’s Weekly cake book. Now I’m the one making the cakes I let my creativity run wild and I probably spend far too much time on them. Only one more cake this year, but I have another two months until I have to think about it.
Hopefully September will be more productive sewing wise. I’ve already finished off a WiP and it’s only the first day of the month, so that’s a good start. Tomorrow is Father’s Day in Australia and even though we celebrated the French father’s day a few months back I have planned a cooked breakfast and a mini quilt to surprise Mr Husband tomorrow morning
I hope it makes him laugh and not cringe LOL I had all sorts of ideas of what I could put on the back, but in the end I just got my stamps out and put in a few nice words and our names. Anyway, it’s late and the light inside doesn’t show the quilting up, so I’ll share it properly tomorrow
But for now I will continue my love hate relationship with my “improv” wall quilt which I’m thinking about way too much to call it improv, but I don’t know what else to call it. I’ve dreamt about piecing it for the last two nights, so I do love it, but I don’t love every part of it. I’m hoping the quilting takes it over the line, but we’ll see.
 |
| This is my least favourite part but probably the best photo. |
Earlier in the week I was having a love hate relationship with a wall quilt. Trying my hand at some improv piecing I found I kept over thinking it. I have found the solution!
For about a year now my one real life crafting buddy, Angelique of La Petite Chouette (formerly of No Life Without Wife), and I have been getting our craft on each week. Well, that’s the plan, but we both have kids and lives and these things often got in the way of our weekly catch up. A recent arrival to our balmy Island decided she was keen to join us, a mutual friend of mine mentioned that she would love to come along and then another lovely girlfriend mentioned that she might just pop over with her preschooler as she had a project she was working on. Et voila! We had our first crafty get together with more than just two of us. And it was so.much.fun!
How cute is that strawberry beanie? So cute you get a second pic
Even better, I found that the distraction of these talented ladies totally got me in my groove and my improv came together! Hoorah!
OK, looking at this photo it doesn’t look so exciting, but I’m happy with how it’s coming along. I really love this bit above the sun.
I do think the sun looks better in real life than this photo shows.
This is the night sky, obviously more work required here.
Here is the beginning of our very own New Caledonian mountains. I don’t know why, but I didn’t realise that New Caledonia would have really tall mountains. I was so surprised the first time I saw them. It truly is a beautiful place, although I don’t think my wall quilt does it justice, but it is nice to be paying tribute to this place.
And keeping up with Kristy over at Quiet Play I’d like to pay tribute to my Quilty Gals, although I probably need to say my crafty gals You know who you are, the ones who comment on my posts, who read my blog, who craft with me on Thursdays, who encourage me and whose work inspires me. You gals are awesome! Thanks for being part of my creative journey
No finishes for TGIFF, but hop over to Stop That Owl to check out all the fabulous finishes As for me, slow progress here. I’ve only sewn on Monday and Friday this week with a little cutting in between.
The fun paper pieced coffee plunger has not progressed. I still love it and will turn it into something special in the next day or two
I was playing with some scraps earlier this week and plan to turn this cute block into a purse. I’ve picked out a striking magenta for the lining and natural linen for the back along with a pink zipper. Fun
This is a custom order cushion cover. I will be hand embroidering the linen block with some flowers and a new baby’s name. I’m hoping to finish this one this afternoon, but it is almost school pickup time so it might not happen until tomorrow (Mr nearly 4 has a middle ear infection so I might have some grumpy poos after school).
Then I have these vintage sheets picked out to cut into fat quarters for the vintage swap organised by Jane over at Fabric Swaps – Australia and International, these need to be in by 15th August so I will cut them over the weekend and post them Monday
Happy Sewing!
I can’t believe that it is Monday, last week was the longest week (sick children, Little Miss refusing to sleep, Mr Husband working late and finally, Little Miss ending the week with a huge bruised bump on her forehead) and it feels like groundhog day today. We’re still sick, the sleep issues continue, but at least the sun is shining. One upside to all this is that we decided to have a very quiet weekend at home. I got to sew on both Saturday and Sunday!!
 |
| Even fitted in some modelling, ooh, ahh! |
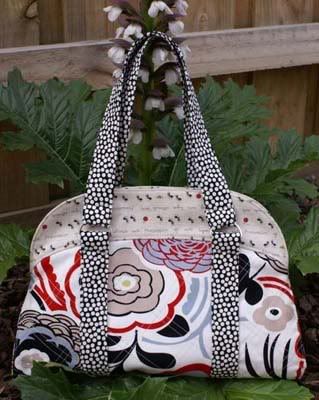
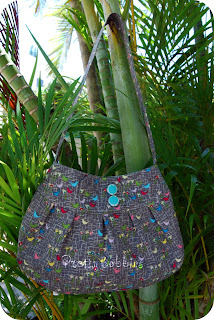
I was playing around with bag designs during the week and really needed to start sewing on Saturday. After going through all my sketches I decided on the same structure as this bag that I made recently, but with more contrasting shapes and textures.
I’m really happy with it, the solid grey is a lovely cotton linen blend. The inside features a phone pocket, zippered pocket and key loop.
I actually made the bag for a market night that has the theme “White Plus One”, you can find it here. It is up to the organisers as to whether your item has enough white to quality so I was planning a backup item while I was stitching away. Anyway, the bag ended up a lot more work that I envisaged (all that quilting, the centre panel, top panels and straps are heavily quilted) and I started to panic about finding a fair price so I decided to go ahead and make the back up item then decide which to submit.
I love the clutch! Again, it is my own design (really though, how many ways are there to design a clutch?) and I was really focused on the structure and texture. It came together exactly as I had imagined and I love the colour. I’m not sure if I can sell this one, I might have to make a second just the same (I usually only make one of a kind)…
It has a card slot, little pocket for a phone or similar and a small zippered pocket. I had fun with the wrist strap. It is detachable, but I made it nice and wide and gathered it. Again, I was playing around with different structures. It
 |
| Sorry for the weird photo, I took it myself and it is all kinds of weird LOL |
Anyway, I had so much fun making these bags that I’ve decided to enter them in Purse Palooza 2012… Crossing all my fingers and toes! There are some lovely entries, you can see them in the flickr group here.

 “/>
“/>