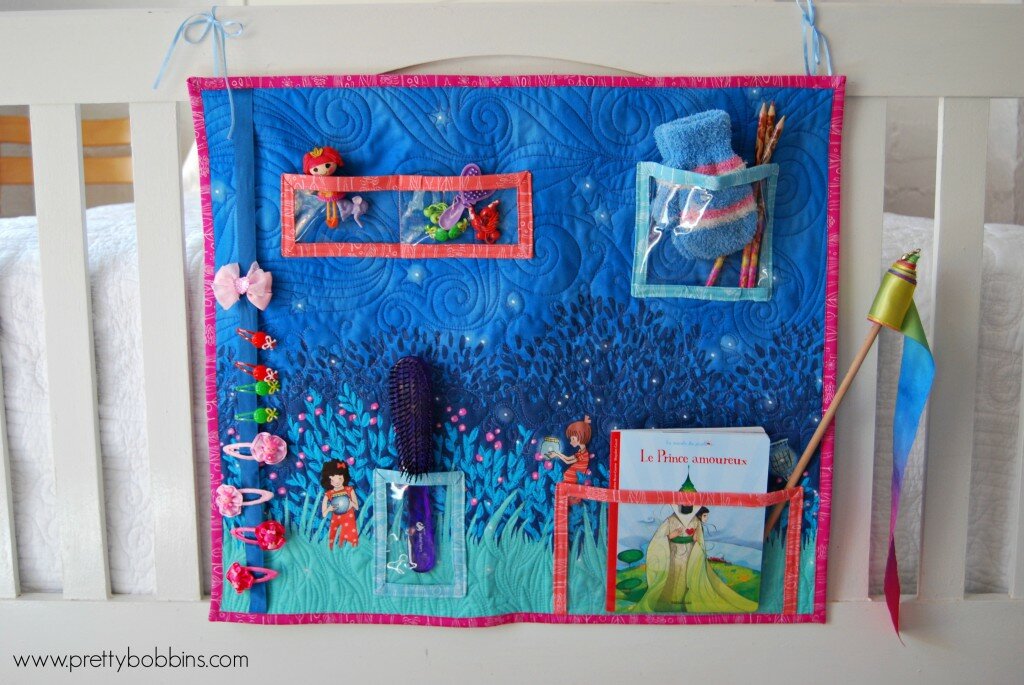
Hanging Organizer Tutorial fit for a wee princess!
When the super talented Sarah Jane put the call out for blogger to work with her new line, Wee Wander, I couldn’t help but put my hand up!

Today I’m sharing a tutorial for a Hanging Organizer. I have a lovely three year old daughter who certainly could do with a little help organizing her important and precious belongings and she just LOVES her pretty new organizer <3
Fit for a princess!
Let’s get started! You will need…
Supplies:
- 1 panel Wee Wander
- Backing fabric (32″ W x 29″ H)
- Wadding (28″ x 25″)
- Hanging sleeve (5′ x 23″)
- 1 piece clear vinyl 11″ x 15″ (I repurposed one of those clear zip bags that pillows and linen come in)
- 12″ x WOF (width of fabric) for binding OR purchase aprox 250″ premade double bias binding (you will have lots left over!)
- 60″ ribbon for clip strip and hanging
- 24″ long piece of dowel rod for hanging
- usual quilting supplies
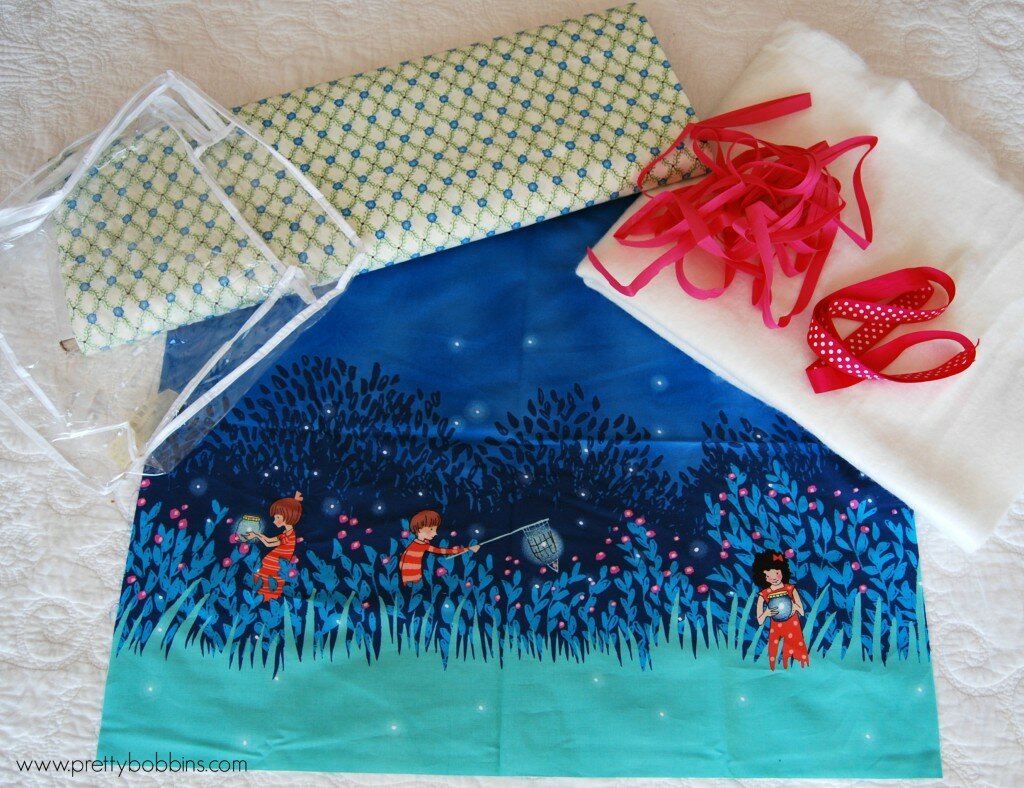
Gather your supplies
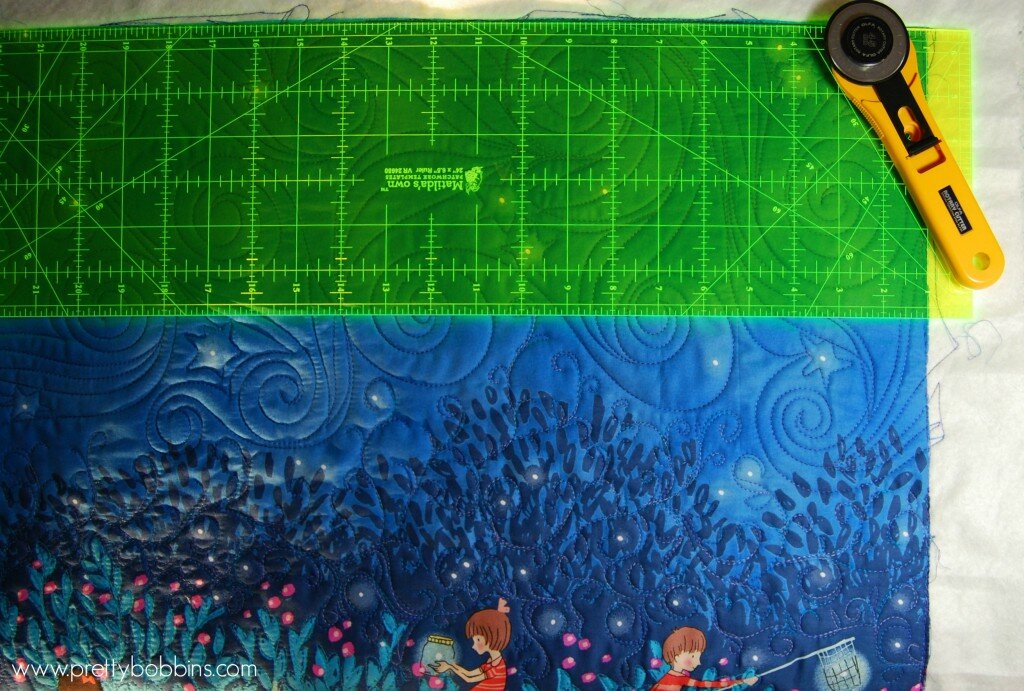
Prepare and quilt you Wee Wander panel for quilting. I cut backing to 32″ x 29″, wadding 28″ x 25″ and the panel to 21″ x 24″. I changed threads a few times and let Sara Jane’s whimsicle design dictate my quilting. TIP: I always find it best to quilt wall hangings quite densely so they sit nice and flat.
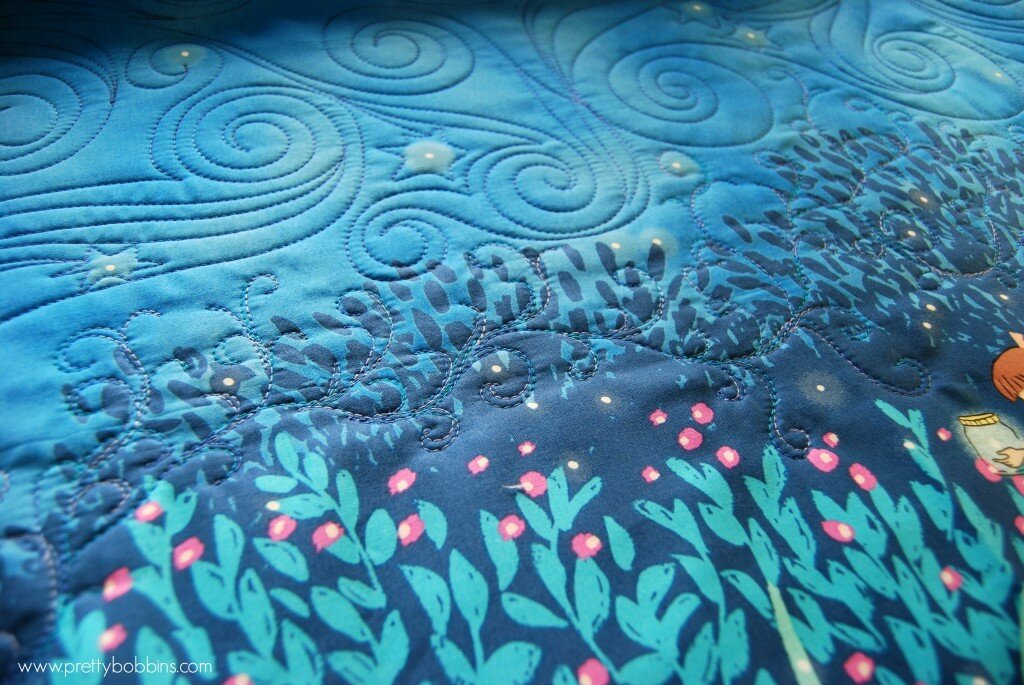
Quilt to your heart’s content!
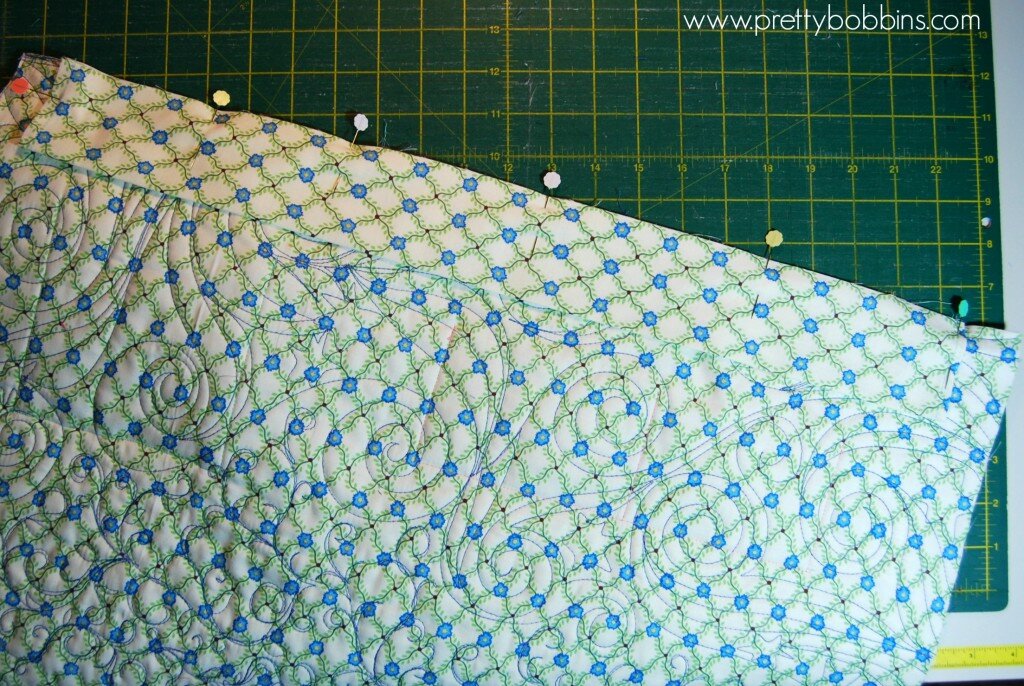
Once you have finished quilting your panel, trim it so it is nice and square, then set it aside.
Trim your quilted panel
Prepare your binding. I wanted to feature a number of Sara Jane’s prints for the binding, but you can use pre-made double bias binding or make your own. You will need 105″ binding for the outside of the organiser and four smaller pieces for the plastic pockets:
- Pocket A 37″ of double fold binding
- Pocket B 36″ of double fold binding
- Pocket C 29″ of double fold binding
- Pocket D 43″ of double fold binding
Prepared your clear plastic/vinyl pockets. Cut one each of:
- Pocket A 3″ x 9.5″
- Pocket B 5″ x 7″
- Pocket C 5″ x 3.5″
- Pocket D 9.5″ x 6″
Bind all four sides of A, B and C. Bind three sides of D (leave one of the long sides raw).

Binding tips
Cut a 23″ length of ribbon for your clip strip. My ribbon is .75″ wide.
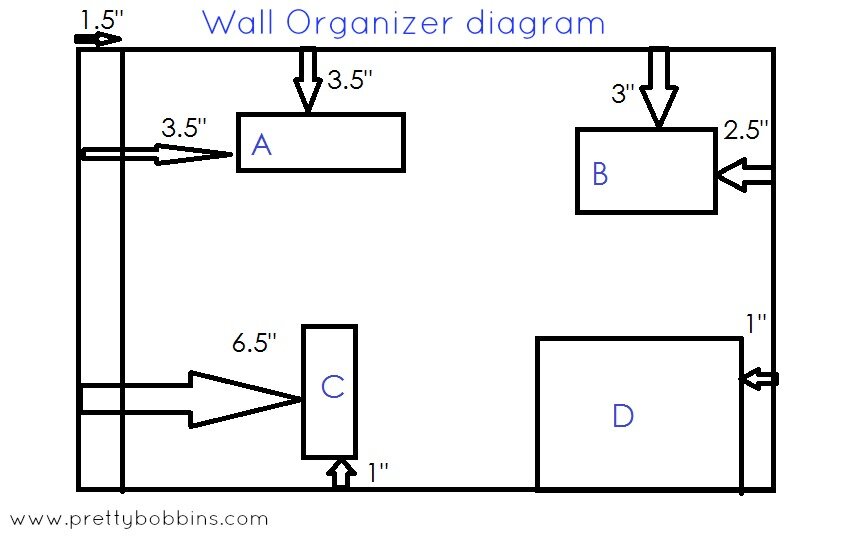
Place your pockets where you would like them. DO NOT PIN THEM!! I decided to fold the bottom two corners of pocket B in a little so that the pocket sits out and can take bigger objects. TIP: make sure that you don’t place your pockets directly over the parts of the panel that you would like to feature.
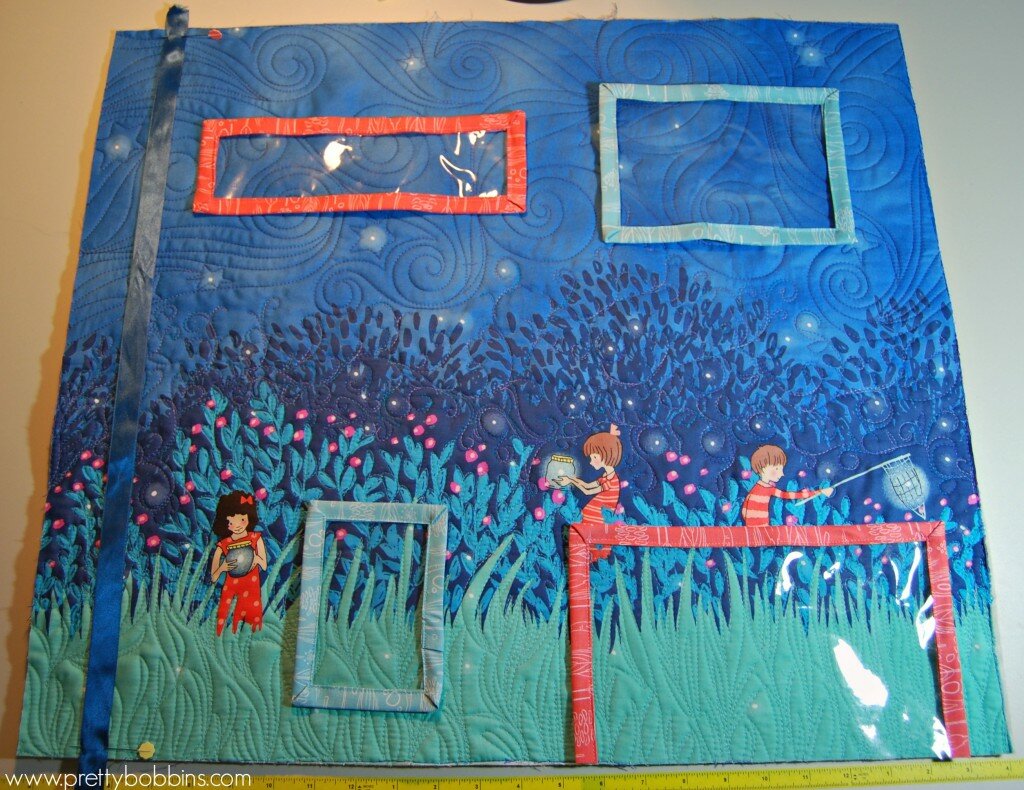
lay out pockets
Once you are happy with the placement of your ribbon and pockets you can pin them carefully within the found section. The pins will leave holes in the vinyl so please be careful 
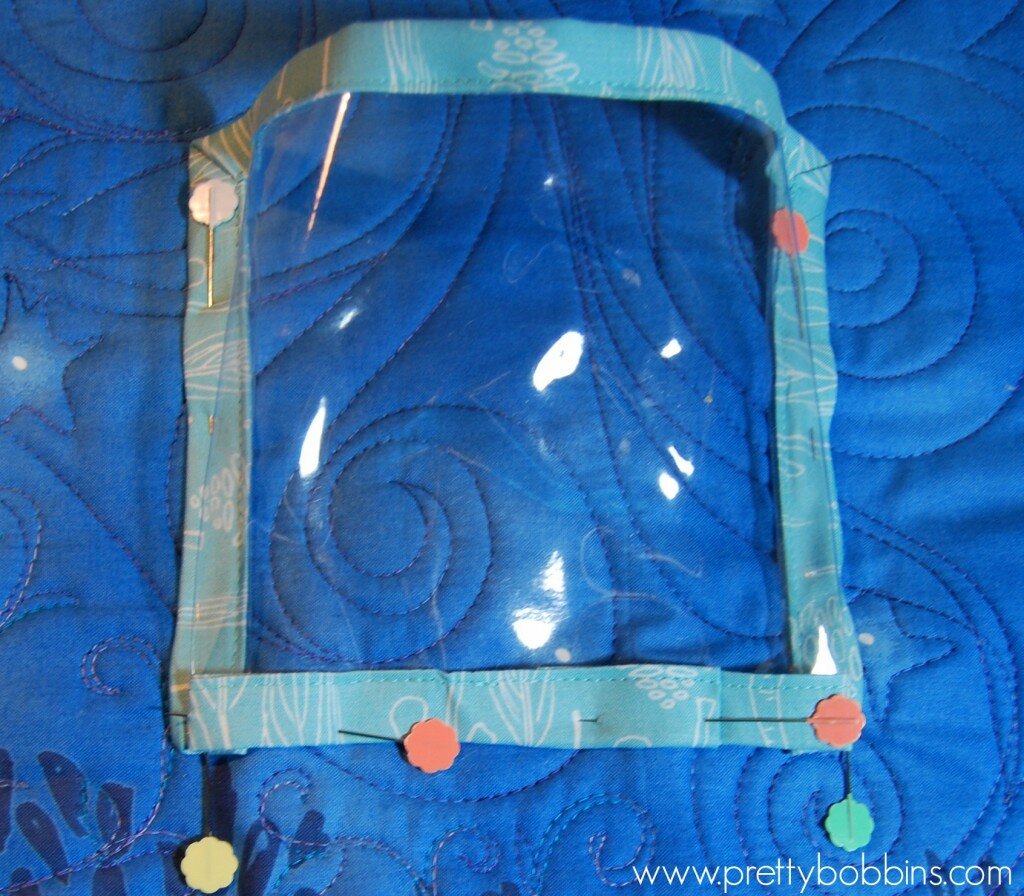
Pin your pockets on the binding so that you don’t mark the vinyl.
Sew your pockets in place. I used a walking foot as the bound vinyl is somewhat bulky.
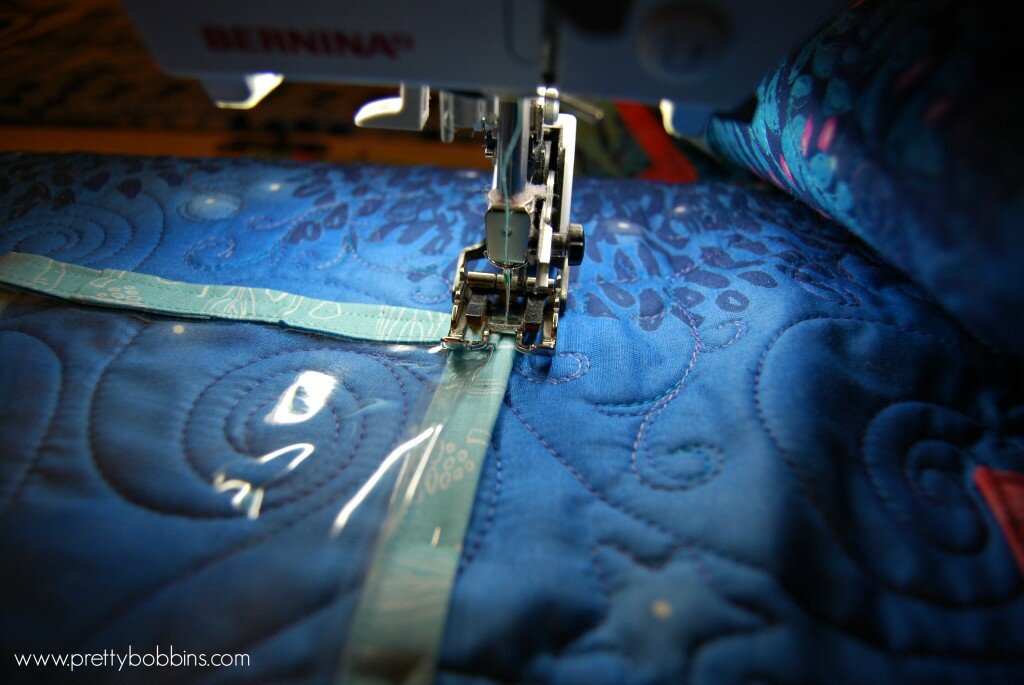
Sew pockets in place
Prepare your hanging sleeve. Take your 5″ x 23″ strip of fabric and fold both short ends in by 1/4″ and again by 1/4″ to conceal the raw edges. Sew in place, fold in half with wrong sides together and press. Center your hanging sleeve on the top back edge of your organiser (raw edges togethre) and sew in place within the 1/4″ seam allowance.
Apply binding. I applied my binding to the back and then machine stitched it down to the front. This is a quick,easy and neat way of binding. Crazy Mom Quilts has a great tutorial here.
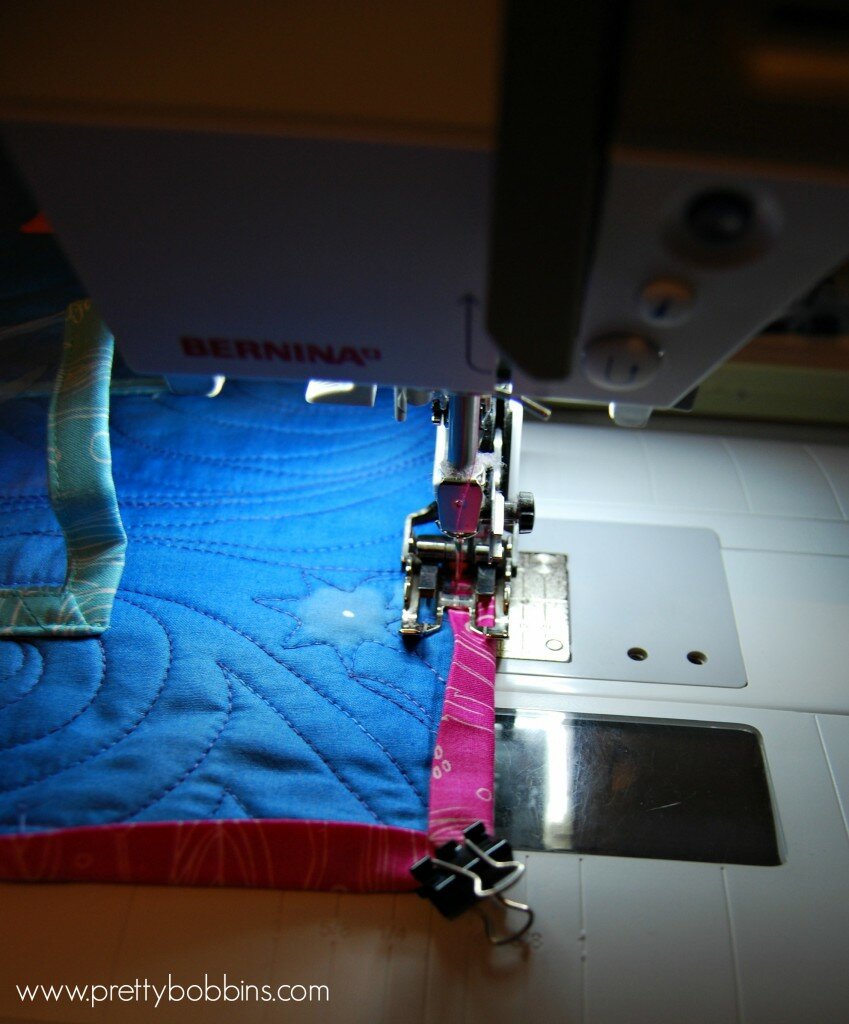
I applied my binding to the back and then machine stitched it in place on the front
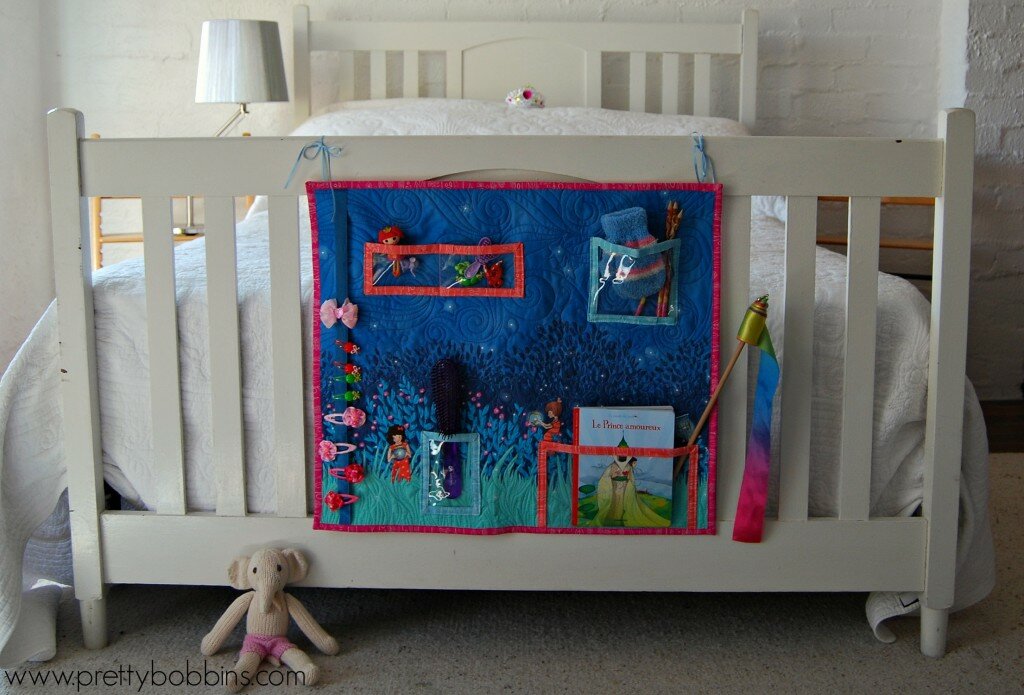
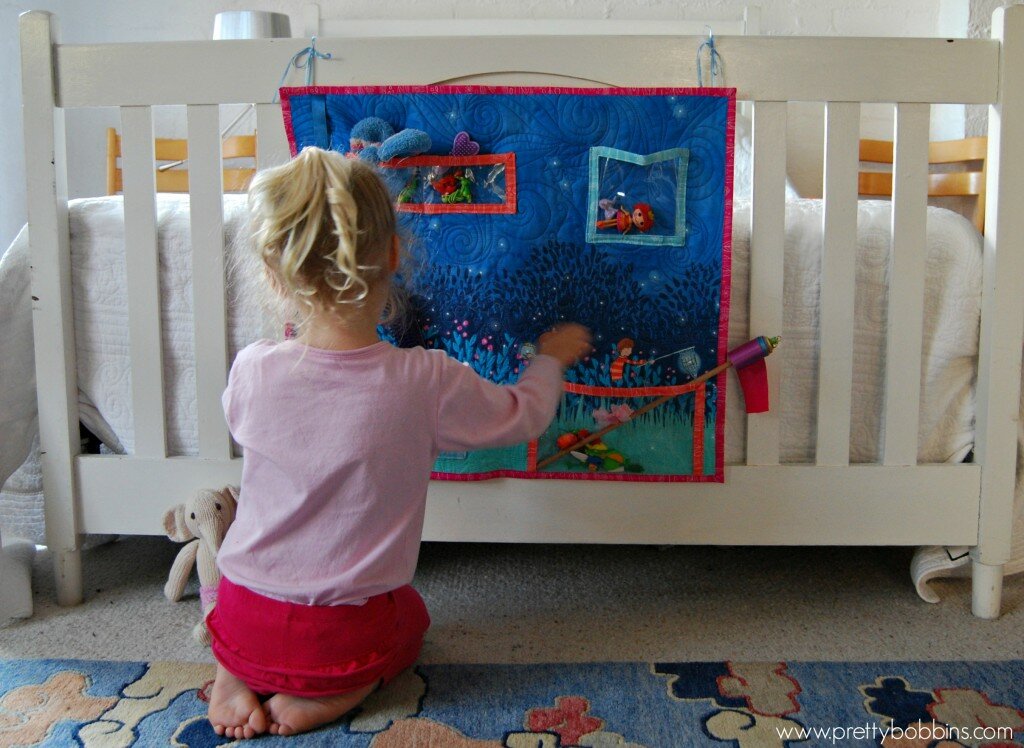
Use your remaining ribbon and dowel to hang your organiser in place. Fill with all your precious items <3

A place for everything and everything in it’s place <3
Then let your wee one re-organize to their heart’s content!
Thanks for stopping by and a big thank you to Sarah Jane for always producing such beautiful illustrations and for turning them into fabric that we can use and love! I’ve loved being part of this blog tour <3 You can find out more about Wee Wander here <3

It’s Thursday, it’s time, I Quilt and I’m guessing you do too  So come link up your quilting process! This week I’m talking about quilting for a cause which is something that I think many of us have done. I was completely inspired by this week’s feature quilter, Kathy from Kayak Quilting.

Used with permission from Kayak Quilting
Kathy made a stunning grey house quilt. I love the mix of straight wavy line quilting and swirls. It really is a fantastic quilt, high in contrast and full of clean, sharp lines. But what I loved most about Kathy’s post last week was this: “A few hours each week my husband and I get to tutor children who have experienced homelessness…suffice it to say it is a gift to us that we have the opportunity to play a small part in these kids’ lives.”

Used with permission from Kayak Quilting
Kathy thank you for reminding us that we can use our quilting for others. Kathy’s lovely house quilt is going to be part of a silent auction for a Housing Families’ upcoming Gala. I don’t want to get all “holier than thou” on you, but I do want to give a virtual high five to all you special quilters out there who are using this wonderful art of ours to do good. Giddy up to you!! Please take a moment to go check out Kathy’s work at Kayak Quilting, thanks for sharing with us Kathy xx

Must quilt names into quilts at every opportunity! Hint: do not try this at night! Ask me how I know…
The past few days I have been quilting a lovely memory quilt (which is awfully hard to photograph without sharing all of the customer’s personal photos). There is a definitely travel theme going on and I love all of the cute prints.

Tres cool Paris and London prints <3
Last week I shared my binding tips and some of you shared your favourite tips back. I found these methods super useful, thanks to Quilt Paradigm and Mel of We Shall Sew:
Reversible Binding tutorial
Reversible Binding tutorial #2
Susie’s Magic Binding
So that’s it from me. Please remember to add a link back to my blog and/or the linky button to your post or sidebar. Please visit three other linkers. We all love visitors!
Happy quilting!!
I’ve just sent my little monsters off Trick or Treating and the house is in chaos (removalists arrive in four days) but it’s time to link up for I Quilt Thursdays here at Pretty Bobbins! Thank you to all of the lovely linkers who joined in last week! I am really enjoying reading all of your posts. I’m sorry that I haven’t replied to all the comments on my blog yet, I am struggling with blogging time at the moment with moving preparations in full swing. Nonetheless, this week I am going to share some of my troubleshooting quilting tips!

photo with permission from Dasha of Patching Pixies
First up I would like to share Dasha’s work with you. Dasha is such a sweetie and has such a big heart. She makes quilts and laundry bags for Aussie Hero Quilts (I think that is like Quilts of Valor for my American readers) and last week she shared her quilting on a BEAUTIFUL quilt for her friend Verna. We first corresponded back in January when she wrote to me about bobbin tension and she claimed in last weeks post that she doesn’t love machine quilting. Dasha, you might not love it, but you are have the goodies girl! I LOVE the quilting in the below photo. Now that is skill! She is seriously accurate! I’d love you to pop by and check out Dasha’s blog. She is a new blogger and a great quilter Thanks so much for linking up Dasha and for being my featured quilter this week <3

Photo with permission from Dasha of Patching Pixies
This week I want to share a few of my trouble shooting tips with you. Alyce of Blossom Heart Quilts was having a frustrating time FMQing recently and whether she wanted it or not I gave her a heap of advice that I thought worth sharing here too For interests sake I will share some photos of my current quilting project, a bee quilt that I will give to my good friend here in Nouméa as a farewell gift. I can’t blog without photos

First up, when you thread your machine make sure that the thread is coming off your spool in the right direction. Check your manual to find out which direction this should be for you. I actually use a separate spool stand as I find it gives me the best results.

When you are threading your machine make sure the foot is up and hold the thread taught where it comes off the spool by doing these two things you will ensure that the thread passes correctly through the tension disks. (I won’t tell you that I ALWAYS used to thread my machine with the foot down!)

I used the star on the back of the quilt as the guide for my quilting design. Yes, that was rather tiresome removing pins from behind whilst quilting!!!
Support your quilt! The weight of your quilt can cause all sorts of problems. I sit my machine in a sewing cabinet and put the ironing board behind it to carry the weight of the quilt. If I’m working on a large quilt I will support it using my arms and shoulders and focus on only small areas at a time, then move the beast to rearrange the way I am supporting it. If you don’t have a drop down table I would suggest that you build a support structure. Even a temporary structure made of phone books or shoeboxes is going to be better than letting the quilt drag against the needle in every direction.

You’ve probably heard me say before, buy the best quality products that you can. It really does make a difference. My current quilt in progress is made up of bee blocks and of all of those various blocks, one little 2″ x 5″ strip (below photo – it’s the yellow with the flowers printed on it) saw me unpick five times! Based on touch alone it is not great quality. I don’t expect my bees to spend lots of money on fabric for my blocks but next time I get a block with poor quality threads I will leave it out. I think using quilt store quality fabric is a safe bet. The quilting in that area had the same backing fabric, same wadding and no more seams than anywhere else and my machine was dropping stitches (which it NEVER does) and the bobbin thread was pulling through to the top. Good quality thread, fabric and wadding will all help improve your quilting experience. You wouldn’t do your plumbing with ancient leaky pipes, give your quilts the same love <3

Troublesome quilting
And that’s it from me for this week. It’s almost 9pm (sorry I’m late with the linky!) and I have to sit down with a glass of wine and prepare to face more packing tomorrow! What have you been quilting this week? I’d love you to link up below. I ask that you visit at least two other linkers and either link to me in your post and/or add my button to your sidebar/post. You can find the button html code near the top right of my blog or at the bottom if you’re on a mobile device. Remember that this linky is all about quilting process, I’d love to hear all about your process!
