Archive of ‘Toys’ category

Wee Wander ~ Hanging Organizer Tutorial

By

Hanging Organizer Tutorial fit for a wee princess!


organiser on bed

When the super talented Sarah Jane put the call out for blogger to work with her new line, Wee Wander, I couldn’t help but put my hand up!

Today I’m sharing a tutorial for a Hanging Organizer.  I have a lovely three year old daughter who certainly could do with a little help organizing her important and precious belongings and she just LOVES her pretty new organizer <3

Fit for a princess!

Fit for a princess!

Let’s get started!  You will need…

Supplies:

  • 1 panel Wee Wander
  • Backing fabric (32″ W x 29″ H)
  • Wadding (28″ x 25″)
  • Hanging sleeve (5′ x 23″)
  • 1 piece clear vinyl 11″ x 15″ (I repurposed one of those clear zip bags that pillows and linen come in)
  • 12″ x WOF (width of fabric) for binding OR purchase aprox 250″ premade double bias binding (you will have lots left over!)
  • 60″ ribbon for clip strip and hanging
  • 24″  long piece of dowel rod for hanging
  • usual quilting supplies
Gather your supplies

Gather your supplies

Prepare and quilt you Wee Wander panel for quilting.  I cut backing to 32″ x 29″, wadding 28″ x 25″ and the panel to 21″ x 24″.  I changed threads a few times and let Sara Jane’s whimsicle design dictate my quilting.  TIP: I always find it best to quilt wall hangings quite densely so they sit nice and flat.

Quilt to your heart's content!

Quilt to your heart’s content!

Once you have finished quilting your panel, trim it so it is nice and square, then set it aside.

Trim your quilted panel

Trim your quilted panel

Prepare your binding.  I wanted to feature a number of Sara Jane’s prints for the binding, but you can use pre-made double bias binding or make your own.  You will need 105″ binding for the outside of the organiser and four smaller pieces for the plastic pockets:

  • Pocket A   37″ of double fold binding
  • Pocket B   36″ of double fold binding
  • Pocket C   29″ of double fold binding
  • Pocket D   43″ of double fold binding

organiser diagram

Prepared your clear plastic/vinyl pockets.  Cut one each of:

  • Pocket A    3″ x 9.5″
  • Pocket B    5″ x 7″
  • Pocket C    5″ x 3.5″
  • Pocket D    9.5″ x 6″

Bind all four sides of A, B and C.  Bind three sides of D (leave one of the long sides raw).

Binding tips

Binding tips

Cut a 23″ length of ribbon for your clip strip.  My ribbon is .75″ wide.

Place your pockets where you would like them.  DO NOT PIN THEM!!  I decided to fold the bottom two corners of pocket B in a little so that the pocket sits out and can take bigger objects.  TIP: make sure that you don’t place your pockets directly over the parts of the panel that you would like to feature.

lay out pockets

lay out pockets

Once you are happy with the placement of your ribbon and pockets you can pin them carefully within the found section.  The pins will leave holes in the vinyl so please be careful :)

Pin your pockets on the binding so that you don't mark the vinyl.

Pin your pockets on the binding so that you don’t mark the vinyl.

Sew your pockets in place.  I used a walking foot as the bound vinyl is somewhat bulky.

Sew pockets in place

Sew pockets in place

Prepare your hanging sleeve.  Take your 5″ x 23″ strip of fabric and fold both short ends in by 1/4″ and again by 1/4″ to conceal the raw edges.  Sew in place, fold in half with wrong sides together and press.  Center your hanging sleeve on the top back edge of your organiser (raw edges togethre) and sew in place within the 1/4″ seam allowance.

Line raw edge of hanging sleeve up with top raw edge of quilt

Apply binding.  I applied my binding to the back and then machine stitched it down to the front.  This is a quick,easy and neat way of binding.  Crazy Mom Quilts has a great tutorial here.

I applied my binding to the back and then machine stitched it in place on the front

I applied my binding to the back and then machine stitched it in place on the front

Use your remaining ribbon and dowel to hang your organiser in place.  Fill with all your precious items <3

A place for everything and everything in it's place <3

A place for everything and everything in it’s place <3

Then let your wee one re-organize to their heart’s content! :)

organiser rearranging


Thanks for stopping by and a big thank you to Sarah Jane for always producing such beautiful illustrations and for turning them into fabric that we can use and love!  I’ve loved being part of this blog tour <3  You can find out more about Wee Wander here <3

Sewing Softies – The Basics

By


I’m just sharing a guest post that I wrote a few weeks ago for The Oz Material Girl’s blog.  I hope that you find it useful :)  I must admit straight up that I’m no expert when it comes to softies, but I do love them and have made a few.  In fact I recently pulled a late nighter making 34 soft bunnies and eggs, you can read about my midnight madness here.  Or you can read my more sane post with links to some great Easter softies here  :)


If you’ve been getting crafty for Easter you’ve probably seen the Twig and Thistle Bunny.  I love it!  I have made, oh, about 6 million as gifts for friends but I need to make two more (please note the terms and conditions on the Twig and Thistle site, it is for personal use only).  It is a super easy softie and a great one for beginners, so today I’m going to share some tips that will help you make great shaped softies.  Of course you can apply these to any softies and there are loads of gorgeous softie patterns over at Patterns Only. 


So, let’s get started.


First of all you need your pattern piece.  If you are going to make your softie a few times I highly recommend making a template rather than using your printed pattern piece.  A template will give you a more consistent shape and is more durable.  Today I am using some clear template plastic, but cereal boxes also work well.


Trace your pattern shape onto your template material.


Cut out your template.  


PLEASE don’t use your fabric scissors!  Save them for your pretty fabrics, you should love and cherish your fabric scissors :)  Don’t put them near paper, glue, carboard, plastic, anything that’s not fabric or thread really.  It is handy to have a few pairs.  I keep my scissors together in an airtight box (remember I live in the tropics and near a salty lagoon) and have a number of pairs. 


Clockwise from top Right: old fabric scissors, thread snipers,
 pliers, curved nail scissors, craft scissors, paper scissors, rotary cutter, good fabric scissors.

Now that you have a nice template to work with select and iron your fabric.  Lay your fabric right sides together and place your template on top.  Using a fabric pen trace around your template.


If you’re a beginner it is going to help you to use some pins.  I may have mentioned before that I don’t really like pins…


It will make life easier if you’re not working with a big piece of fabric, so at this point I tend to roughly trim around my shape making sure that I cut no closer than 1/2″ to my softie outline.


Before you take your fabric over to your sewing machine.  You need to consider a few things first:

  1. Where are you going to start sewing?
  2. Are there any tricky shapes that you might find easier to approach from the left instead or the right, or vise versa?
  3. What colour thread and fabric are you using?
  4. What stitch length have you set your machine to?


I find that:

  1. It is always easiest to start and finish on a straight section, in this case his bottom.
  2. Curves can be tricky when you’re starting out.  You need to lift your foot or pull your fabric to make it turn with your feed dogs.  Maybe you find an inverse curve easier to manage than a converse curve.  I find this something I need to consider more on an overlocker, but it is still worth considering when using your sewing machine.
  3. I know that it can be tempting to just use whatever thread you have in your machine or to only change your top thread and leave your bobbin alone.  But trust me, your softie is going to look so much nicer if the thread is invisible.  Select a colour that blends into your fabric as much as possible.
  4. When making softies you want to reduce your stitch length down to 1.4 or 1.6  This is really important when you come to triming your seams a little later.


Your drawn outline is going to be your guide.  Personally I find it easiest to use my 1/4″ foot and line the outline up with the 1/8″ point which is the inner edge of the foot.  That way I’m watching my foot not my needle and I get a smoother shape.


Sew a couple of stitches back and forth to secure your ends.  You might want to reduce the speed on your machine to help you with those tricky corners.


Don’t forget to leave a gap so that you can stuff your softie!  I leave about a 1″ gap but you might find 1.5-2″ easier for your first few goes.


Now we want to trim our seams to 1/4″.


Clip any corners and cut little Vs on your curves cutting very close but not too close to your stitches.


Snip right up to your corners including the divide in your Bunny’s ears.


You’ve probably got a sore hand from the scissors, but it’s worth it!  You will get nice smooth curves from all those little snips you’ve made :)


Now you want to turn your Bunny right side out.  I use my fingers first.


Then I use my fabric pen with the cap on to gently push out the seams (I find that the smooth plastic cap which has a slightly rounded end is a perfect turning tool).  You can use a chopstick, rubber end of a pencil or anything that isn’t sharp.  Don’t use the right end of a chopstick or knitting needle as you will end up poking a hole in your seams.  If you do poke a hole in your softie, don’t panic, just turn him wrong side out again and sew a little inside the section that has a hole remembering to secure your stitching.


Your rabbit skin should look something like this.


Now you want to stuff him.  Take a small amount of stuffing (I’m using the inside of a cushion, you can use toy fill).   


Push the stuffing up to the tip of his ears.  I start out using my fingers and then use the wrong end of a chopstick to get it all the way to the end.  
Keep using small amounts of stuffing and pushing them into your bunny.
 
You want to make sure that you are pushing the stuffing right to the edges of your softie.

It can get a little frustrating using such small pieces of stuffing at a time, but it is worth it.  If you use big pieces you will end up with a lumpy softie.  Keep going until your softie looks like this!


Recently I was given some fantastic advice on an online sewing group, The Sewing Library, in regards to stuffing softies.  Use the chicken breast test.  It should be firm like a chicken breast and like a chicken breast, it is safer to go too firm than too soft.  Isn’t that great advice?  Now I know exactly how firm to make my softies!


Once you have finished stuffing your softie you need to sew him up.  Select a thread that blends with your fabric and grab yourself a needle.  


You want to use a ladder stitch so that your stitches end up invisible.  There are lots of good tutorials online but I’ve put together some photos to try and show you how to do it.


First sew a heap of little sitiches within your seam allowance to secure your thread.  Then bring your needle up right on the seam line right next to where your hole starts.


Take your needle over to the other side and push it in to the seam line and bring it back out about 1/8″ on the seam line on the same side (see photo below).


Pull your thread tight and insert your needle back into your seam line on the other side directly opposite your last stitch.  Bring your needle out again 1/8″ along on the seam line same side.


Continue until you get to the end of the hole.


Now you need to secure your stitches but you want them to be invisible.  [If I'm using a thread and material that allow me to make a few tiny stitches that can't be seen, then I will do so in addition to tying a knot.]  Bring you needle out as close to your last stitch as possible.  Now you want to tie a knot as close to the fabric as possible.  I tend to do about 3 or 4 knots on top of each other.


OK, get close to your fabric and pull your thread tight.  Can you see the hole that your thread came out of last?  You want to thread your needle back into that same hole.


Without loosing your needle inside your softie take it through your softie and bring it out.  Pull the thread firmly but not hard.  You want your knot to pop into the inside of your softie but not tear a hole in it.


Pull your thread tight and snip it nice and close to the fabric so that the thread tail disappears inside the body.


Hooray!  You shouldn’t be able to see where you closed up your softie!


Now stand back and admire your work :)


You can even add a ribbon and watch your Bunnies hop around the garden.


Or put them in a basket and take them to school for your kid’s friends!


You can use these tips for any softies and you will probably find that the shape of your softies improves with time :)  I hope you found this tutorial helpful!


J’adore Barbie! Dressing my favourite dolly

By

Today we attended the 6th birthday party of a lovely little girl.  Her parents had ordered some party favours from me (which I’ll post about soon) but I really wanted to make her something special.  It turns out she likes Barbie.  A lot.  She has 7 Barbies!  I wish I had 7 Barbies.  We all know that Barbie can never have too many clothes so I got busy making some itty bitty dolly sets.

Craftiness is not Optional has some fantastic Barbie clothes tutorials and I used her Easy Barbie Skirt and Barbie Dress tutorials to make this outfit.

Barbie hitching a ride

I had a tiny scrap of my favourite cupcake fabric left and decided another skirt was in order.  Shirring is always fun so I made a matching hot pink top.

Barbie greets her fans

Do you like the beading detail on the back?

I might need to talk to my friend about the
condition of Barbie’s hair…

There was no way I could stop there, making Barbie clothes is fiddly and frustrating, but playing with Barbie in her new clothes is FUN.  So I gritted my teeth and produced a sundress that I would wear if I had enough fabric left.

Barbie rocks the fence line

Unfortunately 3 Barbie outfits doesn’t amount to much in the way of gifts so she also got a couple of the lovely Easter Bunnies I have been making (you can see them here), a book (always a book!) and a lovely little handbag.  I’m really pleased with the handbag but not sure that I can get away with a bag in this fabric…

I think I would have been very happy with this gift when I turned 6!  And I might just have to give back my Barbie loan-er and buy one for myself.  I see many more Barbie outfits in my future…

Easter Sewing – Before I stayed up all night sewing Bunnies

By

I’ve jumped on the bandwagon and am sewing Easter gifts.  I’m not sure how I feel about this.  (After staying up all night sewing Bunnies I know exactly how I feel about this and you can read about my Bunny inspired madness here.)  When did Easter turn into another gift giving holiday…?  I mean, chocolate eggs sure, but some of the gift lists I’ve heard are akin to Christmas.  Anyhow, I’m on board and I’ve been sewing up fabric eggs and a range of bunnies (you can find the links to the tutorials below).

I added little gift tags on ribbons.

My first Bunny was a combination of two great tutorials.  I took the shape of this Chibi Bunny and did a face inspired by this Easter Bunny.

I was having a lot of fun and even had a little girl in mind as I was stitching on the Bunny’s pink eyes.  Then I remembered that pink eyes on bunnies are not a good thing.  Where I grew up rabbits were considered a noxious pest and myxomatosis was rampant, slow moving, pink eyed bunnies were on a gruesome death train…

Heck!  Where was I?  Lovely Easter bunnies should not have pink eyes.  Having said that, eggs shouldn’t really be blue or yellow but these look pretty good.

You can find the tutorial for the Fabric Eggs over at Retro Mama.  I have to say, I seriously love the look of her blog!  I’ll be heading back for a better look around soon :)  I have also started a Pinterest Board on Seasonal Crafts, so you can always look there for some ideas :)

In addition to my morbid memories of rabbits and lack of exposure to Easter gift giving, I face another hurdle.  My children go to school in Noumea, the French education system has little place for religion.  Will I be making a faux pas if I give Easter gifts at school?  And if I do decide that it is OK to give the gifts, how do we hand them out?  I’m not making one for all 32 classmates of each child (64 fabric bunnies!) so I’ve decided that they can have half a dozen each to give to their friends and one for each of their teachers (remembering that Mr 3.5 has 2 teachers and a teacher’s aides.

Update: I made enough Easter Bunnies and Eggs for all the Mr 5.5′s classmates, all the teachers and teacher’s aides and a few for close friends of Mr 3.5.  You can read about my descent into Easter madness here.

But back to sewing.  How cute are these fabric Easter Bunnies and eggs?  The template and tutorial for the silhoutte style bunny can be found here at Twig and Thistle.

I’m thinking of having an Easter Egg hunt for our toddler playgroup with fabric eggs instead of chocolate ones.  Although I’m not sure if I can face making another dozen fabric eggs for a few days at least ;)

Are you sewing for Easter?  How do you handle distributing gifts at school when someone will miss out?

Tutorial: Cheat’s (Easy!) Bias Binding

By

I still haven’t finished the project that I mentioned in my last post.  I really want to share it with you, but it will be much nicer once it is all finished so I’m doing my best not to blog about it yet :)  So here is the tutorial on bias binding that I did for the lovely Oz Material Girls, you can find their blog here and their online fabric store  http://theozmaterialgirls.com.au/ .  I hope you find it useful :)


I’m so excited to have been asked by the lovely Oz Material Girls to write a guest post for their blog.  I’ve been sewing for almost as long as I can remember and before that I used to sit on my Mum’s machine cover and pretend it was a horse while I watched her sew.  You can find my blog about sewing adventures here.  I think everyone can sew, you just need to give it a go and then practice, practice, practice!  
Whilst I’m not the most experienced quilter by a long shot, I wanted to share something quilting related with you as The Oz Material Girls stock so many lovely quilting fabrics.  Of course bias binding has many uses, including on clothing and accessories, so hopefully this tutorial will help lots of people.
I call this method of bias binding the “cheat’s method” as it is so easy and looks fantastic.  That’s definitely not a bad thing, but we are cutting a few corners here :)
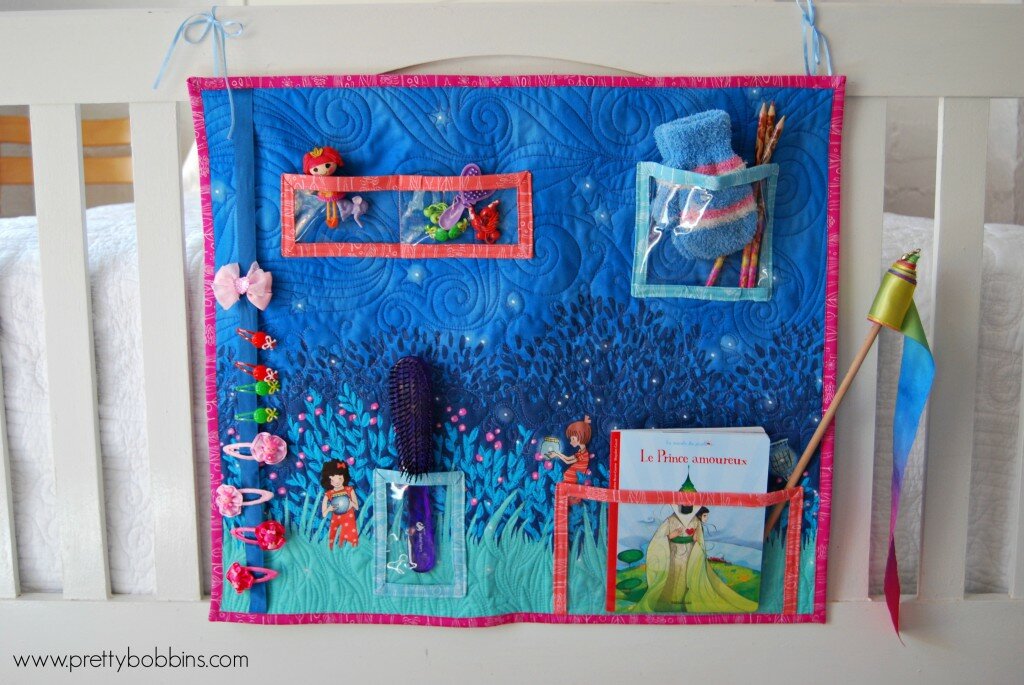
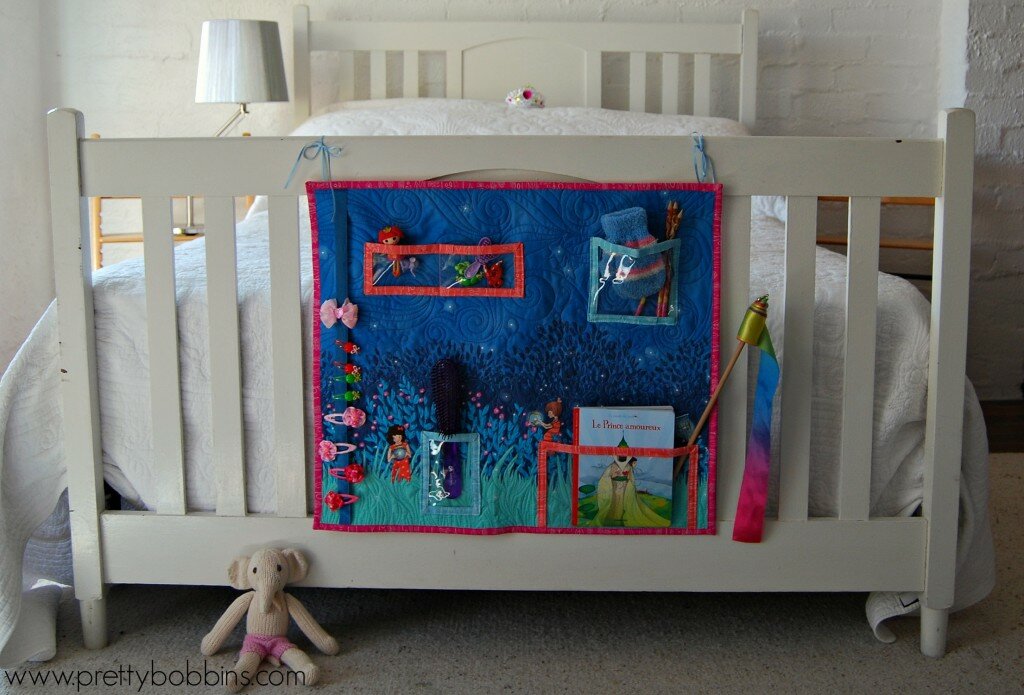
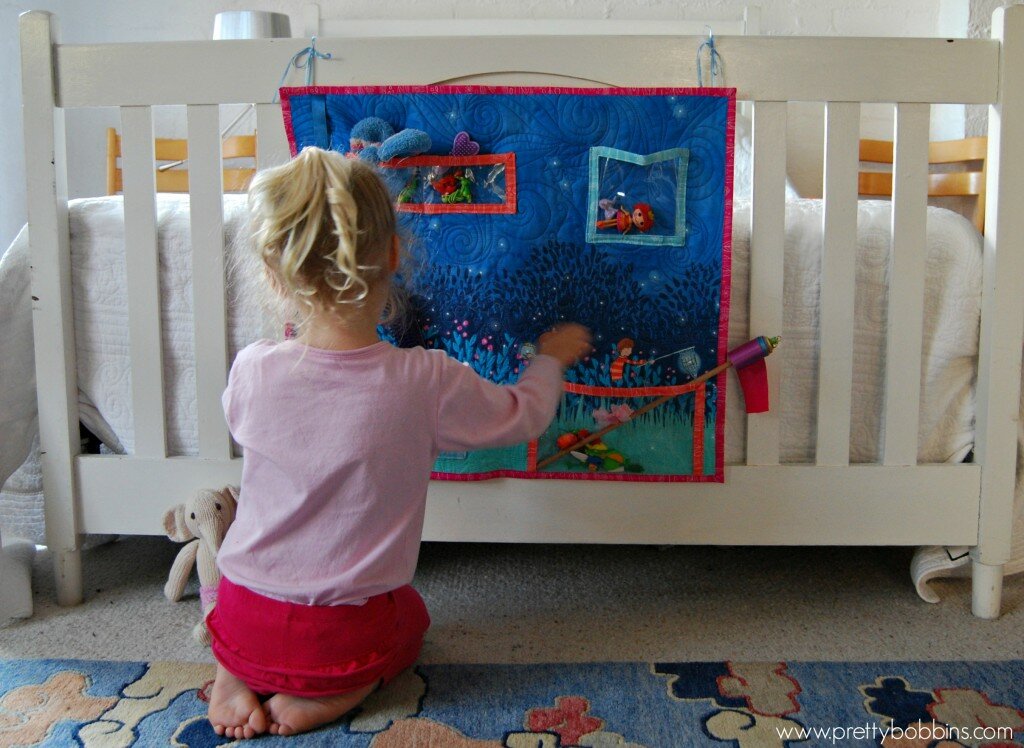
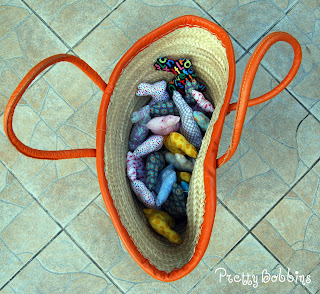
I’m making a mini quilt for my daughter’s dolly’s bed, but this method will work on any size quilt or any item where you need to use double folded bias binding.  The one down side to this method is that it does eat a little bit more fabric, about half an inch on each strip as you cut it.  But I think all of the positives far outweigh that one negative.
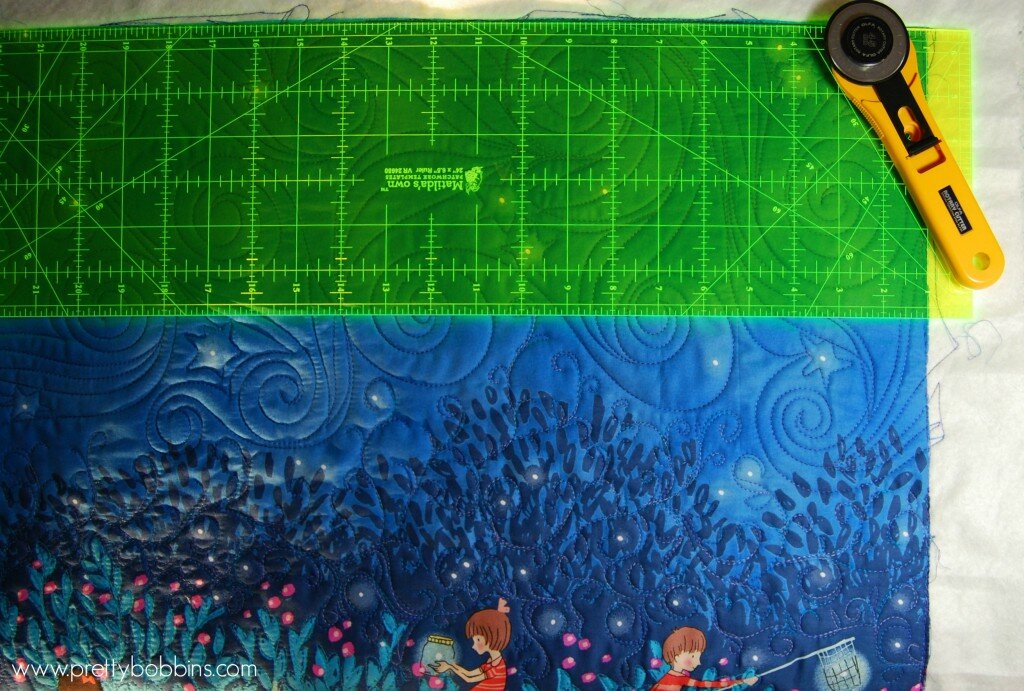
Once you have your quilt ready to go, measure how much binding you need.  I do this by measuring the four sides, adding them together and then adding say 6″.  It’s always better to have too much binding than to run out!
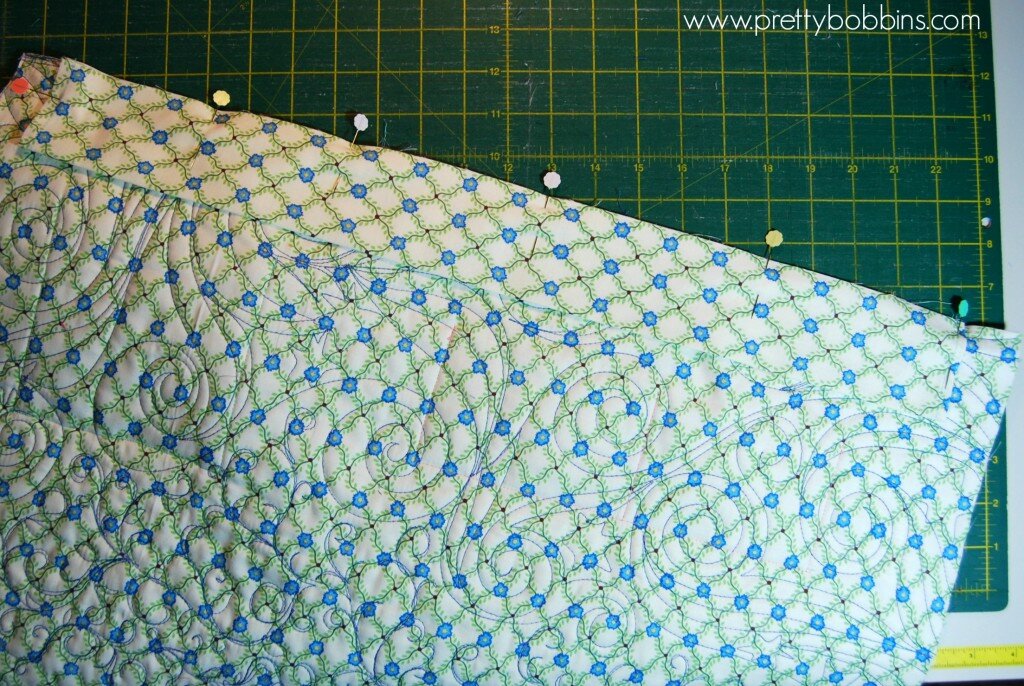
Whilst you don’t actually need bias binding if you’re only doing straight lines and corners, it is good to be in the habit of cutting your binding strips on the bias.  You do this by cutting on a 45 degree angle from your selvedge.  
Lots of fabrics have a printed selvedge but the one I was using doesn’t.  If you look really closely you can see that the selvedges are neatly woven edges rather than being cut raw by scissors.
Note the woven (not raw) edge?  This is a selvedge.

I want my binding to be about 1/2″ wide on both front and back of the quilt so I need to cut my strips 2 1/2″ wide.
Usually you will need to join a number of strips together to get the required length of binding.  Do this by placing the ends of two strips right sides together at right angles.  
Sew a stright line at a 45 degree angle.  I just use my eye but you can draw a line with a fabric marker as a guide.
Cut off your excess.
Press your seams open and cut off any excess fabric peeping through.

Once you have the required length of binding, cut both ends on a 45 degree angle, fold your ends back 1/2″ wrong sides together and press.  It should look like this.
Now you need to fold your strip in half lengthwise wrong sides together and press.  
It is now starting to look more like binding.
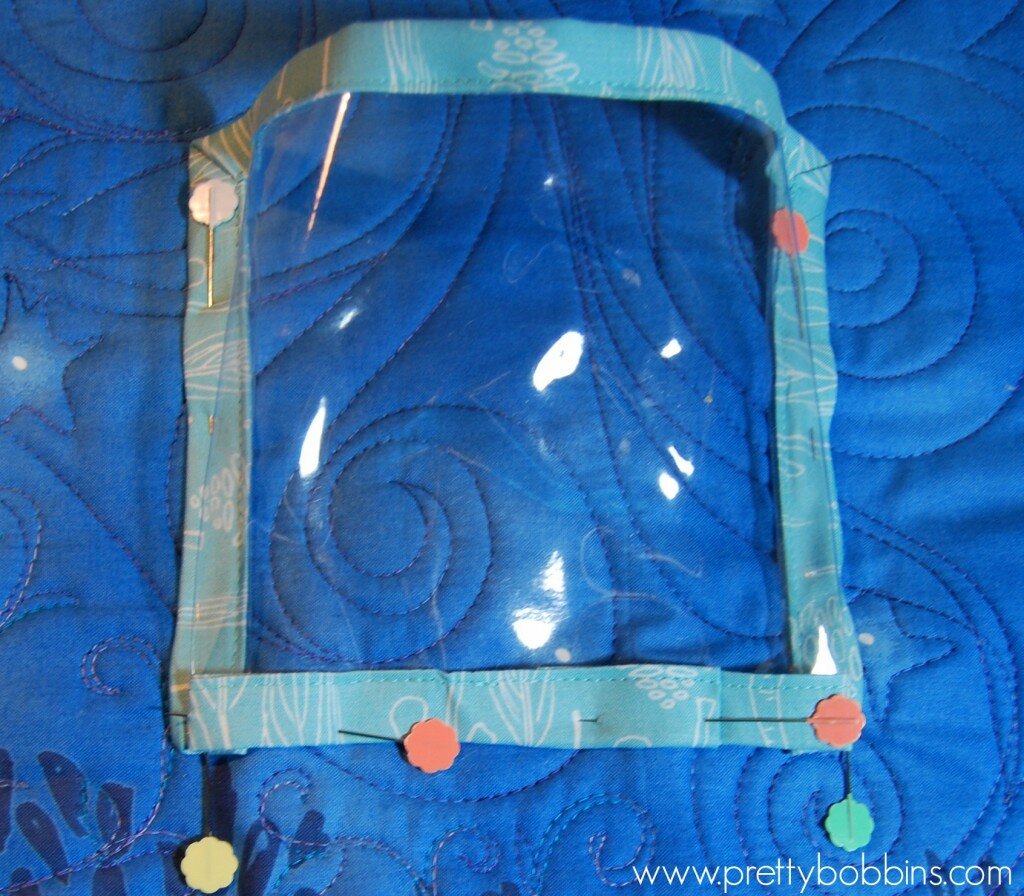
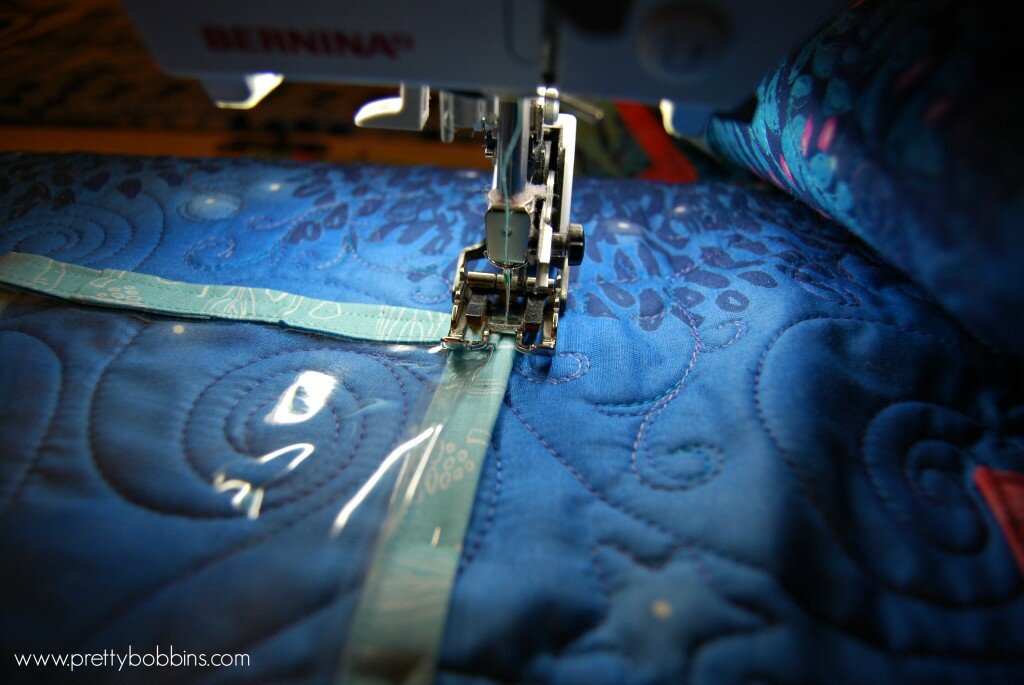
Now lay your binding on the front of your quilt 1/4″ in from the raw edge of the quilt top.  It is best to start your binding on a straight edge, at least a few inches away from a corner.  It just makes everything easier.  In this example I laid my binding on the back of my quilt as I was using a minky backing and it is slippery stuff.  I would much rather machine sew the minky side and hand stitch the cotton side.  Just remember that the side you choose to machine stitch will be “invisible” which is why I would normally lay my binding on the front of my quilt at this step.
Pin in place.  Keep going until you meet a corner.  Just to be conclusive I’ll give you a quick guide to mitred corners.

Mitred corner
A mitred corner gives you a lovely smooth corner and a great looking finish.  It can be a bit confusing the first time, but don’t be put off.  It’s actually really simple once you get the hang of it!
Take your quilt to your sewing machine.  I want my binding to be about 1/2″ on both the quilt top and bottom so I will be using my 1/2″ sewing guide on my foot plate. (You will notice that I have pinned my binding so that the raw edge is 1/4″ in from the raw edge of the quilt.  I’m sewing 1/2″ in from the raw edge of the quilt, not the raw edge of the binding.)  Make sure that you start a couple of inches in from the end of your binding.  Secure your thread and start sewing using your standard straight stitch.  Stop exactly 1/2″ from the corner of your quilt.  Secure your thread with a few stitches back and forth.
Cut your threads and lay your quilt flat.  You want to flip your binding up away from the corner that you have just hit and iron it in place.  It’s really important to get everything perfectly lined up as it will give you a better finish.
Now fold your binding back on itself so it is running down the corner that you just hit.  Press your binding again. It’s good to use a pin at this point or very steady fingers.  You want everything to remain perfectly lined up.
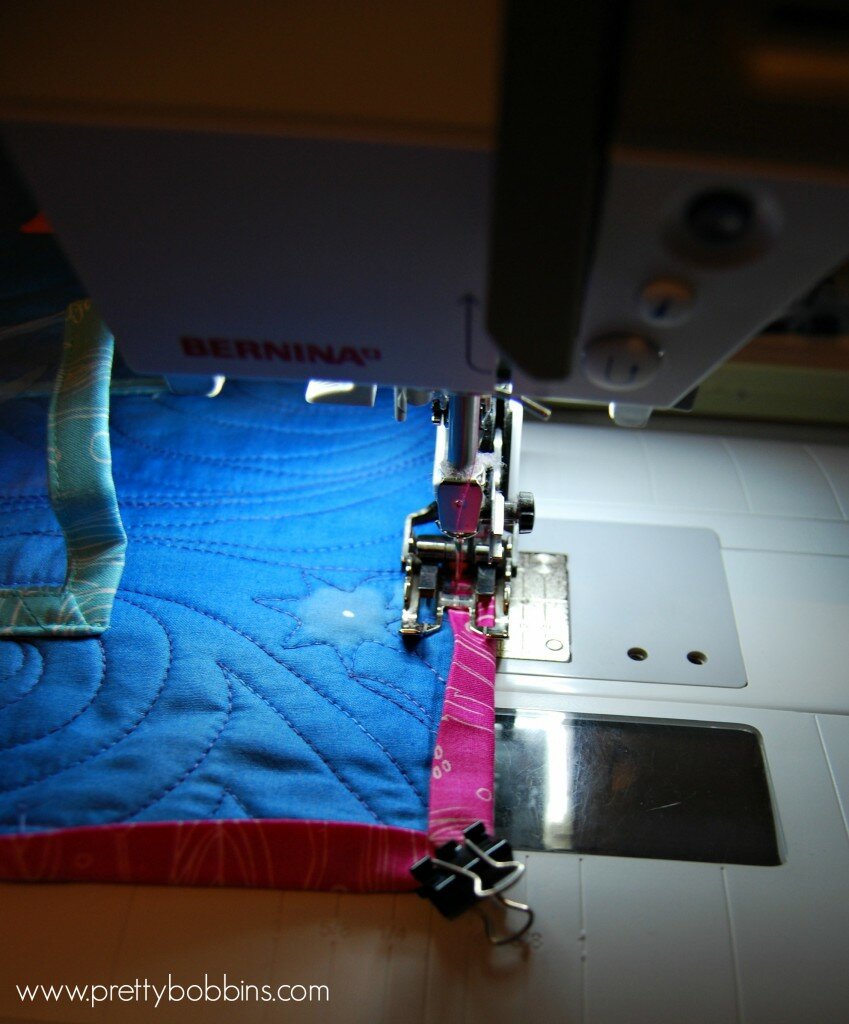
Head back to your sewing machine and start sewing 1/2″ in from the end running down the next edge of your quilt.  Make sure that your stitches are secure, you don’t want your lovely mitred corner to come undone!  Keep going until you hit your next corner and repeat.
Without removing your needle or cutting your thread stop before you get back to start of your binding.
 With your quilt still in your sewing machine you now want to slip the end of your binding into the beginning, you may need to trim off a little.
Once your bias binding is sitting nice and flat continue sewing until you reach the beginning, secure your stitches and cut your threads.
Hooray, you’re halfway there!
Now you want to iron your binding flat.  Lay your quilt binding side up and press your bias binding flat.  
Turn it over.  It is now peeping over the edge. 
Now you want to fold it over to the back of your quilt and press it flat.  Go slowly.  I find using my high steam setting helps.  When you get to your lovely mitred corners press your binding right to the end and then straight back on itself from the other side.  
You might need to jiggle the fabric a little to get that perfect 45 degree angle on your fold, but if you lined everything up perfectly when you sewed your corners it should be pretty easy :)
At this point just make sure that your binding is covering the stitching where you first attached it.  If your binding doesn’t reach far enough don’t tug it, just trim back your quilt edge a little.  Just make sure you don’t cut off your binding!
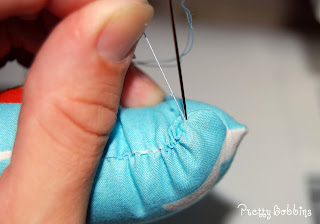
Now all that is left is your hand stitching.
You want to make sure that your binding sits nice and flat so feel free to use as many pins as you want to pin it down.  
You want to begin a few inches along from the beginning.  You’re stitches will get more even as you get into a rhythm.

I like to use tiny stitches to hold my mitred corners in place.  I start on the side that I am handstitching,

work my way up to the outside corner,

slip a sneaky stitch through to the other side

and then continue stitching the other side of the mitred corner closed.  You should be pretty much in the spot that you started but on the other side of your quilt, so just slip your needle back through and keep going.

Keep going until you get back to the beginning.  Lucky me I’m only making a dolly quilt so my hand stitching didn’t take very long.  For bigger projects I will do the hand stitching at night in front of the TV with a good lamp over my shoulder.  I find a distraction helps with such repetitive work :)

When you get back to the beginning make sure that your binding is still sitting neatly tucked inside itself.  Because you started a few inches from the beginning you have a little room to jiggle it if you need to, but not much.

And voila!  You’re done!

Front (hand stitched bias)
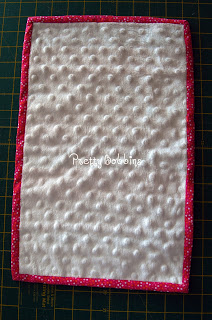
Back (machine stitched)


Yes, you could use store bought binding and machine sew the whole thing but this way the stitching is pretty much invisible.  You could also hand sew the binding on both sides, but this is much more fiddly and time consuming.  And that is why I call this “Cheat’s bias binding” because you get a great look and you’ve only had to hand stitch one side of your binding :)

I hope you found this tutorial useful :)  You can find the tutorial for the Dolly’s Quilt here on my blog.
Gemma
Pretty Bobbins

Tutorial: A faux quilt for Dolly

By

My Little Miss has just hit 18 months and is very much enjoying playing with her babies.  With each pregnancy we seemed to acquire at least two baby dolls to prepare the older children for the coming change in their lives.  We have not, however, acquired much doll paraphernalia and Little Miss has resorted to stealing face-washers out of the bathroom cabinet to play with her babies.  She enjoys nothing more than giving them a good clean and putting them to sleep under a face-washer.  Well, she also enjoys smearing them with sunscreen, peanut butter and yoghurt, but I try not to let that happen.

Anyway, I needed to do a quick project that involved bias binding (I’m VERY excited about sharing this with you soon!!!) and it seemed logical to make some bedding for Little Miss’s babies.  Who knows, I might be making them clothes next :)

As you know I LOVE using up my scraps.  Do you remember the scrappy coasters I made in December?  I have three fabric boxes overflowing with scraps and I keep every size from about 1″ square.  They will all be used eventually.  After looking through my fabric stash I decided that the doll’s quilt would be a great way to use up some scraps.

I will point out that technically this is NOT a quilt as there is not quilting involved, but it looks like a quilt, has no wadding and is so small that it doesn’t actually need quilting.  So, for Dolly’s sake we’re calling it a quilt ;)

I hope you find this tutorial useful!

Measure your Doll’s bed.  If you don’t have one you could use a shoe box and cover it in wrapping paper or let your Little One paint it.  You might like to base your quilt size on how much fabric will be needed to cover Dolly when she is laying in bed, or prehaps you would just like a quilt that lays flat on the bed.  Our Doll’s bed is 16.5″ x 8.5″. I would like Dolly to be somewhat covered so am aiming for a quilt size of 15″ x 10″.

Now, hit your scrap stash.  You could go for a rainbow colour scheme or choose a theme.  I’ve gone for blues and pinks.  You want scraps that are 1″ wider than the desired width of the quilt.  My strips are all 11″ wide (except for the deep red strips which are 10″ wide as I was using scraps) and range in height from .875″to 3.875″.

In order from top to bottom my strips are the following heights 2.5″, 1.5″, .875″, 3.875″, 1.5″, 1.875″, 2″, 1.875″, .875″, 1.375″, 2.25″.  I’m including these measurements in case you want to replicate my quilt exactly.  These sizes were selected based on my available scraps.  You can cut your strips to whatever size as you want as long as their combined height by width meets your required bedding size.  Remember to take you 1/4″ seam allowances into account. 

I always make quilts with a 1/4″ seam so to make sure I have enough strips I added up their combined heights and subtracted 1/4″ for each raw edge.  You could easily cut regular sized strips so you know that you have enough.  However I like using every last bit of my scraps and you can always add a couple of extra strips or trim your quilt before basting.

Lay out your strips and decide on your placement.  It’s a good idea to either take a photo or number your strips at this point.

Sew your strips together using your 1/4″ foot as a guide.

Hooray, you should now have a quilt top that looks like this :)
Take your quilt top and place it right side down on your ironing board.  You now want to press your seams to one side.  It doesn’t matter if you decide to press your seams to the left or the right, what you need to think about is the colour of your fabrics.  For example, I always press my seams toward the darker coloured strip to avoid the seam allowance showing through on the right side of the quilt top.  This means that some of my seams are to the left and some to the right.
You now need to select your backing fabric.  I had some minky scraps and knew that my Little Miss would love a soft minky back on her Dolly’s quilt.  Cut your backing fabric to size.  My quilt backing is 15.5″ x 11″
Lay your backing right side down.  With your quilt top right side up, line up your edges.
Now you need to trim your quilt to size.  I want to trim my quilt to 15″ x 10″.
Now pin your quilt top and back together.
We are going to eventually finish our quilt with bias binding.  To make this easier we want to baste around the outside edge of our quilt at this point.  You want to sew as close to the edge of your quilt as possible so that you basting stitches are hidden in your seam allowance.  Using my 1/4″ foot as a guide my basting stitches are 1/8″ from the raw edges of the quilt.

Can you believe that I forgot to take a photo of my quilt at this important stage? :(  It will look like the below photo but with only the basting stitches (the outermost stitching).

And voila!  You have you quilt basted and ready to bind.  If you hang about a few days I’ll have a tutorial up to help you finish off your quilt :)  You can find the tutorial for the bias binding here.  It’s my first ever guest post over at The Oz Material Girls =D  It will end up looking like this :)